This is the multi-page printable view of this section. Click here to print.
Reference
- 1: Config
- 1.1: Bare metal configuration
- 1.2: vSphere configuration
- 1.3: Optional configuration
- 1.3.1: CNI plugin configuration
- 1.3.2: IAM for Pods configuration
- 1.3.3: Multus CNI plugin configuration
- 1.3.4: etcd configuration
- 1.3.5: AWS IAM Authenticator configuration
- 1.3.6: OIDC configuration
- 1.3.7: GitOpsConfig configuration
- 1.3.8: Proxy configuration
- 1.3.9: Registry Mirror configuration
- 2: Bare Metal
- 2.1: Requirements for EKS Anywhere on Bare Metal
- 2.2: Overview of iPXE and Tinkerbell for Bare Metal
- 2.3: Preparing Bare Metal for EKS Anywhere
- 2.4: Customize HookOS for EKS Anywhere on Bare Metal
- 2.5: Customize OVAs for EKS Anywhere on Bare Metal
- 3: VMware vSphere
- 3.1: Requirements for EKS Anywhere on VMware vSphere
- 3.2: Preparing vSphere for EKS Anywhere
- 3.3: Customize OVAs: Ubuntu
- 3.4: Import OVAs
- 3.5: Custom DHCP Configuration
- 3.6:
- 4: Security best practices
- 5: Packages
- 5.1: Harbor configuration
- 5.1.1: v2.5.0
- 6: What's New?
- 7: Frequently Asked Questions
- 8: Troubleshooting
- 9: Support
- 10: Artifacts
- 11: Ports and protocols
- 12: eksctl anywhere CLI reference
1 - Config
1.1 - Bare metal configuration
This is a generic template with detailed descriptions below for reference. The following additional optional configuration can also be included:
ADD GENERIC BARE METAL TEMPLATE
Cluster Fields
ADD DESCRIPTIONS OF FIELDS
1.2 - vSphere configuration
This is a generic template with detailed descriptions below for reference. The following additional optional configuration can also be included:
apiVersion: anywhere.eks.amazonaws.com/v1alpha1
kind: Cluster
metadata:
   name: my-cluster-name
spec:
   clusterNetwork:
      cniConfig:
         cilium: {}
      pods:
         cidrBlocks:
            - 192.168.0.0/16
      services:
         cidrBlocks:
            - 10.96.0.0/12
   controlPlaneConfiguration:
      count: 1
      endpoint:
         host: ""
      machineGroupRef:
        kind: VSphereMachineConfig
        name: my-cluster-machines
      taints:
      - key: ""
        value: ""
        effect: ""
      labels:
        "<key1>": ""
        "<key2>": ""
   datacenterRef:
      kind: VSphereDatacenterConfig
      name: my-cluster-datacenter
   externalEtcdConfiguration:
     count: 3
     machineGroupRef:
        kind: VSphereMachineConfig
        name: my-cluster-machines
   kubernetesVersion: "1.22"
   workerNodeGroupConfigurations:
   - count: 1
     machineGroupRef:
       kind: VSphereMachineConfig
       name: my-cluster-machines
     name: md-0
     taints:
     - key: ""
       value: ""
       effect: ""
     labels:
       "<key1>": ""
       "<key2>": ""
---
apiVersion: anywhere.eks.amazonaws.com/v1alpha1
kind: VSphereDatacenterConfig
metadata:
   name: my-cluster-datacenter
spec:
  datacenter: ""
  server: ""
  network: ""
  insecure:
  thumbprint: ""

---
apiVersion: anywhere.eks.amazonaws.com/v1alpha1
kind: VSphereMachineConfig
metadata:
   name: my-cluster-machines
spec:
  diskGiB:
  datastore: ""
  folder: ""
  numCPUs:
  memoryMiB:
  osFamily: ""
  resourcePool: ""
  storagePolicyName: ""
  template: ""
  users:
  - name: ""
    sshAuthorizedKeys:
    - ""
Cluster Fields
name (required)
Name of your cluster my-cluster-name in this example
clusterNetwork (required)
Specific network configuration for your Kubernetes cluster.
clusterNetwork.cni (required)
CNI plugin to be installed in the cluster. The only supported value at the moment is cilium.
clusterNetwork.pods.cidrBlocks[0] (required)
Subnet used by pods in CIDR notation. Please note that only 1 custom pods CIDR block specification is permitted. This CIDR block should not conflict with the network subnet range selected for the VMs.
clusterNetwork.services.cidrBlocks[0] (required)
Subnet used by services in CIDR notation. Please note that only 1 custom services CIDR block specification is permitted. This CIDR block should not conflict with the network subnet range selected for the VMs.
clusterNetwork.dns.resolvConf.path (optional)
Path to the file with a custom DNS resolver configuration.
controlPlaneConfiguration (required)
Specific control plane configuration for your Kubernetes cluster.
controlPlaneConfiguration.count (required)
Number of control plane nodes
controlPlaneConfiguration.machineGroupRef (required)
Refers to the Kubernetes object with vsphere specific configuration for your nodes. See VSphereMachineConfig Fields below.
controlPlaneConfiguration.endpoint.host (required)
A unique IP you want to use for the control plane VM in your EKS Anywhere cluster. Choose an IP in your network range that does not conflict with other VMs.
NOTE: This IP should be outside the network DHCP range as it is a floating IP that gets assigned to one of the control plane nodes for kube-apiserver loadbalancing. Suggestions on how to ensure this IP does not cause issues during cluster creation process are here
controlPlaneConfiguration.taints
A list of taints to apply to the control plane nodes of the cluster.
Replaces the default control plane taint, node-role.kubernetes.io/master. The default control plane components will tolerate the provided taints.
Modifying the taints associated with the control plane configuration will cause new nodes to be rolled-out, replacing the existing nodes.
NOTE: The taints provided will be used instead of the default control plane taint
node-role.kubernetes.io/master. Any pods that you run on the control plane nodes must tolerate the taints you provide in the control plane configuration.
controlPlaneConfiguration.labels
A list of labels to apply to the control plane nodes of the cluster. This is in addition to the labels that EKS Anywhere will add by default.
Modifying the labels associated with the control plane configuration will cause new nodes to be rolled out, replacing the existing nodes.
workerNodeGroupConfigurations (required)
This takes in a list of node groups that you can define for your workers. You may define one or more worker node groups.
workerNodeGroupConfigurations.count (required)
Number of worker nodes
workerNodeGroupConfigurations.machineGroupRef (required)
Refers to the Kubernetes object with vsphere specific configuration for your nodes. See VSphereMachineConfig Fields below.
workerNodeGroupConfigurations.name (required)
Name of the worker node group (default: md-0)
workerNodeGroupConfigurations.taints
A list of taints to apply to the nodes in the worker node group.
Modifying the taints associated with a worker node group configuration will cause new nodes to be rolled-out, replacing the existing nodes associated with the configuration.
At least one node group must not have NoSchedule or NoExecute taints applied to it.
workerNodeGroupConfigurations.labels
A list of labels to apply to the nodes in the worker node group. This is in addition to the labels that EKS Anywhere will add by default.
Modifying the labels associated with a worker node group configuration will cause new nodes to be rolled out, replacing the existing nodes associated with the configuration.
externalEtcdConfiguration.count
Number of etcd members
externalEtcdConfiguration.machineGroupRef
Refers to the Kubernetes object with vsphere specific configuration for your etcd members. See VSphereMachineConfig Fields below.
datacenterRef
Refers to the Kubernetes object with vsphere environment specific configuration. See VSphereDatacenterConfig Fields below.
kubernetesVersion (required)
The Kubernetes version you want to use for your cluster. Supported values: 1.22, 1.21, 1.20
VSphereDatacenterConfig Fields
datacenter (required)
The vSphere datacenter to deploy the EKS Anywhere cluster on. For example SDDC-Datacenter.
network (required)
The VM network to deploy your EKS Anywhere cluster on.
server (required)
The vCenter server fully qualified domain name or IP address. If the server IP is used, the thumbprint must be set
or insecure must be set to true.
insecure (optional)
Set insecure to true if the vCenter server does not have a valid certificate. (Default: false)
thumbprint (required if insecure=false)
The SHA1 thumbprint of the vCenter server certificate which is only required if you have a self signed certificate.
There are several ways to obtain your vCenter thumbprint. The easiest way is if you have govc installed, you
can run:
govc about.cert -thumbprint -k
Another way is from the vCenter web UI, go to Administration/Certificate Management and click view details of the
machine certificate. The format of this thumbprint does not exactly match the format required though and you will
need to add : to separate each hexadecimal value.
Another way to get the thumbprint is use this command with your servers certificate in a file named ca.crt:
openssl x509 -sha1 -fingerprint -in ca.crt -noout
If you specify the wrong thumbprint, an error message will be printed with the expected thumbprint. If no valid
certificate is being used, insecure must be set to true.
VSphereMachineConfig Fields
memoryMiB (optional)
Size of RAM on virtual machines (Default: 8192)
numCPUs (optional)
Number of CPUs on virtual machines (Default: 2)
osFamily (optional)
Operating System on virtual machines. Permitted values: ubuntu, bottlerocket (Default: bottlerocket)
diskGiB (optional)
Size of disk on virtual machines if snapshots aren’t included (Default: 25)
users (optional)
The users you want to configure to access your virtual machines. Only one is permitted at this time
users[0].name (optional)
The name of the user you want to configure to access your virtual machines through ssh.
The default is ec2-user if osFamily=bottlrocket and capv if osFamily=ubuntu
users[0].sshAuthorizedKeys (optional)
The SSH public keys you want to configure to access your virtual machines through ssh (as described below). Only 1 is supported at this time.
users[0].sshAuthorizedKeys[0] (optional)
This is the SSH public key that will be placed in authorized_keys on all EKS Anywhere cluster VMs so you can ssh into
them. The user will be what is defined under name above. For example:
ssh -i <private-key-file> <user>@<VM-IP>
The default is generating a key in your $(pwd)/<cluster-name> folder when not specifying a value
template (optional)
The VM template to use for your EKS Anywhere cluster. This template was created when you imported the OVA file into vSphere . This is a required field if you are using Bottlerocket OVAs.
datastore (required)
The vSphere datastore to deploy your EKS Anywhere cluster on.
folder (required)
The VM folder for your EKS anywhere cluster VMs. This allows you to organize your VMs. If the folder does not exist, it will be created for you. If the folder is blank, the VMs will go in the root folder.
resourcePool (required)
The vSphere Resource pools for your VMs in the EKS Anywhere cluster. Examples of resource pool values include:
- If there is no resource pool:
/<datacenter>/host/<cluster-name>/Resources - If there is a resource pool:
/<datacenter>/host/<cluster-name>/Resources/<resource-pool-name> - The wild card option
*/Resourcesalso often works.
storagePolicyName (optional)
The storage policy name associated with your VMs.
Optional VSphere Credentials
Use the following environment variables to configure Cloud Provider and CSI Driver with different credentials.
EKSA_VSPHERE_CP_USERNAME
Username for Cloud Provider (Default: $EKSA_VSPHERE_USERNAME).
EKSA_VSPHERE_CP_PASSWORD
Password for Cloud Provider (Default: $EKSA_VSPHERE_PASSWORD).
EKSA_VSPHERE_CSI_USERNAME
Username for CSI Driver (Default: $EKSA_VSPHERE_USERNAME).
EKSA_VSPHERE_CSI_PASSWORD
Password for CSI Driver (Default: $EKSA_VSPHERE_PASSWORD).
1.3 - Optional configuration
1.3.1 - CNI plugin configuration
Specifying CNI Plugin in EKS Anywhere cluster spec
EKS Anywhere currently supports two CNI plugins: Cilium and Kindnet. Only one of them can be selected
for a cluster, and the plugin cannot be changed once the cluster is created.
Up until the 0.7.x releases, the plugin had to be specified using the cni field on cluster spec.
Starting with release 0.8, the plugin should be specified using the new cniConfig field as follows:
-
For selecting Cilium as the CNI plugin:
apiVersion: anywhere.eks.amazonaws.com/v1alpha1
kind: Cluster
metadata:
  name: my-cluster-name
spec:
  clusterNetwork:
    pods:
      cidrBlocks:
      - 192.168.0.0/16
    services:
      cidrBlocks:
      - 10.96.0.0/12
    cniConfig:
      cilium: {}
EKS Anywhere selects this as the default plugin when generating a cluster config.
-
Or for selecting Kindnetd as the CNI plugin:
apiVersion: anywhere.eks.amazonaws.com/v1alpha1
kind: Cluster
metadata:
  name: my-cluster-name
spec:
  clusterNetwork:
    pods:
      cidrBlocks:
      - 192.168.0.0/16
    services:
      cidrBlocks:
      - 10.96.0.0/12
    cniConfig:
      kindnetd: {}
NOTE: EKS Anywhere allows specifying only 1 plugin for a cluster and does not allow switching the plugins after the cluster is created.
Policy Configuration options for Cilium plugin
Cilium accepts policy enforcement modes from the users to determine the allowed traffic between pods.
The allowed values for this mode are: default, always and never.
Please refer the official Cilium documentation
for more details on how each mode affects
the communication within the cluster and choose a mode accordingly.
You can choose to not set this field so that cilium will be launched with the default mode.
Starting release 0.8, Cilium’s policy enforcement mode can be set through the cluster spec
as follows:
apiVersion: anywhere.eks.amazonaws.com/v1alpha1
kind: Cluster
metadata:
  name: my-cluster-name
spec:
  clusterNetwork:
    pods:
      cidrBlocks:
      - 192.168.0.0/16
    services:
      cidrBlocks:
      - 10.96.0.0/12
    cniConfig:
      cilium:
        policyEnforcementMode: "always"
Please note that if the always mode is selected, all communication between pods is blocked unless
NetworkPolicy objects allowing communication are created.
In order to ensure that the cluster gets created successfully, EKS Anywhere will create the required
NetworkPolicy objects for all its core components. But it is up to the user to create the NetworkPolicy
objects needed for the user workloads once the cluster is created.
Network policies created by EKS Anywhere for “always” mode
As mentioned above, if Cilium is configured with policyEnforcementMode set to always,
EKS Anywhere creates NetworkPolicy objects to enable communication between
its core components. These policies are created based on the type of cluster as follows:
-
For self-managed/management cluster, EKS Anywhere will create NetworkPolicy resources in the following namespaces allowing all ingress/egress traffic by default:
- kube-system
- eksa-system
- All core Cluster API namespaces:
- capi-system
- capi-kubeadm-bootstrap-system
- capi-kubeadm-control-plane-system
- etcdadm-bootstrap-provider-system
- etcdadm-controller-system
- cert-manager
- Infrastruture provider’s namespace (for instance, capd-system OR capv-system)
- If Gitops is enabled, then the gitops namespace (flux-system by default)
This is the NetworkPolicy that will be created in these namespaces for the self-managed cluster:
apiVersion: networking.k8s.io/v1 kind: NetworkPolicy metadata: name: allow-all-ingress-egress namespace: test spec: podSelector: {} ingress: - {} egress: - {} policyTypes: - Ingress - Egress -
For a workload cluster managed by another EKS Anywhere cluster, EKS Anywhere will create NetworkPolicy resource only in the following namespace by default:
- kube-system
For the workload clusters using Kubernetes version 1.21 and higher, the ingress/egress of pods in the kube-system namespace will be limited to other pods only in the kube-system namespace by using the following NetworkPolicy:
apiVersion: networking.k8s.io/v1
kind: NetworkPolicy
metadata:
  name: allow-all-ingress-egress
  namespace: test
spec:
  podSelector: {}
  ingress:
  - from:
    - namespaceSelector:
        matchLabels:
          kubernetes.io/metadata.name: kube-system
  egress:
  - to:
    - namespaceSelector:
        matchLabels:
          kubernetes.io/metadata.name: kube-system
  policyTypes:
  - Ingress
  - Egress
For workload clusters using Kubernetes version 1.20, the NetworkPolicy in kube-system will allow ingress/egress from all pods. This is because Kubernetes versions prior to 1.21 do not set the default labels on the namespaces so EKS Anywhere cannot use a namespace selector. This NetworkPolicy will ensure that the cluster gets created successfully. Later the cluster admin can edit/replace it if required.
Switching the Cilium policy enforcement mode
The policy enforcement mode for Cilium can be changed as a part of cluster upgrade through the cli upgrade command.
-
Switching to
alwaysmode: When switching fromdefault/nevertoalwaysmode, EKS Anywhere will create the required NetworkPolicy objects for its core components (listed above). This will ensure that the cluster gets upgraded successfully. But it is up to the user to create the NetworkPolicy objects required for the user workloads. -
Switching from
alwaysmode: When switching fromalwaystodefaultmode, EKS Anywhere will not delete any of the existing NetworkPolicy objects, including the ones required for EKS Anywhere components (listed above). The user must delete NetworkPolicy objects as needed.
Node IPs configuration option
Starting with release v0.10, the node-cidr-mask-size flag
for Kubernetes controller manager (kube-controller-manager) is configurable via the EKS anywhere cluster spec. The clusterNetwork.nodes being an optional field,
is not generated in the EKS Anywhere spec using generate clusterconfig command. This block for nodes will need to be manually added to the cluster spec under the
clusterNetwork section:
  clusterNetwork:
    pods:
      cidrBlocks:
      - 192.168.0.0/16
    services:
      cidrBlocks:
      - 10.96.0.0/12
    cniConfig:
      cilium: {}
    nodes:
      cidrMaskSize: 24
If the user does not specify the clusterNetwork.nodes field in the cluster yaml spec, the value for this flag defaults to 24 for IPv4.
Please note that this mask size needs to be greater than the pods CIDR mask size. In the above spec, the pod CIDR mask size is 16
and the node CIDR mask size is 24. This ensures the cluster 256 blocks of /24 networks. For example, node1 will get
192.168.0.0/24, node2 will get 192.168.1.0/24, node3 will get 192.168.2.0/24 and so on.
To support more than 256 nodes, the cluster CIDR block needs to be large, and the node CIDR mask size needs to be small, to support that many IPs. For instance, to support 1024 nodes, a user can do any of the following things
- Set the pods cidr blocks to
192.168.0.0/16and node cidr mask size to 26 - Set the pods cidr blocks to
192.168.0.0/15and node cidr mask size to 25
Please note that the node-cidr-mask-size needs to be large enough to accommodate the number of pods you want to run on each node.
A size of 24 will give enough IP addresses for about 250 pods per node, however a size of 26 will only give you about 60 IPs.
This is an immutable field, and the value can’t be updated once the cluster has been created.
1.3.2 - IAM for Pods configuration
IAM Role for Service Account on EKS Anywhere clusters with self-hosted signing keys
IAM Roles for Service Account (IRSA) enables applications running in clusters to authenticate with AWS services using IAM roles. The current solution for leveraging this in EKS Anywhere involves creating your own OIDC provider for the cluster, and hosting your cluster’s public service account signing key. The public keys along with the OIDC discovery document should be hosted somewhere that AWS STS can discover it. The steps below assume the keys will be hosted on a publicly accessible S3 bucket. Refer this doc to ensure that the s3 bucket is publicly accessible.
The steps below are based on the guide for configuring IRSA for DIY Kubernetes , with modifications specific to EKS Anywhere’s cluster provisioning workflow. The main modification is the process of generating the keys.json document. As per the original guide, the user has to create the service account signing keys, and then use that to create the keys.json document prior to cluster creation. This order is reversed for EKS Anywhere clusters, so you will create the cluster first, and then retrieve the service account signing key generated by the cluster, and use it to create the keys.json document. The sections below show how to do this in detail.
Create an OIDC provider and make its discovery document publicly accessible
-
Create an s3 bucket to host the public signing keys and OIDC discovery document for your cluster as per this section . Ensure you follow all the steps and save the
$HOSTNAMEand$ISSUER_HOSTPATH. -
Create the OIDC discovery document as follows:
cat <<EOF > discovery.json { "issuer": "https://$ISSUER_HOSTPATH", "jwks_uri": "https://$ISSUER_HOSTPATH/keys.json", "authorization_endpoint": "urn:kubernetes:programmatic_authorization", "response_types_supported": [ "id_token" ], "subject_types_supported": [ "public" ], "id_token_signing_alg_values_supported": [ "RS256" ], "claims_supported": [ "sub", "iss" ] } EOF -
Upload it to the publicly accessible S3 bucket:
aws s3 cp --acl public-read ./discovery.json s3://$S3_BUCKET/.well-known/openid-configuration -
Create an OIDC provider for your cluster. Set the
Provider URLtohttps://$ISSUER_HOSTPATH, and audience tosts.amazonaws.com. -
Note down the
Providerfield of OIDC provider after it is created. -
Assign an IAM role to this OIDC provider.
- To do so from the AWS console, select and click on the OIDC provider, and click on Assign role at the top right.
- Select Create a new role.
- In the Select type of trusted entity section, choose Web identity.
- In the Choose a web identity provider section:
- For Identity provider, choose the auto selected Identity Provider URL for your cluster.
- For Audience, choose sts.amazonaws.com.
- Choose Next: Permissions.
- In the Attach Policy section, select the IAM policy that has the permissions that you want your applications running in the pods to use.
- Continue with the next sections of adding tags if desired and a suitable name for this role and create the role.
- After the role is created, note down the name of this IAM Role as
OIDC_IAM_ROLE. After the cluster is created, you can create service accounts and grant them this role by editing the trust relationship of this role. The last section shows how to do this.
Create the EKS Anywhere cluster
- When creating the EKS Anywhere cluster, you need to configure the kube-apiserver’s
service-account-issuerflag so it can issue and mount projected service account tokens in pods. For this, use the value obtained in the first section for$ISSUER_HOSTPATHas theservice-account-issuer. Configure the kube-apiserver by setting this value through the EKS Anywhere cluster spec as follows:apiVersion: anywhere.eks.amazonaws.com/v1alpha1 kind: Cluster metadata: name: my-cluster-name spec: podIamConfig: serviceAccountIssuer: https://$ISSUER_HOSTPATH
Set the remaining fields in cluster spec
as required and create the cluster using the eksctl anywhere create cluster command.
Generate keys.json and make it publicly accessible
-
The cluster provisioning workflow generates a pair of service account signing keys. Retrieve the public signing key generated and used by the cluster, and create a keys.json document containing the public signing key.
kubectl get secret ${CLUSTER_NAME}-sa -n eksa-system -o jsonpath={.data.tls\\.crt} | base64 --decode > ${CLUSTER_NAME}-sa.pub wget https://raw.githubusercontent.com/aws/amazon-eks-pod-identity-webhook/master/hack/self-hosted/main.go -O keygenerator.go go run keygenerator.go -key ${CLUSTER_NAME}-sa.pub | jq '.keys += [.keys[0]] | .keys[1].kid = ""' > keys.json -
Upload the keys.json document to the s3 bucket.
aws s3 cp --acl public-read ./keys.json s3://$S3_BUCKET/keys.json
Deploy pod identity webhook
-
After hosting the service account public signing key and OIDC discovery documents, the applications running in pods can start accessing the desired AWS resources, as long as the pod is mounted with the right service account tokens. This part of configuring the pods with the right service account tokens and env vars is automated by the amazon pod identity webhook . Once the webhook is deployed, it mutates any pods launched using service accounts annotated with
eks.amazonaws.com/role-arn -
Check out this commit of the amazon-eks-pod-identity-webhook.
-
Set the $KUBECONFIG env var to the path of the EKS Anywhere cluster.
-
Run the following command:
make cluster-up IMAGE=amazon/amazon-eks-pod-identity-webhook:a65cc3d
Configure the trust relationship for the OIDC provider’s IAM Role
In order to grant certain service accounts access to the desired AWS resources, edit the trust relationship for the OIDC provider’s IAM Role (OIDC_IAM_ROLE) created in the first section, and add in the desired service accounts.
- Choose the role in the console to open it for editing.
- Choose the Trust relationships tab, and then choose Edit trust relationship.
- Find the line that looks similar to the following:
"$ISSUER_HOSTPATH:aud": "sts.amazonaws.com"
Change the line to look like the following line. Replace aud with sub and replace KUBERNETES_SERVICE_ACCOUNT_NAMESPACE and KUBERNETES_SERVICE_ACCOUNT_NAME with the name of your Kubernetes service account and the Kubernetes namespace that the account exists in.
"$ISSUER_HOSTPATH:sub": "system:serviceaccount:KUBERNETES_SERVICE_ACCOUNT_NAMESPACE:KUBERNETES_SERVICE_ACCOUNT_NAME"
Refer this
doc for different ways of configuring one or multiple service accounts through the condition operators in the trust relationship.
- Choose Update Trust Policy to finish.
1.3.3 - Multus CNI plugin configuration
Specifying Multus CNI Plugin in EKS Anywhere cluster spec
ADD SAMPLE YAML FILES AND DESCRIPTIONS FOR MULTUS CNI PLUGIN
1.3.4 - etcd configuration
Unstacked etcd topology (recommended)
There are two types of etcd topologies for configuring a Kubernetes cluster:
- Stacked: The etcd members and control plane components are colocated (run on the same node/machines)
- Unstacked/External: With the unstacked or external etcd topology, etcd members have dedicated machines and are not colocated with control plane components
The unstacked etcd topology is recommended for a HA cluster for the following reasons:
- External etcd topology decouples the control plane components and etcd member. So if a control plane-only node fails, or if there is a memory leak in a component like kube-apiserver, it won’t directly impact an etcd member.
- Etcd is resource intensive, so it is safer to have dedicated nodes for etcd, since it could use more disk space or higher bandwidth. Having a separate etcd cluster for these reasons could ensure a more resilient HA setup.
EKS Anywhere supports both topologies. In order to configure a cluster with the unstacked/external etcd topology, you need to configure your cluster by updating the configuration file before creating the cluster. This is a generic template with detailed descriptions below for reference:
apiVersion: anywhere.eks.amazonaws.com/v1alpha1
kind: Cluster
metadata:
   name: my-cluster-name
spec:
   clusterNetwork:
      pods:
         cidrBlocks:
            - 192.168.0.0/16
      services:
         cidrBlocks:
            - 10.96.0.0/12
      cniConfig:
         cilium: {}
   controlPlaneConfiguration:
      count: 1
      endpoint:
         host: ""
      machineGroupRef:
         kind: VSphereMachineConfig
         name: my-cluster-name-cp
   datacenterRef:
      kind: VSphereDatacenterConfig
      name: my-cluster-name
   # etcd configuration
   externalEtcdConfiguration:
      count: 3
      machineGroupRef:
        kind: VSphereMachineConfig
        name: my-cluster-name-etcd
   kubernetesVersion: "1.19"
   workerNodeGroupConfigurations:
      - count: 1
        machineGroupRef:
           kind: VSphereMachineConfig
           name: my-cluster-name
        name: md-0
externalEtcdConfiguration (under Cluster)
This field accepts any configuration parameters for running external etcd.
count (required)
This determines the number of etcd members in the cluster. The recommended number is 3.
machineGroupRef (required)
1.3.5 - AWS IAM Authenticator configuration
AWS IAM Authenticator support (optional)
EKS Anywhere can create clusters that support AWS IAM Authenticator-based api server authentication. In order to add IAM Authenticator support, you need to configure your cluster by updating the configuration file before creating the cluster. This is a generic template with detailed descriptions below for reference:
apiVersion: anywhere.eks.amazonaws.com/v1alpha1
kind: Cluster
metadata:
   name: my-cluster-name
spec:
   ...
   # IAM Authenticator support
   identityProviderRefs:
      - kind: AWSIamConfig
        name: aws-iam-auth-config
---
apiVersion: anywhere.eks.amazonaws.com/v1alpha1
kind: AWSIamConfig
metadata:
   name: aws-iam-auth-config
spec:
    awsRegion: ""
    backendMode:
        - ""
    mapRoles:
        - roleARN: arn:aws:iam::XXXXXXXXXXXX:role/myRole
          username: myKubernetesUsername
          groups:
          - ""
    mapUsers:
        - userARN: arn:aws:iam::XXXXXXXXXXXX:user/myUser
          username: myKubernetesUsername
          groups:
          - ""
    partition: ""
identityProviderRefs (Under Cluster)
List of identity providers you want configured for the Cluster.
This would include a reference to the AWSIamConfig object with the configuration below.
awsRegion (required)
- Description: awsRegion can be any region in the aws partition that the IAM roles exist in.
- Type: string
backendMode (required)
- Description: backendMode configures the IAM authenticator server’s backend mode (i.e. where to source mappings from). We support EKSConfigMap and CRD modes supported by AWS IAM Authenticator, for more details refer to backendMode
- Type: string
mapRoles, mapUsers (recommended for EKSConfigMap backend)
-
Description: When using
EKSConfigMapbackendMode, we recommend providing eithermapRolesormapUsersto set the IAM role mappings at the time of creation. This input is added to an EKS style ConfigMap. For more details refer to EKS IAM -
Type: list object
roleARN, userARN (required)
- Description: IAM ARN to authenticate to the cluster.
roleARNspecifies an IAM role anduserARNspecifies an IAM user. - Type: string
username (required)
- Description: The Kubernetes username the IAM ARN is mapped to in the cluster. The ARN gets mapped to the Kubernetes cluster permissions associated with the username.
- Type: string
groups
- Description: List of kubernetes user groups that the mapped IAM ARN is given permissions to.
- Type: list string
- Description: IAM ARN to authenticate to the cluster.
partition
- Description: This field is used to set the aws partition that the IAM roles are present in. Default value is
aws. - Type: string
1.3.6 - OIDC configuration
OIDC support (optional)
EKS Anywhere can create clusters that support api server OIDC authentication. In order to add OIDC support, you need to configure your cluster by updating the configuration file before creating the cluster. This is a generic template with detailed descriptions below for reference:
apiVersion: anywhere.eks.amazonaws.com/v1alpha1
kind: Cluster
metadata:
   name: my-cluster-name
spec:
   ...
   # OIDC support
   identityProviderRefs:
      - kind: OIDCConfig
        name: my-cluster-name
---
apiVersion: anywhere.eks.amazonaws.com/v1alpha1
kind: OIDCConfig
metadata:
   name: my-cluster-name
spec:
    clientId: ""
    groupsClaim: ""
    groupsPrefix: ""
    issuerUrl: "https://x"
    requiredClaims:
      - claim: ""
        value: ""
    usernameClaim: ""
    usernamePrefix: ""
identityProviderRefs (Under Cluster)
List of identity providers you want configured for the Cluster.
This would include a reference to the OIDCConfig object with the configuration below.
clientId (required)
- Description: ClientId defines the client ID for the OpenID Connect client
- Type: string
groupsClaim (optional)
- Description: GroupsClaim defines the name of a custom OpenID Connect claim for specifying user groups
- Type: string
groupsPrefix (optional)
- Description: GroupsPrefix defines a string to be prefixed to all groups to prevent conflicts with other authentication strategies
- Type: string
issuerUrl (required)
- Description: IssuerUrl defines the URL of the OpenID issuer, only HTTPS scheme will be accepted
- Type: string
requiredClaims (optional)
List of RequiredClaim objects listed below. Only one is supported at this time.
requiredClaims[0] (optional)
- Description: RequiredClaim defines a key=value pair that describes a required claim in the ID Token
- claim
- type: string
- value
- type: string
- claim
- Type: object
usernameClaim (optional)
- Description: UsernameClaim defines the OpenID claim to use as the user name. Note that claims other than the default (‘sub’) is not guaranteed to be unique and immutable
- Type: string
usernamePrefix (optional)
- Description: UsernamePrefix defines a string to be prefixed to all usernames. If not provided, username claims other than ’email’ are prefixed by the issuer URL to avoid clashes. To skip any prefixing, provide the value ‘-’.
- Type: string
1.3.7 - GitOpsConfig configuration
GitOps Support (Optional)
EKS Anywhere can create clusters that supports GitOps configuration management with Flux.
In order to add GitOps support, you need to configure your cluster by updating the configuration file before creating the cluster.
We currently support two types of configurations: FluxConfig and GitOpsConfig.
Flux Configuration
The flux configuration spec has three optional fields, regardless of the chosen git provider.
Flux Configuration Spec Details
systemNamespace (optional)
- Description: Namespace in which to install the gitops components in your cluster. Defaults to
flux-system - Type: string
clusterConfigPath (optional)
- Description: The path relative to the root of the git repository where EKS Anywhere will store the cluster configuration files. Defaults to the cluster name
- Type: string
branch (optional)
- Description: The branch to use when committing the configuration. Defaults to
main - Type: string
EKS Anywhere currently supports two git providers for FluxConfig: Github and Git.
Github provider
Please note that for the Flux config to work successfully with the Github provider, the environment variable EKSA_GITHUB_TOKEN needs to be set with a valid GitHub PAT
.
This is a generic template with detailed descriptions below for reference:
apiVersion: anywhere.eks.amazonaws.com/v1alpha1
kind: Cluster
metadata:
  name: my-cluster-name
spec:
  ...
  #GitOps Support
  gitOpsRef:
    name: my-github-flux-provider
    kind: FluxConfig
---
apiVersion: anywhere.eks.amazonaws.com/v1alpha1
kind: FluxConfig
metadata:
  name: my-github-flux-provider
spec:
  systemNamespace: "my-alternative-flux-system-namespace"
  clusterConfigPath: "path-to-my-clusters-config"
  branch: "main"
  github:
    personal: true
    repository: myClusterGitopsRepo
    owner: myGithubUsername

---
github Configuration Spec Details
repository (required)
- Description: The name of the repository where EKS Anywhere will store your cluster configuration, and sync it to the cluster. If the repository exists, we will clone it from the git provider; if it does not exist, we will create it for you.
- Type: string
owner (required)
- Description: The owner of the Github repository; either a Github username or Github organization name. The Personal Access Token used must belong to the owner if this is a personal repository, or have permissions over the organization if this is not a personal repository.
- Type: string
personal (optional)
- Description: Is the repository a personal or organization repository?
If personal, this value is
true; otherwise,false. If using an organizational repository (e.g.personalisfalse) theownerfield will be used as theorganizationwhen authenticating to github.com - Default: true
- Type: boolean
Git provider
Before you create a cluster using the Git provider, you will need to set and export the EKSA_GIT_KNOWN_HOSTS and EKSA_GIT_PRIVATE_KEY environment variables.
EKSA_GIT_KNOWN_HOSTS
EKS Anywhere uses the provided known hosts file to verify the identity of the git provider when connecting to it with SSH.
The EKSA_GIT_KNOWN_HOSTS environment variable should be a path to a known hosts file containing entries for the git server to which you’ll be connecting.
For example, if you wanted to provide a known hosts file which allows you to connect to and verify the identity of github.com using a private key based on the key algorithm ecdsa, you can use the OpenSSH utility ssh-keyscan
to obtain the known host entry used by github.com for the ecdsa key type.
EKS Anywhere supports ecdsa, rsa, and ed25519 key types, which can be specified via the sshKeyAlgorithm field of the git provider config.
ssk-keyscan -t ecdsa github.com >> my_eksa_known_hosts
This will produce a file which contains known-hosts entries for the ecdsa key type supported by github.com, mapping the host to the key-type and public key.
github.com ecdsa-sha2-nistp256 AAAAE2VjZHNhLXNoYTItbmlzdHAyNTYAAAAIbmlzdHAyNTYAAABBBEmKSENjQEezOmxkZMy7opKgwFB9nkt5YRrYMjNuG5N87uRgg6CLrbo5wAdT/y6v0mKV0U2w0WZ2YB/++Tpockg=
EKS Anywhere will use the content of the file at the path EKA_GIT_KNOWN_HOSTS to verify the identity of the remote git server, and the provided known hosts file must contain an entry for the remote host and key type.
EKSA_GIT_PRIVATE_KEY
The EKSA_GIT_PRIVATE_KEY environment variable should be a path to the private key file associated with a valid SSH public key registered with your Git provider.
This key must have permission to both read from and write to your repository.
The key can use the key algorithms rsa, ecdsa, and ed25519.
This key file must have restricted file permissions, allowing only the owner to read and write, such as octal permissions 600.
If your private key file is passphrase protected, you must also set EKSA_GIT_SSH_KEY_PASSPHRASE with that value.
This is a generic template with detailed descriptions below for reference:
apiVersion: anywhere.eks.amazonaws.com/v1alpha1
kind: Cluster
metadata:
  name: my-cluster-name
spec:
  ...
  #GitOps Support
  gitOpsRef:
    name: my-git-flux-provider
    kind: FluxConfig
---
apiVersion: anywhere.eks.amazonaws.com/v1alpha1
kind: FluxConfig
metadata:
  name: my-git-flux-provider
spec:
  systemNamespace: "my-alternative-flux-system-namespace"
  clusterConfigPath: "path-to-my-clusters-config"
  branch: "main"
  git:
    repositoryUrl: ssh://git@github.com/myAccount/myClusterGitopsRepo.git
    sshKeyAlgorithm: ecdsa
---
git Configuration Spec Details
repositoryUrl (required)
- Description: The URL of an existing repository where EKS Anywhere will store your cluster configuration and sync it to the cluster.
- Type: string
sshKeyAlgorithm (optional)
- Description: The SSH key algorithm of the private key specified via
EKSA_PRIVATE_KEY_FILE. Defaults toecdsa - Type: string
Supported SSH key algorithm types are ecdsa, rsa, and ed25519.
Be sure that this SSH key algorithm matches the private key file provided by EKSA_GIT_PRIVATE_KEY_FILE and that the known hosts entry for the key type is present in EKSA_GIT_KNOWN_HOSTS.
GitOps Configuration
Warning
GitOps Config will be deprecated in v0.11.0 in lieu of using the Flux Config described above.Please note that for the GitOps config to work successfully the environment variable EKSA_GITHUB_TOKEN needs to be set with a valid GitHub PAT
. This is a generic template with detailed descriptions below for reference:
apiVersion: anywhere.eks.amazonaws.com/v1alpha1
kind: Cluster
metadata:
  name: my-cluster-name
spec:
  ...
  #GitOps Support
  gitOpsRef:
    name: my-gitops
    kind: GitOpsConfig
---
apiVersion: anywhere.eks.amazonaws.com/v1alpha1
kind: GitOpsConfig
metadata:
  name: my-gitops
spec:
  flux:
    github:
      personal: true
      repository: myClusterGitopsRepo
      owner: myGithubUsername
      fluxSystemNamespace: ""
      clusterConfigPath: ""
GitOps Configuration Spec Details
flux (required)
- Description: our supported gitops provider is
flux. This is the only supported value. - Type: object
Flux Configuration Spec Details
github (required)
- Description:
githubis the only currently supported git provider. This defines your github configuration to be used by EKS Anywhere and flux. - Type: object
github Configuration Spec Details
repository (required)
- Description: The name of the repository where EKS Anywhere will store your cluster configuration, and sync it to the cluster. If the repository exists, we will clone it from the git provider; if it does not exist, we will create it for you.
- Type: string
owner (required)
- Description: The owner of the Github repository; either a Github username or Github organization name.
The Personal Access Token used must belong to the
ownerif this is apersonalrepository, or have permissions over the organization if this is not apersonalrepository. - Type: string
personal (optional)
- Description: Is the repository a personal or organization repository?
If personal, this value is
true; otherwise,false. If using an organizational repository (e.g.personalisfalse) theownerfield will be used as theorganizationwhen authenticating to github.com - Default:
true - Type: boolean
clusterConfigPath (optional)
- Description: The path relative to the root of the git repository where EKS Anywhere will store the cluster configuration files.
- Default:
clusters/$MANAGEMENT_CLUSTER_NAME - Type: string
fluxSystemNamespace (optional)
- Description: Namespace in which to install the gitops components in your cluster.
- Default:
flux-system. - Type: string
branch (optional)
- Description: The branch to use when committing the configuration.
- Default:
main - Type: string
1.3.8 - Proxy configuration
Proxy support (optional)
You can configure EKS Anywhere to use a proxy to connect to the Internet. This is the generic template with proxy configuration for your reference:
apiVersion: anywhere.eks.amazonaws.com/v1alpha1
kind: Cluster
metadata:
   name: my-cluster-name
spec:
   ...
   proxyConfiguration:
      httpProxy: http-proxy-ip:port
      httpsProxy: https-proxy-ip:port
      noProxy:
      - list of no proxy endpoints
Proxy Configuration Spec Details
proxyConfiguration (required)
- Description: top level key; required to use proxy.
- Type: object
httpProxy (required)
- Description: HTTP proxy to use to connect to the internet; must be in the format IP:port
- Type: string
- Example:
httpProxy: 192.168.0.1:3218
httpsProxy (required)
- Description: HTTPS proxy to use to connect to the internet; must be in the format IP:port
- Type: string
- Example:
httpsProxy: 192.168.0.1:3218
noProxy (optional)
- Description: list of endpoints that should not be routed through the proxy; can be an IP, CIDR block, or a domain name
- Type: list of strings
- Example
  noProxy:
   - localhost
   - 192.168.0.1
   - 192.168.0.0/16
   - .example.com
1.3.9 - Registry Mirror configuration
Registry Mirror Support (optional)
You can configure EKS Anywhere to use a private registry as a mirror for pulling the required images.
The following cluster spec shows an example of how to configure registry mirror:
apiVersion: anywhere.eks.amazonaws.com/v1alpha1
kind: Cluster
metadata:
   name: my-cluster-name
spec:
   ...
  registryMirrorConfiguration:
    endpoint: <private registry IP or hostname>
    port: <private registry port>
    caCertContent: |
      -----BEGIN CERTIFICATE-----
      MIIF1DCCA...
      ...
      es6RXmsCj...
      -----END CERTIFICATE-----
Registry Mirror Configuration Spec Details
registryMirrorConfiguration (required)
- Description: top level key; required to use a private registry.
- Type: object
endpoint (required)
- Description: IP address or hostname of the private registry for pulling images
- Type: string
- Example:
endpoint: 192.168.0.1
port (optional)
- Description: Port for the private registry. This is an optional field. If a port
is not specified, the default HTTPS port
443is used - Type: string
- Example:
port: 443
caCertContent (optional)
- Description: Certificate Authority (CA) Certificate for the private registry . When using
self-signed certificates it is necessary to pass this parameter in the cluster spec.
It is also possible to configure CACertContent by exporting an environment variable:
export EKSA_REGISTRY_MIRROR_CA="/path/to/certificate-file" - Type: string
- Example:
CACertContent: |
  -----BEGIN CERTIFICATE-----
  MIIF1DCCA...
  ...
  es6RXmsCj...
  -----END CERTIFICATE-----
Import images into a private registry
You can use the import-images command to pull images from public.ecr.aws and push them to your
private registry.
Starting with release 0.8, import-images command also pulls the cilium chart from public.ecr.aws and pushes it to the registry mirror. It requires the registry credentials for performing a login. Set the following environment variables for the login:
export REGISTRY_USERNAME=<username>
export REGISTRY_PASSWORD=<password>
docker login https://<private registry endpoint>
...
eksctl anywhere import-images -f cluster-spec.yaml
Docker configurations
It is necessary to add the private registry’s CA Certificate to the list of CA certificates on the admin machine if your registry uses self-signed certificates.
For Linux
, you can place your certificate here: /etc/docker/certs.d/<private-registry-endpoint>/ca.crt
For Mac , you can follow this guide to add the certificate to your keychain: https://docs.docker.com/desktop/mac/#add-tls-certificates
Note
You may need to restart Docker after adding the certificates.Registry configurations
Depending on what registry you decide to use, you will need to create the following projects:
bottlerocket
eks-anywhere
eks-distro
isovalent
cilium-chart
For example, if a registry is available at private-registry.local, then the following
projects will have to be created:
https://private-registry.local/bottlerocket
https://private-registry.local/eks-anywhere
https://private-registry.local/eks-distro
https://private-registry.local/isovalent
https://private-registry.local/cilium-chart
2 - Bare Metal
2.1 - Requirements for EKS Anywhere on Bare Metal
ADD CONTENT TO DESCRIBE:
- Hardware requirements (IPMI, extra upgrade machines, etc.), including list of validated hardware models/families, etc.
- Network requirements
2.2 - Overview of iPXE and Tinkerbell for Bare Metal
2.3 - Preparing Bare Metal for EKS Anywhere
2.4 - Customize HookOS for EKS Anywhere on Bare Metal
2.5 - Customize OVAs for EKS Anywhere on Bare Metal
3 - VMware vSphere
3.1 - Requirements for EKS Anywhere on VMware vSphere
To run EKS Anywhere, you will need:
Prepare Administrative machine
Set up an Administrative machine as described in Install EKS Anywhere .
Prepare a VMware vSphere environment
To prepare a VMware vSphere environment to run EKS Anywhere, you need the following:
-
A vSphere 7+ environment running vCenter
-
Capacity to deploy 6-10 VMs
-
DHCP service running in vSphere environment in the primary VM network for your workload cluster
-
One network in vSphere to use for the cluster. This network must have inbound access into vCenter
-
An OVA imported into vSphere and converted into a template for the workload VMs
-
User credentials to create VMs and attach networks, etc
-
One IP address routable from cluster but excluded from DHCP offering. This IP address is to be used as the Control Plane Endpoint IP or kube-vip VIP address
Below are some suggestions to ensure that this IP address is never handed out by your DHCP server.
You may need to contact your network engineer.
- Pick an IP address reachable from cluster subnet which is excluded from DHCP range OR
- Alter DHCP ranges to leave out an IP address(s) at the top and/or the bottom of the range OR
- Create an IP reservation for this IP on your DHCP server. This is usually accomplished by adding a dummy mapping of this IP address to a non-existent mac address.
Each VM will require:
- 2 vCPUs
- 8GB RAM
- 25GB Disk
The administrative machine and the target workload environment will need network access to:
- public.ecr.aws
- anywhere-assets.eks.amazonaws.com (to download the EKS Anywhere binaries, manifests and OVAs)
- distro.eks.amazonaws.com (to download EKS Distro binaries and manifests)
- d2glxqk2uabbnd.cloudfront.net (for EKS Anywhere and EKS Distro ECR container images)
- api.github.com (only if GitOps is enabled)
vSphere information needed before creating the cluster
You need to get the following information before creating the cluster:
-
Static IP Addresses: You will need one IP address for the management cluster control plane endpoint, and a separate one for the controlplane of each workload cluster you add.
Let’s say you are going to have the management cluster and two workload clusters. For those, you would need three IP addresses, one for each. All of those addresses will be configured the same way in the configuration file you will generate for each cluster.
A static IP address will be used for each control plane VM in your EKS Anywhere cluster. Choose IP addresses in your network range that do not conflict with other VMs and make sure they are excluded from your DHCP offering.
An IP address will be the value of the property
controlPlaneConfiguration.endpoint.hostin the config file of the management cluster. A separate IP address must be assigned for each workload cluster.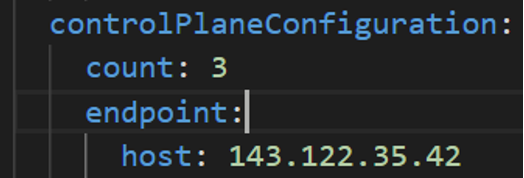
-
vSphere Datacenter Name: The vSphere datacenter to deploy the EKS Anywhere cluster on.

-
VM Network Name: The VM network to deploy your EKS Anywhere cluster on.
-
vCenter Server Domain Name: The vCenter server fully qualified domain name or IP address. If the server IP is used, the thumbprint must be set or insecure must be set to true.

-
thumbprint (required if insecure=false): The SHA1 thumbprint of the vCenter server certificate which is only required if you have a self-signed certificate for your vSphere endpoint.
There are several ways to obtain your vCenter thumbprint. If you have govc installed , you can run the following command in the Administrative machine terminal, and take a note of the output:
govc about.cert -thumbprint -k -
template: The VM template to use for your EKS Anywhere cluster. This template was created when you imported the OVA file into vSphere.

-
datastore: The vSphere datastore to deploy your EKS Anywhere cluster on.
-
folder: The folder parameter in VSphereMachineConfig allows you to organize the VMs of an EKS Anywhere cluster. With this, each cluster can be organized as a folder in vSphere. You will have a separate folder for the management cluster and each cluster you are adding.
-
resourcePool: The vSphere Resource pools for your VMs in the EKS Anywhere cluster. If there is a resource pool:
/<datacenter>/host/<resource-pool-name>/Resources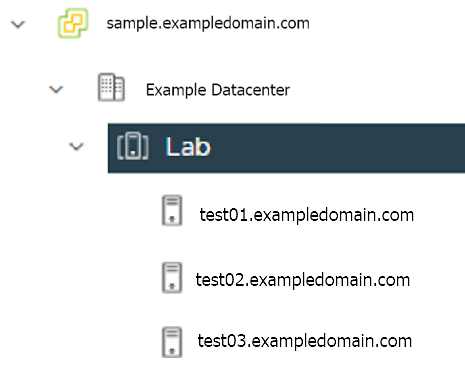
3.2 - Preparing vSphere for EKS Anywhere
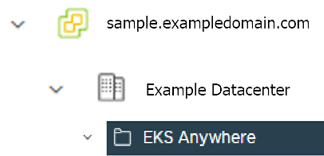
Create a VM and template folder (Optional):
For each user that needs to create workload clusters, have the vSphere administrator create a VM and template folder. That folder will host:
- The VMs of the Control plane and Data plane nodes of each cluster.
- A nested folder for the management cluster and another one for each workload cluster.
- Each cluster VM in its own nested folder under this folder.
User permissions should be set up to:
- Only allow the user to see and create EKS Anywhere resources in that folder and its nested folders.
- Prevent the user from having visibility and control over the whole vSphere cluster domain and its sub-child objects (datacenter, resource pools and other folders).
In your EKS Anywhere configuration file you will reference to a path under this folder associated with the cluster you create.
Add a vSphere folder
Follow these steps to create the user’s vSphere folder:
- From vCenter, select the Menus/VM and Template tab.
- Select either a datacenter or another folder as a parent object for the folder that you want to create.
- Right-click the parent object and click New Folder.
- Enter a name for the folder and click OK. For more details, see the vSphere Create a Folder documentation.
Set up vSphere roles and user permission
You need to get a vSphere username with the right privileges to let you creatie EKS Anywhere clusters on top of your vSphere cluster. Then you would need to import the latest release of the EKS Anywhere OVA template to your VSphere cluster to use it to provision your Cluster nodes.
Add a vCenter User
Ask your VSphere administrator to add a vCenter user that will be used for the provisioning of the EKS Anywhere cluster in VMware vSphere.
- Log in with the vSphere Client to the vCenter Server.
- Specify the user name and password for a member of the vCenter Single Sign-On Administrators group.
- Navigate to the vCenter Single Sign-On user configuration UI.
- From the Home menu, select Administration.
- Under Single Sign On, click Users and Groups.
- If vsphere.local is not the currently selected domain, select it from the drop-down menu. You cannot add users to other domains.
- On the Users tab, click Add.
- Enter a user name and password for the new user.
- The maximum number of characters allowed for the user name is 300.
- You cannot change the user name after you create a user. The password must meet the password policy requirements for the system.
- Click Add.
For more details, see vSphere Add vCenter Single Sign-On Users documentation.
Create and define user roles
When you add a user for creating clusters, that user initially has no privileges to perform management operations. So you have to add this user to groups with the required permissions, or assign a role or roles with the required permission to this user.
Three roles are needed to be able to create the EKS Anywhere cluster:
-
Create a global custom role: For example, you could name this EKS Anywhere Global. Define it for the user on the vCenter domain level and its children objects. Create this role with the following privileges:
> Content Library * Add library item * Check in a template * Check out a template * Create local library > vSphere Tagging * Assign or Unassign vSphere Tag * Assign or Unassign vSphere Tag on Object * Create vSphere Tag * Create vSphere Tag Category * Delete vSphere Tag * Delete vSphere Tag Category * Edit vSphere Tag * Edit vSphere Tag Category * Modify UsedBy Field For Category * Modify UsedBy Field For Tag -
Create a user custom role: The second role is also a custom role that you could call, for example, EKS Anywhere User. Define this role with the following objects and children objects.
- The pool resource level and its children objects. This resource pool that our EKS Anywhere VMs will be part of.
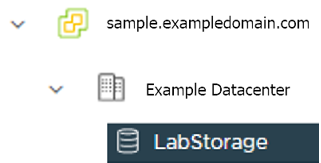
- The storage object level and its children objects. This storage that will be used to store the cluster VMs.
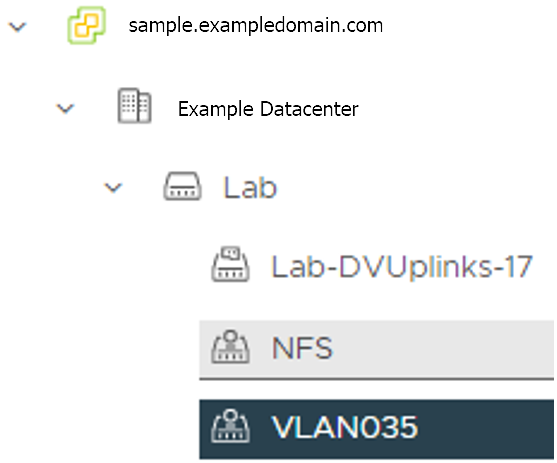
- The network VLAN object level and its children objects. This network that will host the cluster VMs.
- The VM and Template folder level and its children objects.
Create this role with the following privileges:
> Content Library * Add library item * Check in a template * Check out a template * Create local library > Datastore * Allocate space * Browse datastore * Low level file operations > Folder * Create folder > vSphere Tagging * Assign or Unassign vSphere Tag * Assign or Unassign vSphere Tag on Object * Create vSphere Tag * Create vSphere Tag Category * Delete vSphere Tag * Delete vSphere Tag Category * Edit vSphere Tag * Edit vSphere Tag Category * Modify UsedBy Field For Category * Modify UsedBy Field For Tag > Network * Assign network > Resource * Assign virtual machine to resource pool > Scheduled task * Create tasks * Modify task * Remove task * Run task > Profile-driven storage * Profile-driven storage view > Storage views * View > vApp * Import > Virtual machine * Change Configuration - Add existing disk - Add new disk - Add or remove device - Advanced configuration - Change CPU count - Change Memory - Change Settings - Configure Raw device - Extend virtual disk - Modify device settings - Remove disk * Edit Inventory - Create from existing - Create new - Remove * Interaction - Power off - Power on * Provisioning - Clone template - Clone virtual machine - Create template from virtual machine - Customize guest - Deploy template - Mark as template - Read customization specifications * Snapshot management - Create snapshot - Remove snapshot - Revert to snapshot -
Create a default Administrator role: The third role is the default system role Administrator that you define to the user on the folder level and its children objects (VMs and OVA templates) that was created by the VSphere admistrator for you.
To create a role and define privileges check Create a vCenter Server Custom Role and Defined Privileges pages.
Deploy an OVA Template
If the user creating the cluster has permission and network access to create and tag a template, you can skip these steps because EKS Anywhere will automatically download the OVA and create the template if it can. If the user does not have the permissions or network access to create and tag the template, follow this guide. The OVA contains the operating system (Ubuntu or Bottlerocket) for a specific EKS-D Kubernetes release and EKS-A version. The following example uses Ubuntu as the operating system, but a similar workflow would work for Bottlerocket.
Steps to deploy the Ubuntu OVA
- Go to the artifacts page and download the OVA template with the newest EKS-D Kubernetes release to your computer.
- Log in to the vCenter Server.
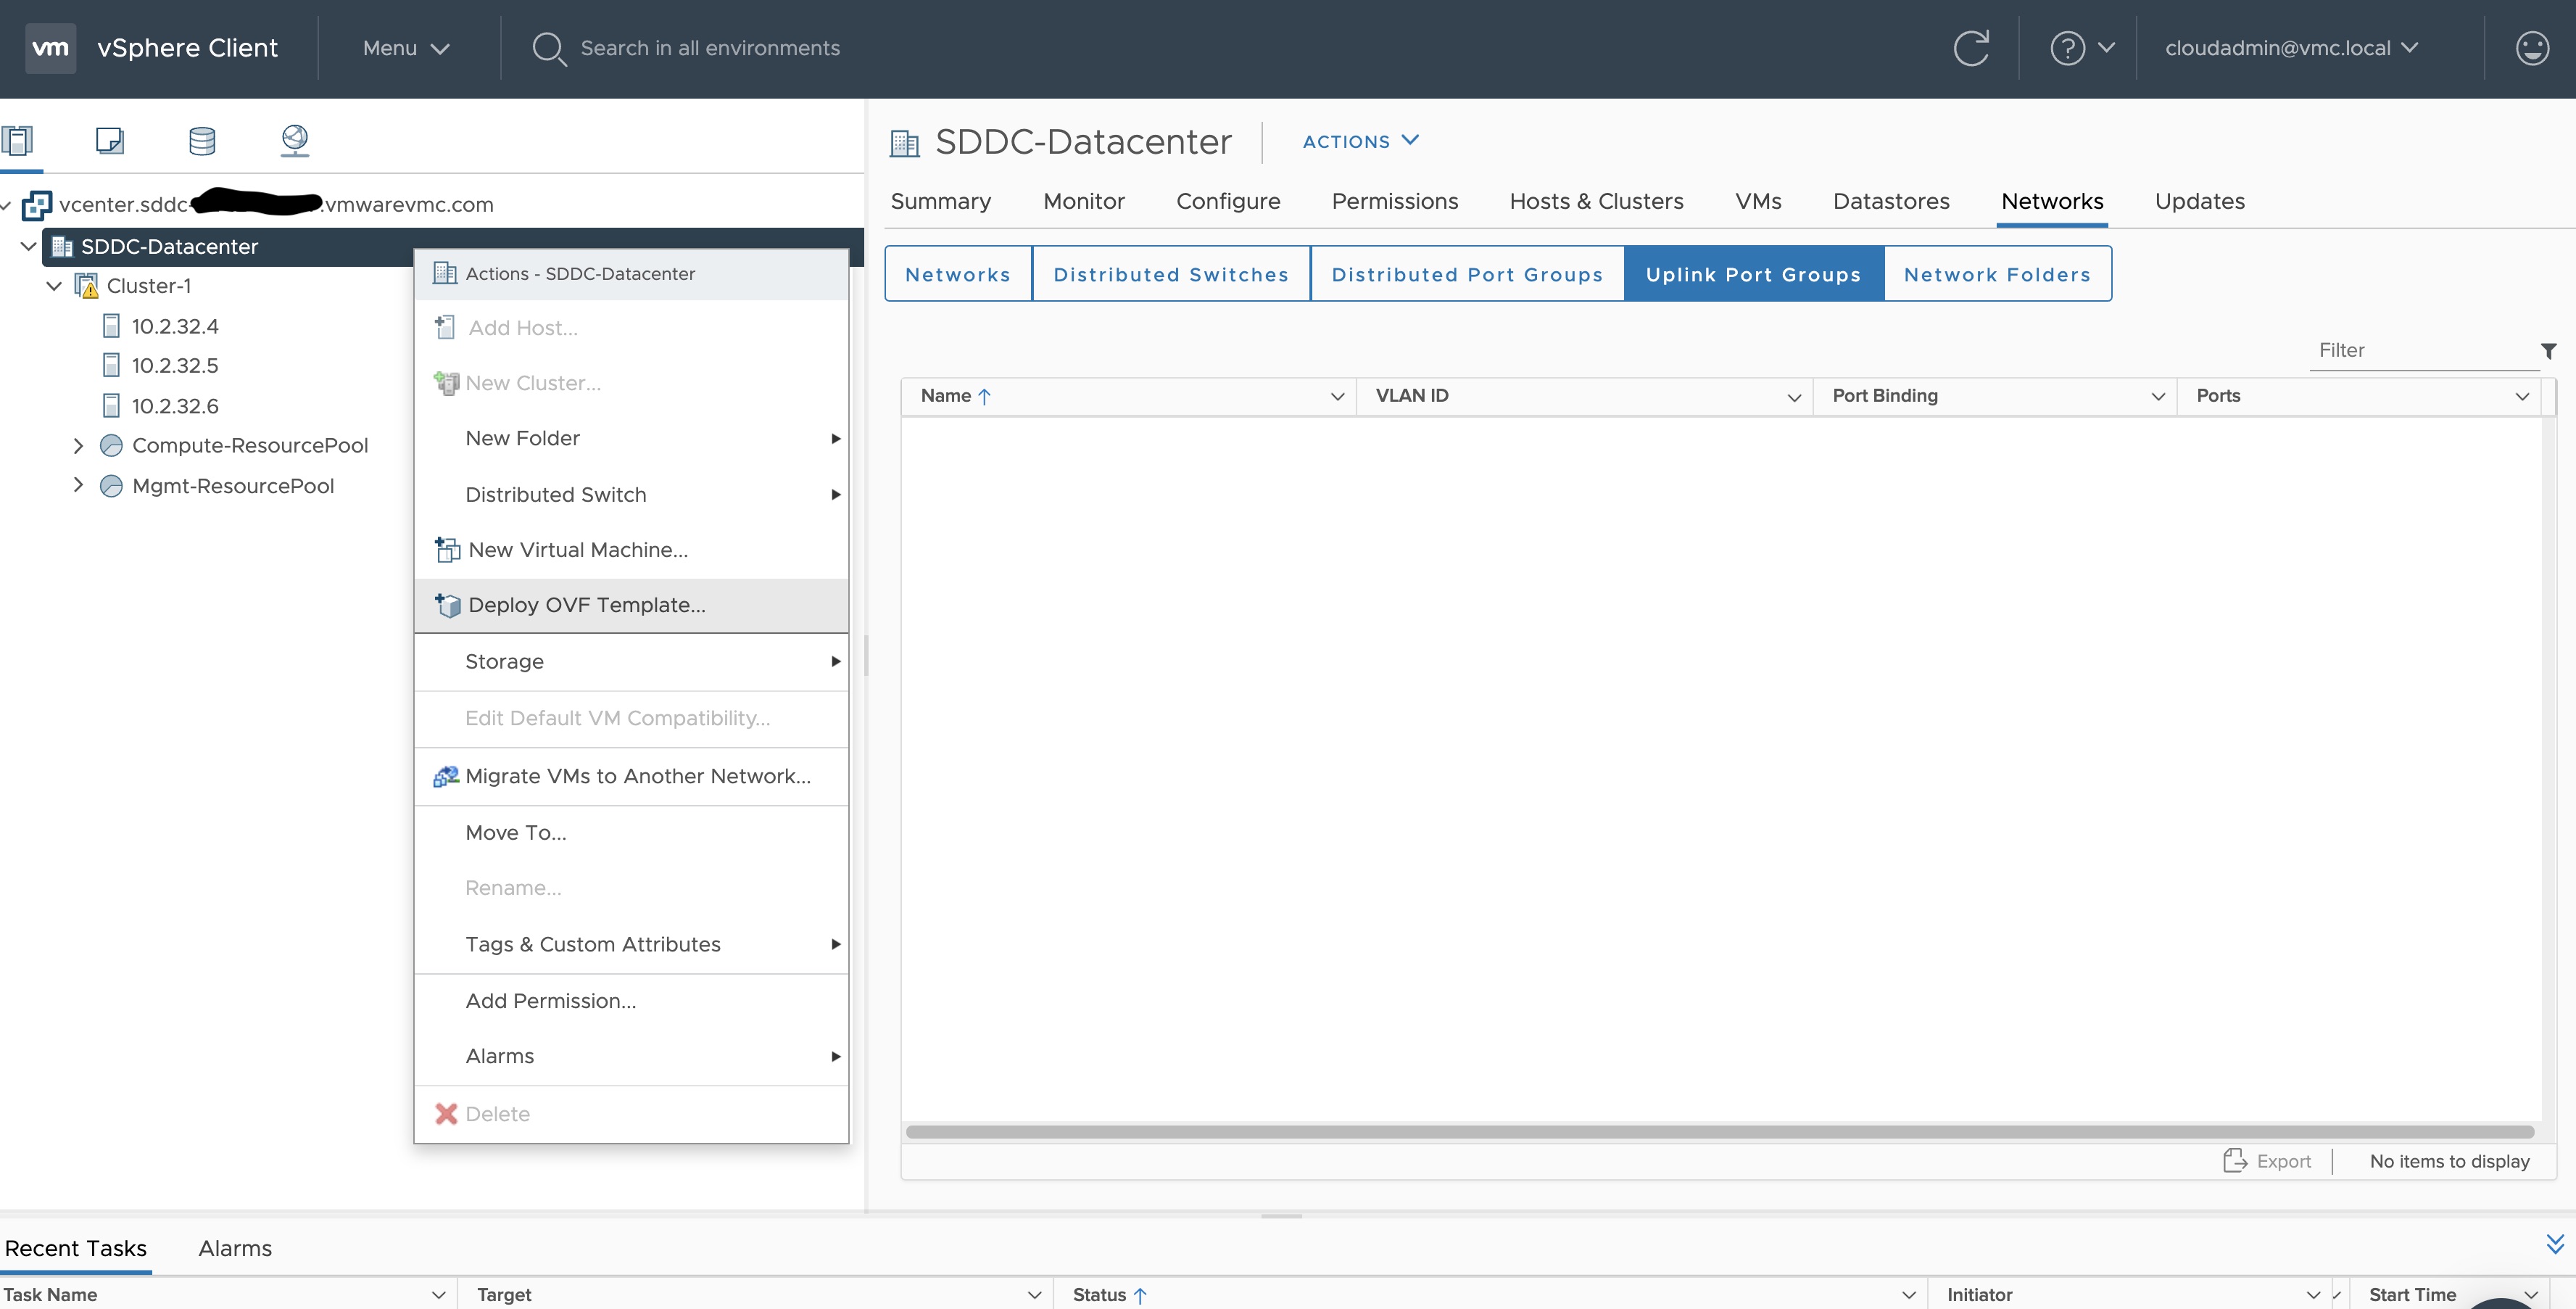
- Right-click the folder you created above and select Deploy OVF Template. The Deploy OVF Template wizard opens.
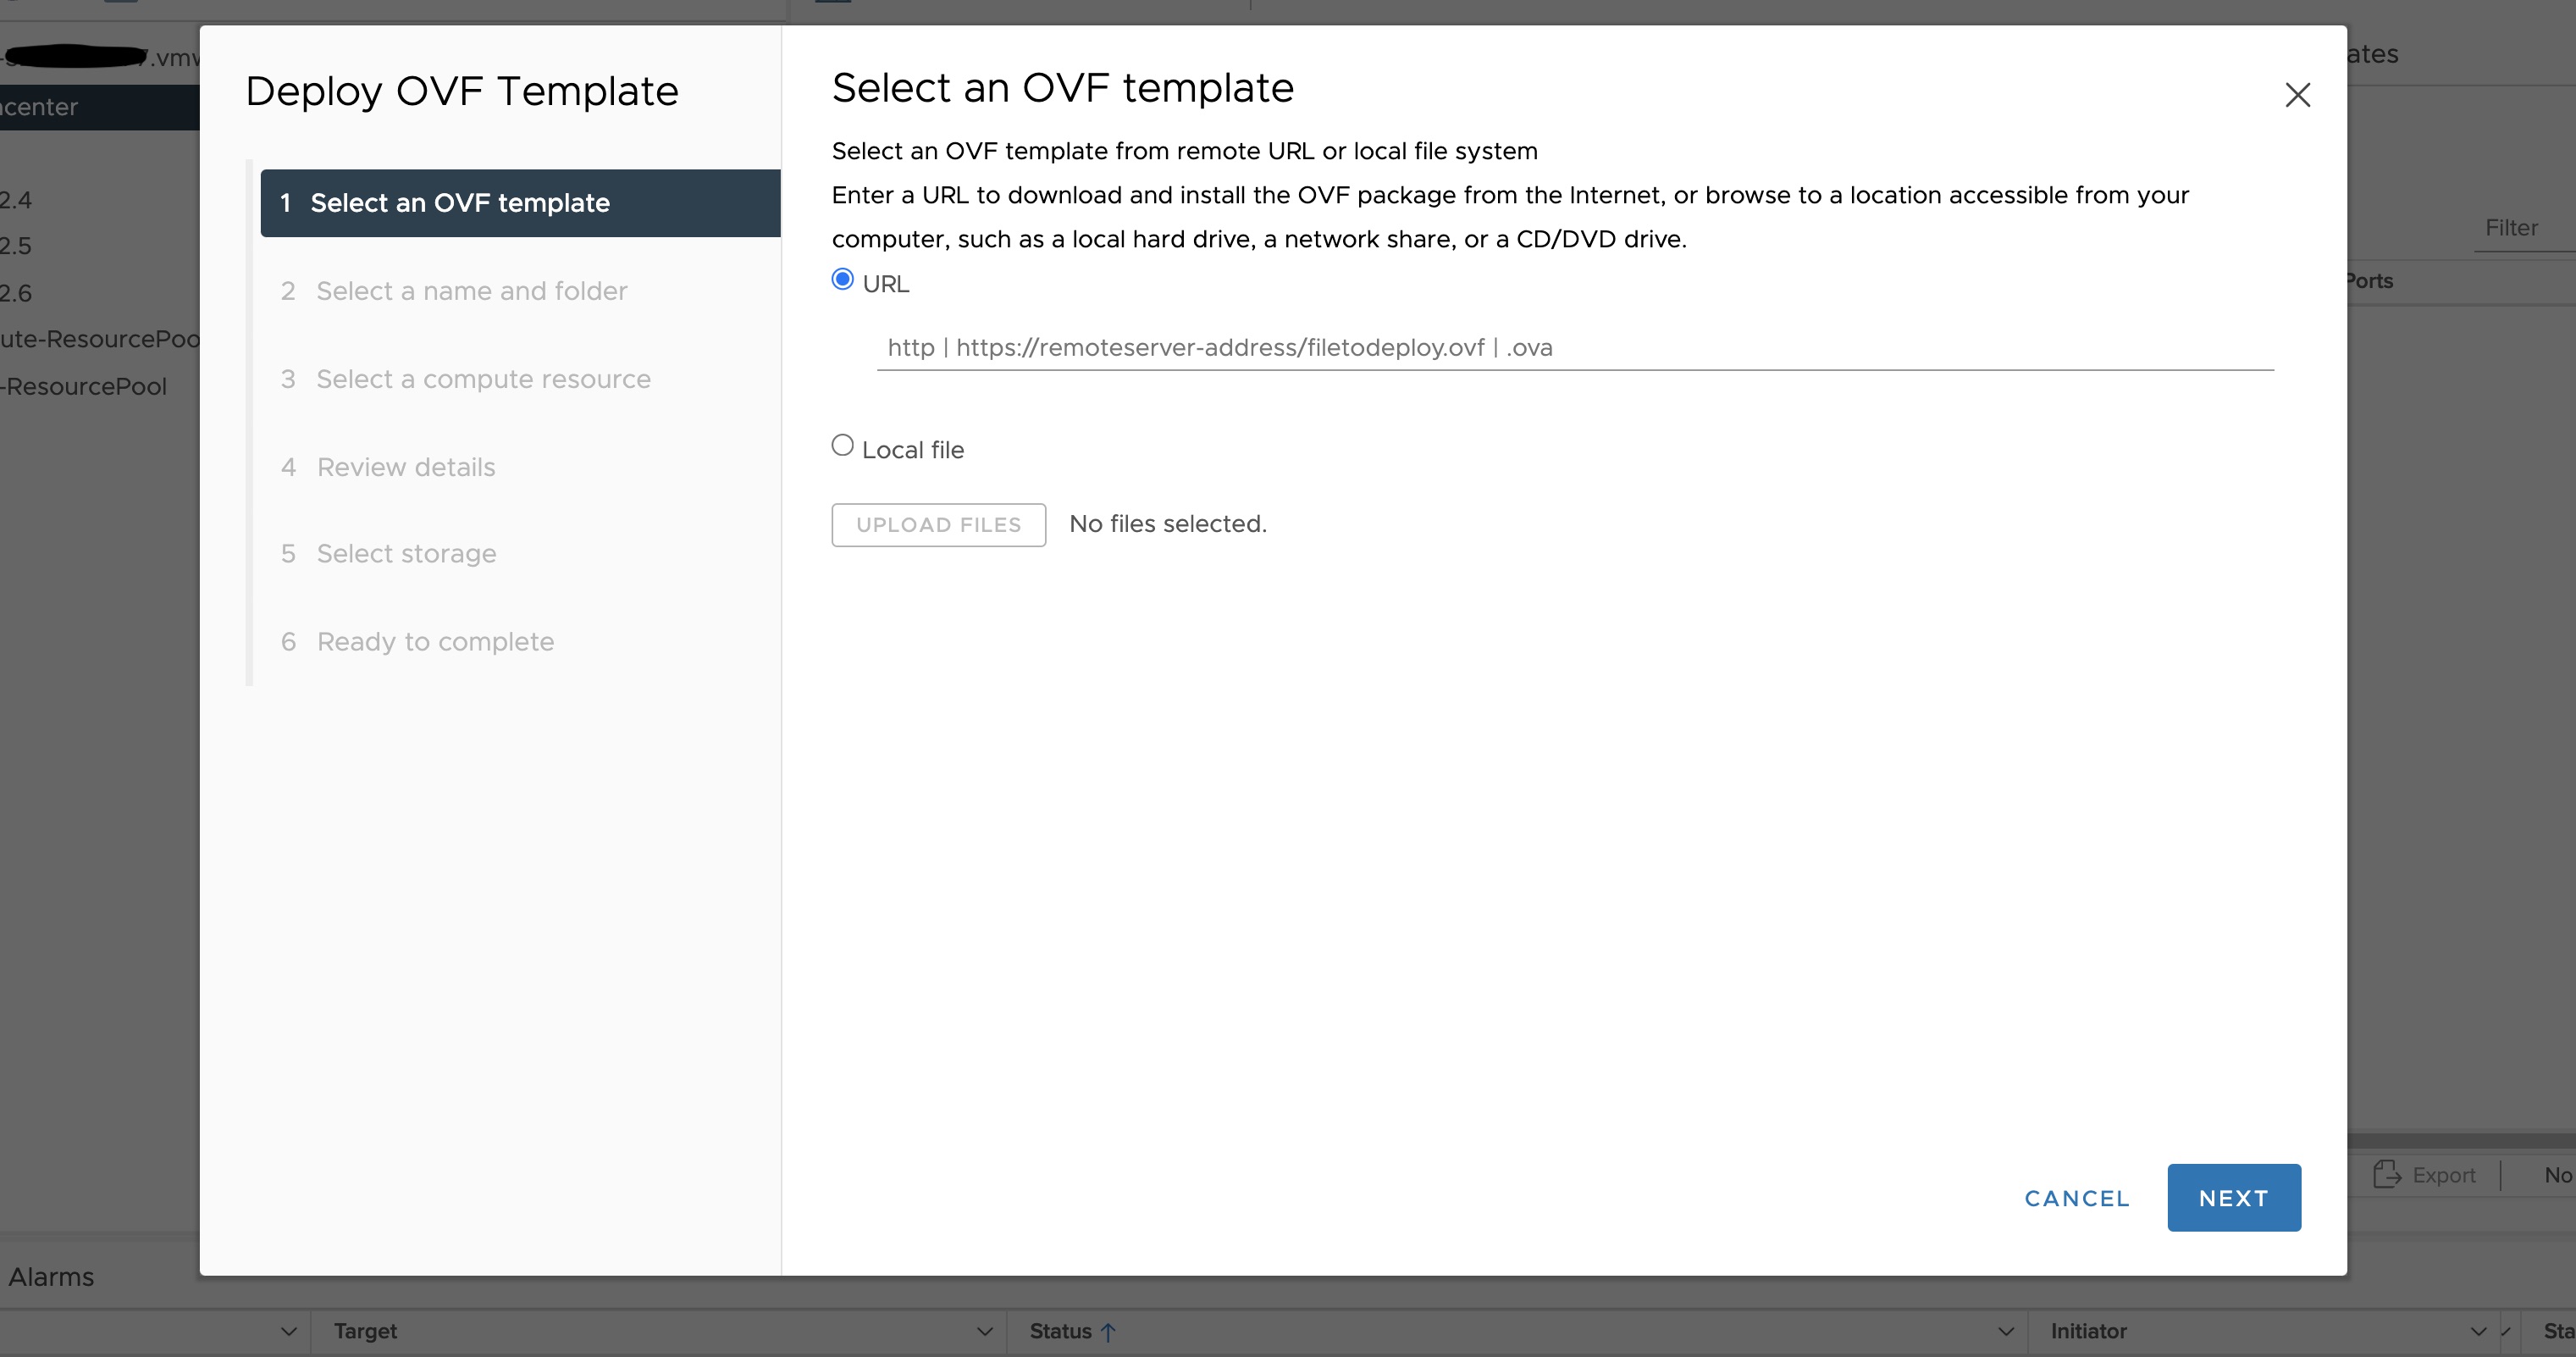
- On the Select an OVF template page, select the Local file option, specify the location of the OVA template you downloaded to your computer, and click Next.
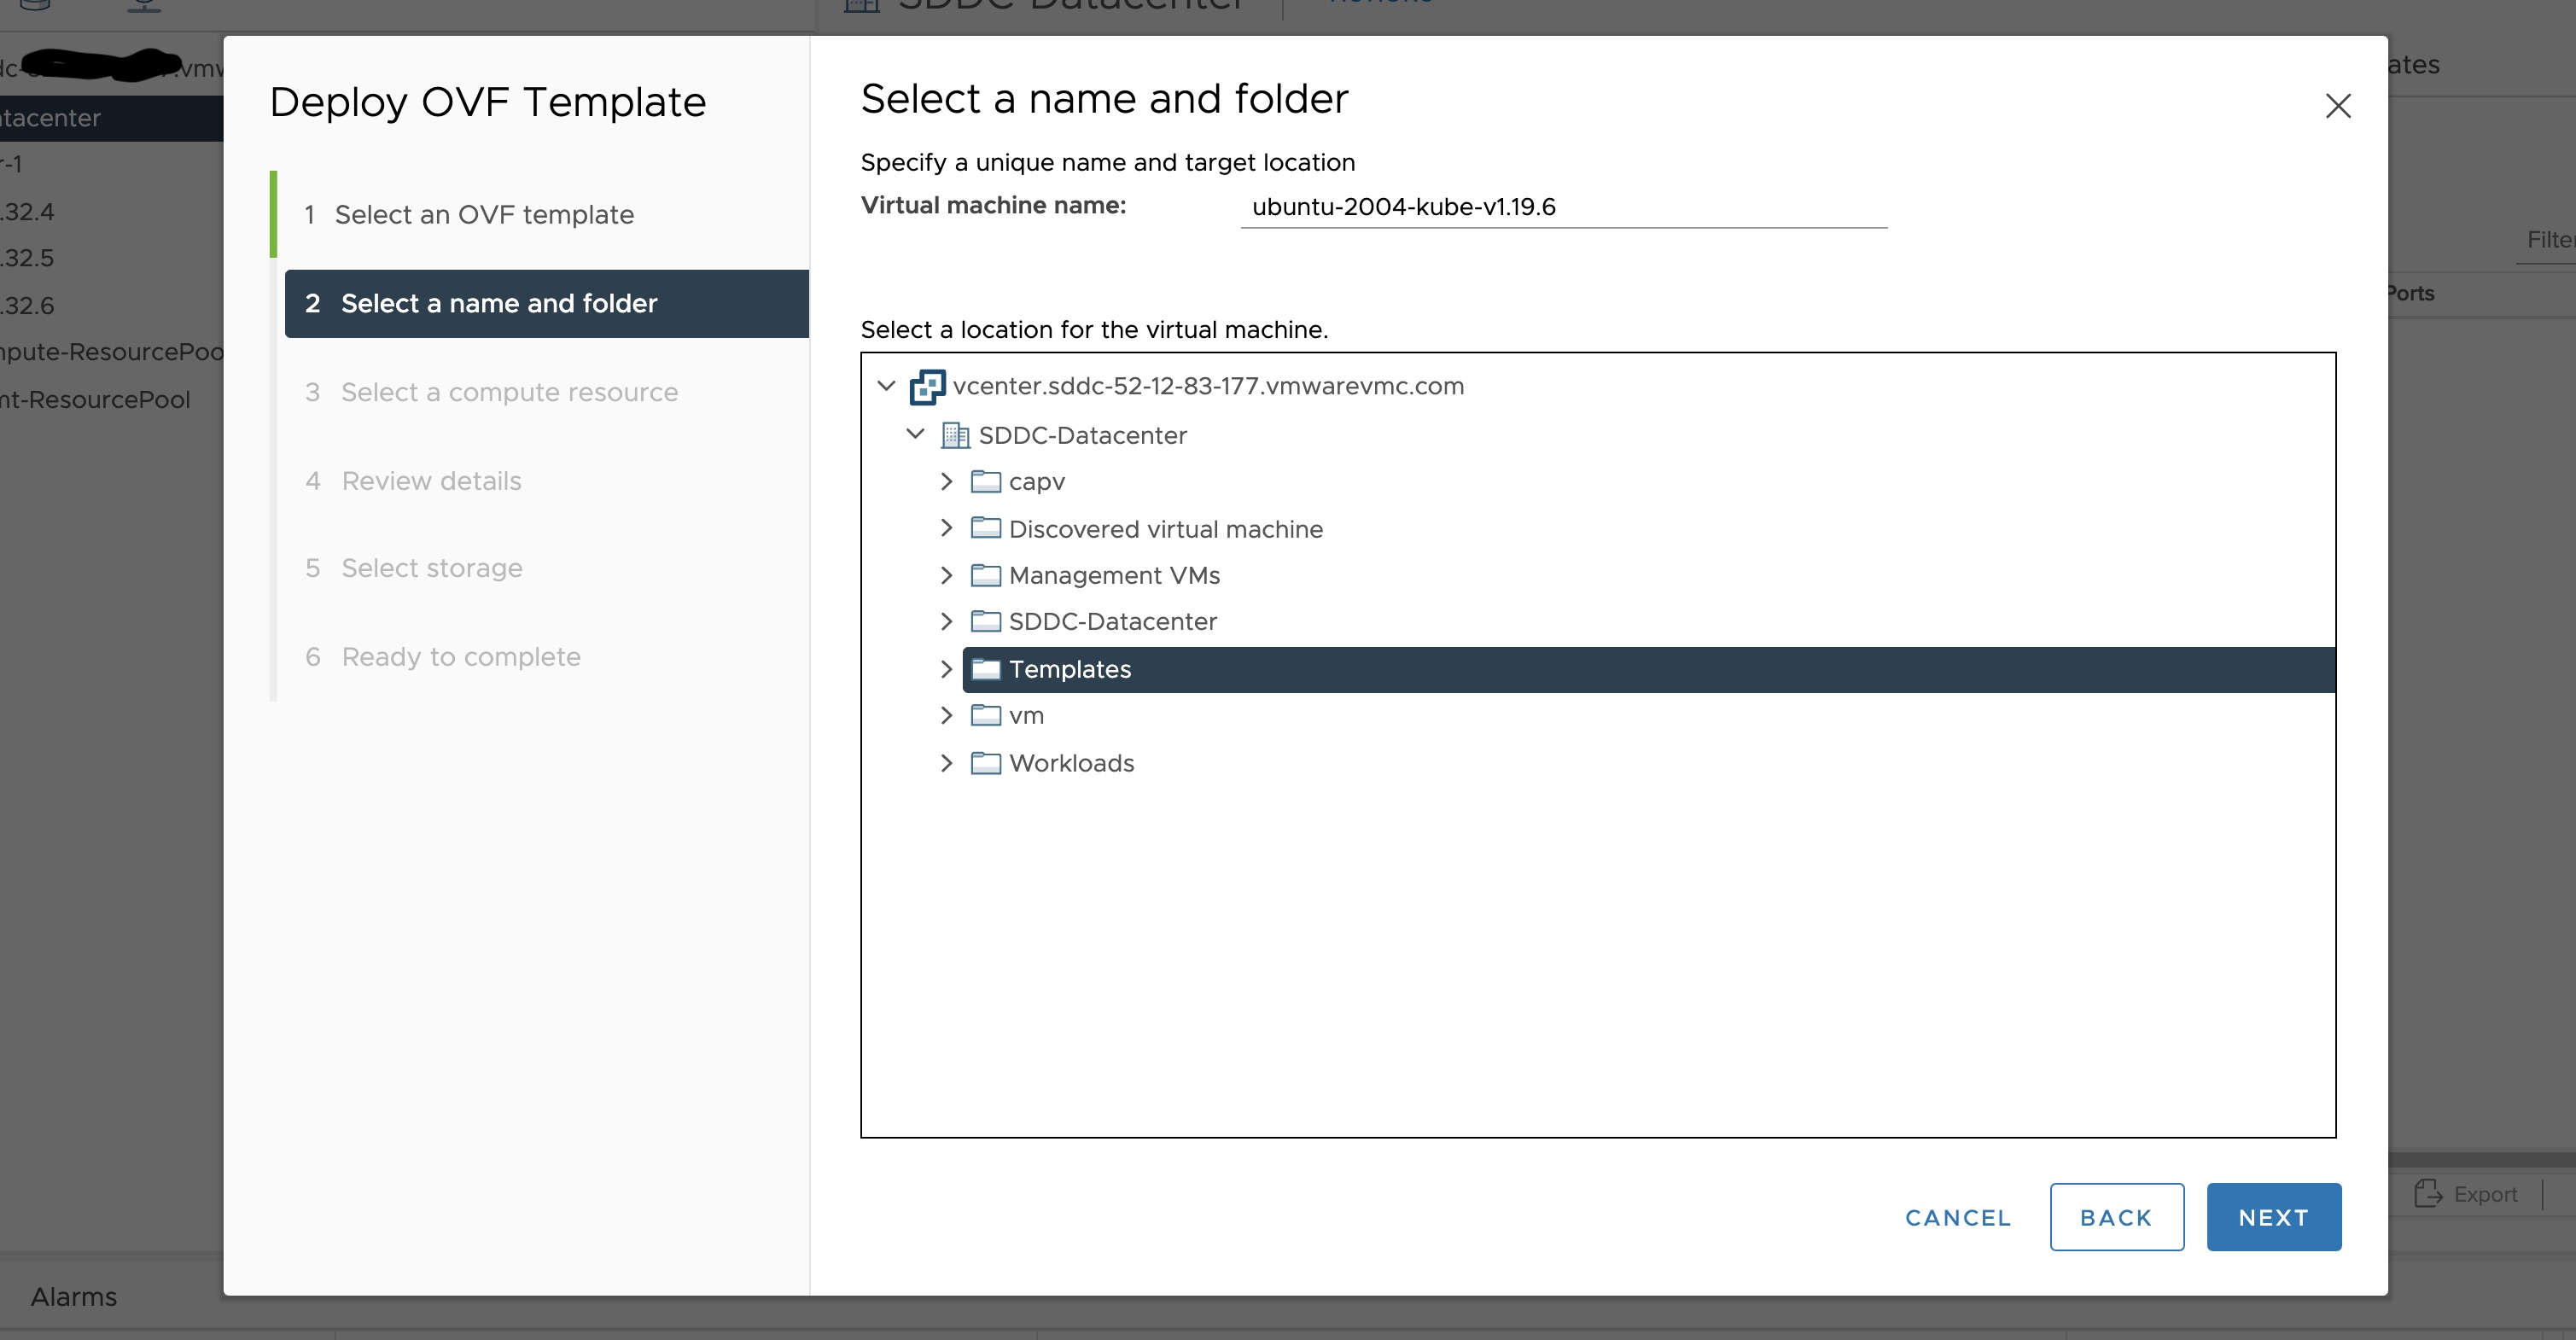
- On the Select a name and folder page, enter a unique name for the virtual machine or leave the default generated name, if you do not have other templates with the same name within your vCenter Server virtual machine folder. The default deployment location for the virtual machine is the inventory object where you started the wizard, which is the folder you created above. Click Next.
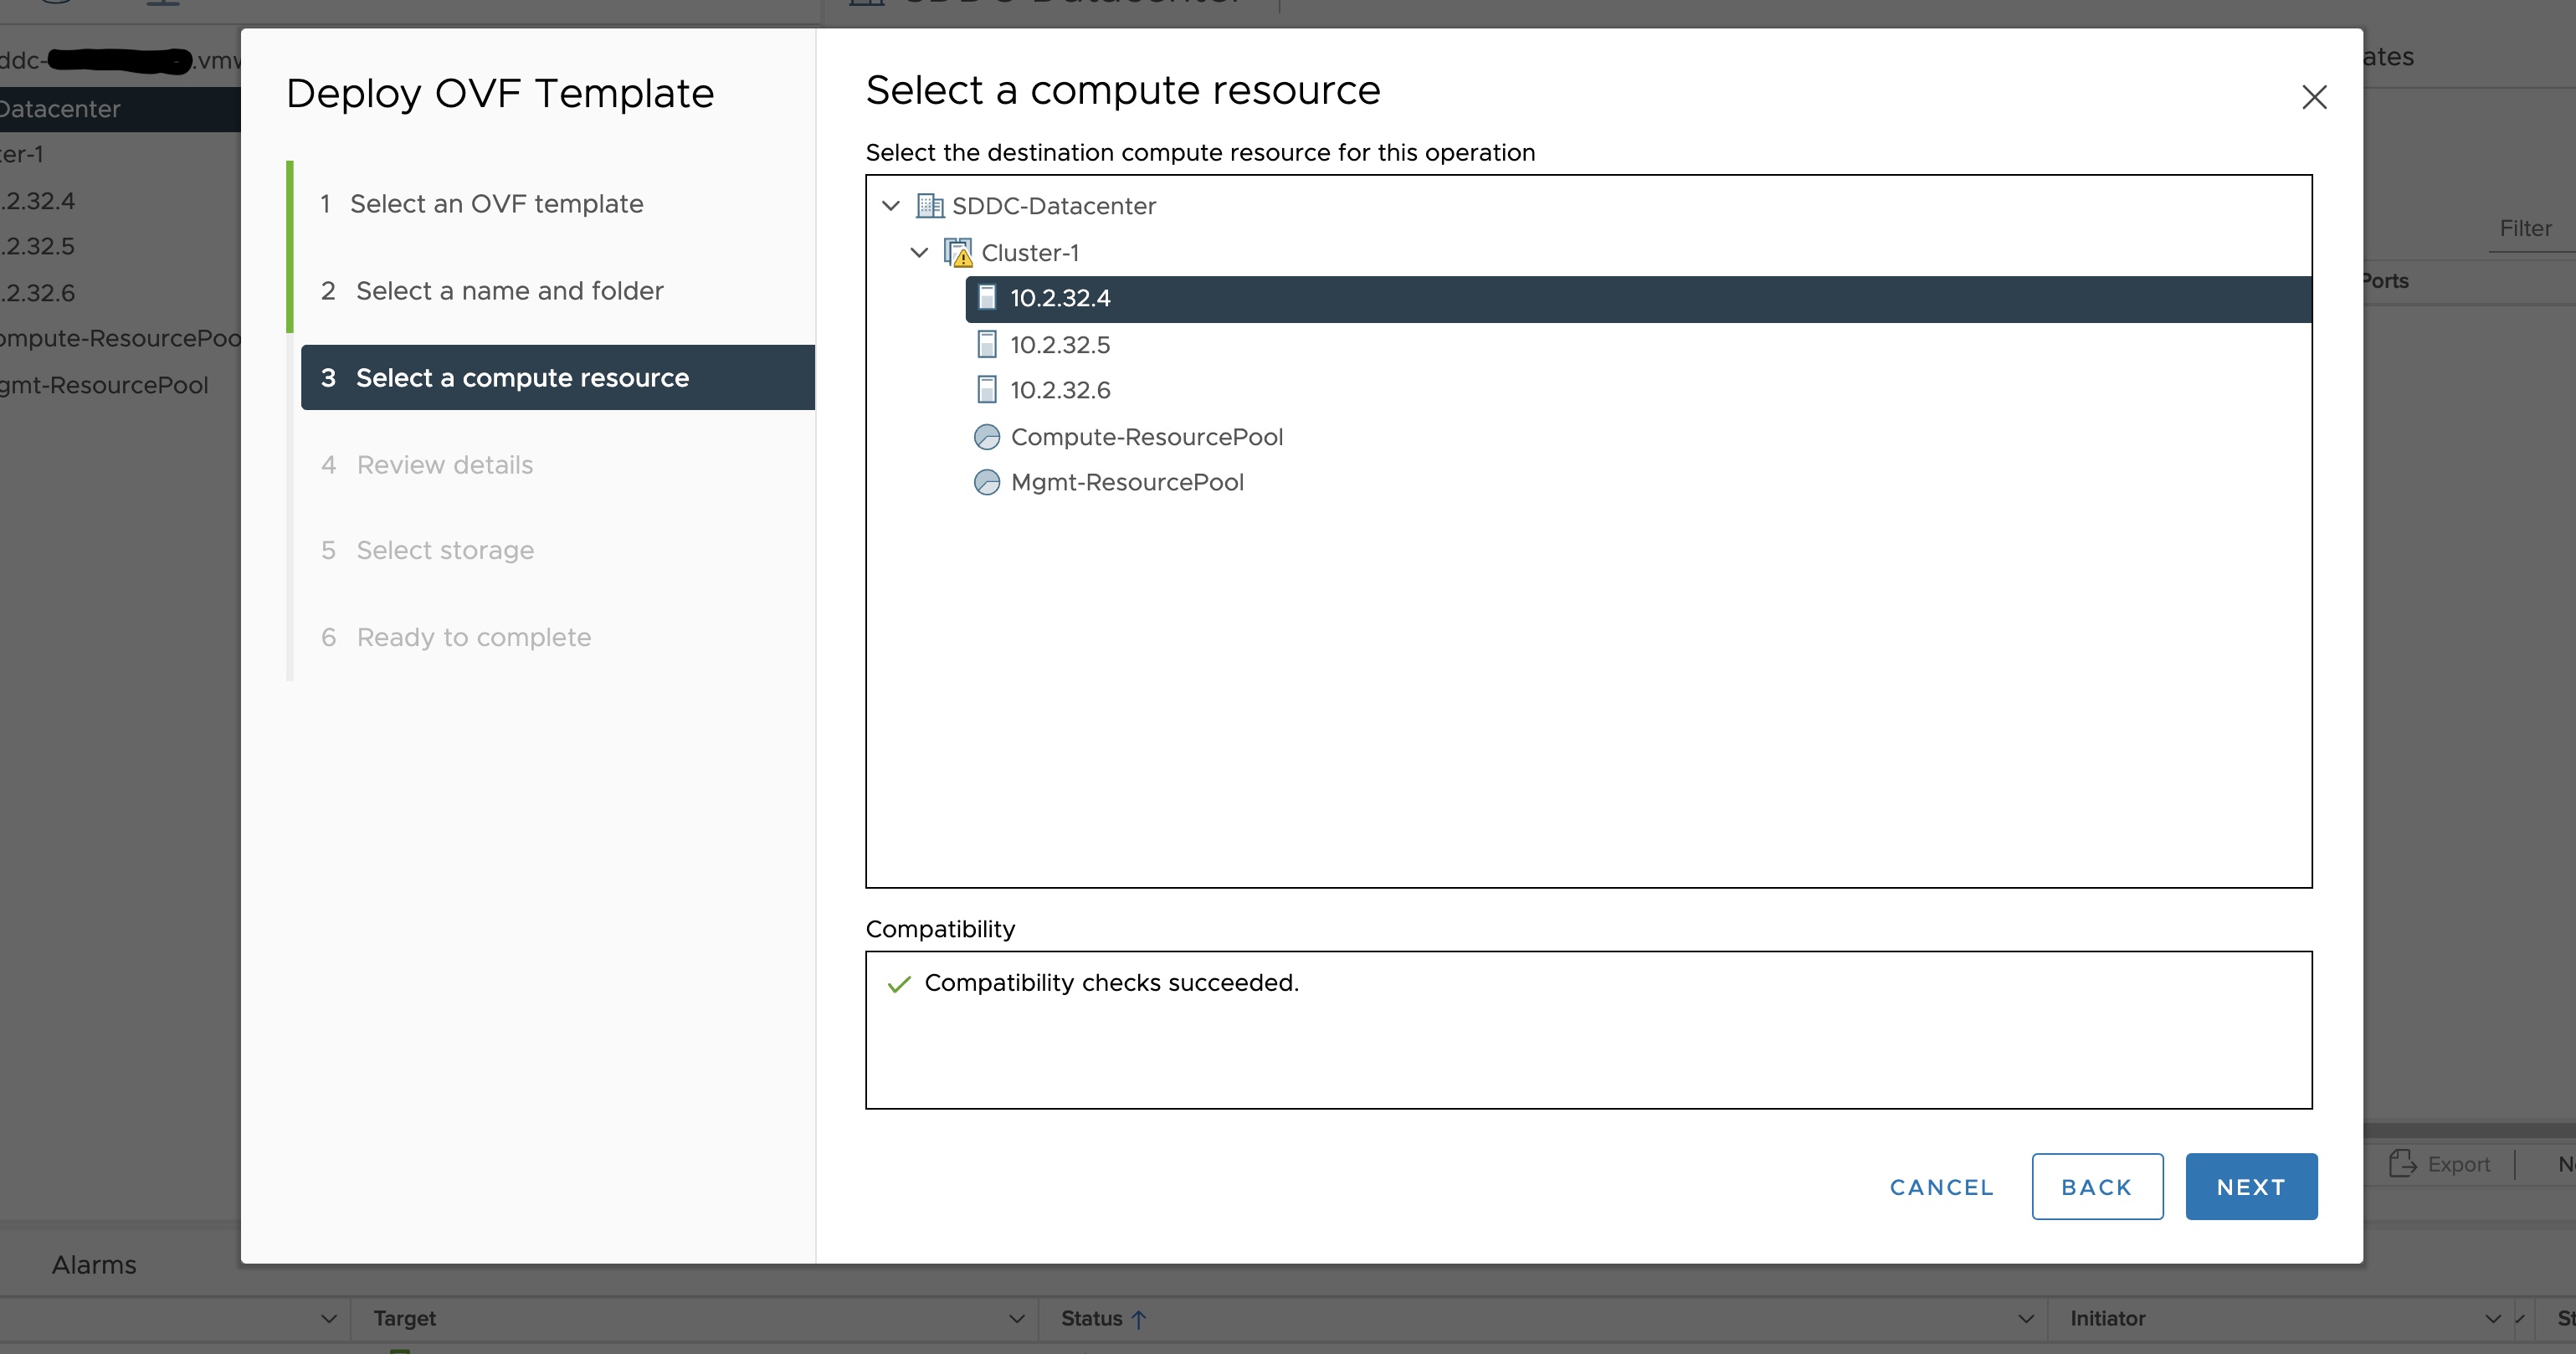
- On the Select a compute resource page, select the resource pool where to run the deployed VM template, and click Next.
- On the Review details page, verify the OVF or OVA template details and click Next.
- On the Select storage page, select a datastore to store the deployed OVF or OVA template and click Next.
- On the Select networks page, select a source network and map it to a destination network. Click Next.
- On the Ready to complete page, review the page and click Finish. For details, see Deploy an OVF or OVA Template
To build your own Ubuntu OVA template check the Building your own Ubuntu OVA section in the following link .
To use the deployed OVA template to create the VMs for the EKS Anywhere cluster, you have to tag it with specific values for the os and eksdRelease keys.
The value of the os key is the operating system of the deployed OVA template, which is ubuntu in our scenario.
The value of the eksdRelease holds kubernetes and the EKS-D release used in the deployed OVA template.
Check the following Customize OVAs
page for more details.
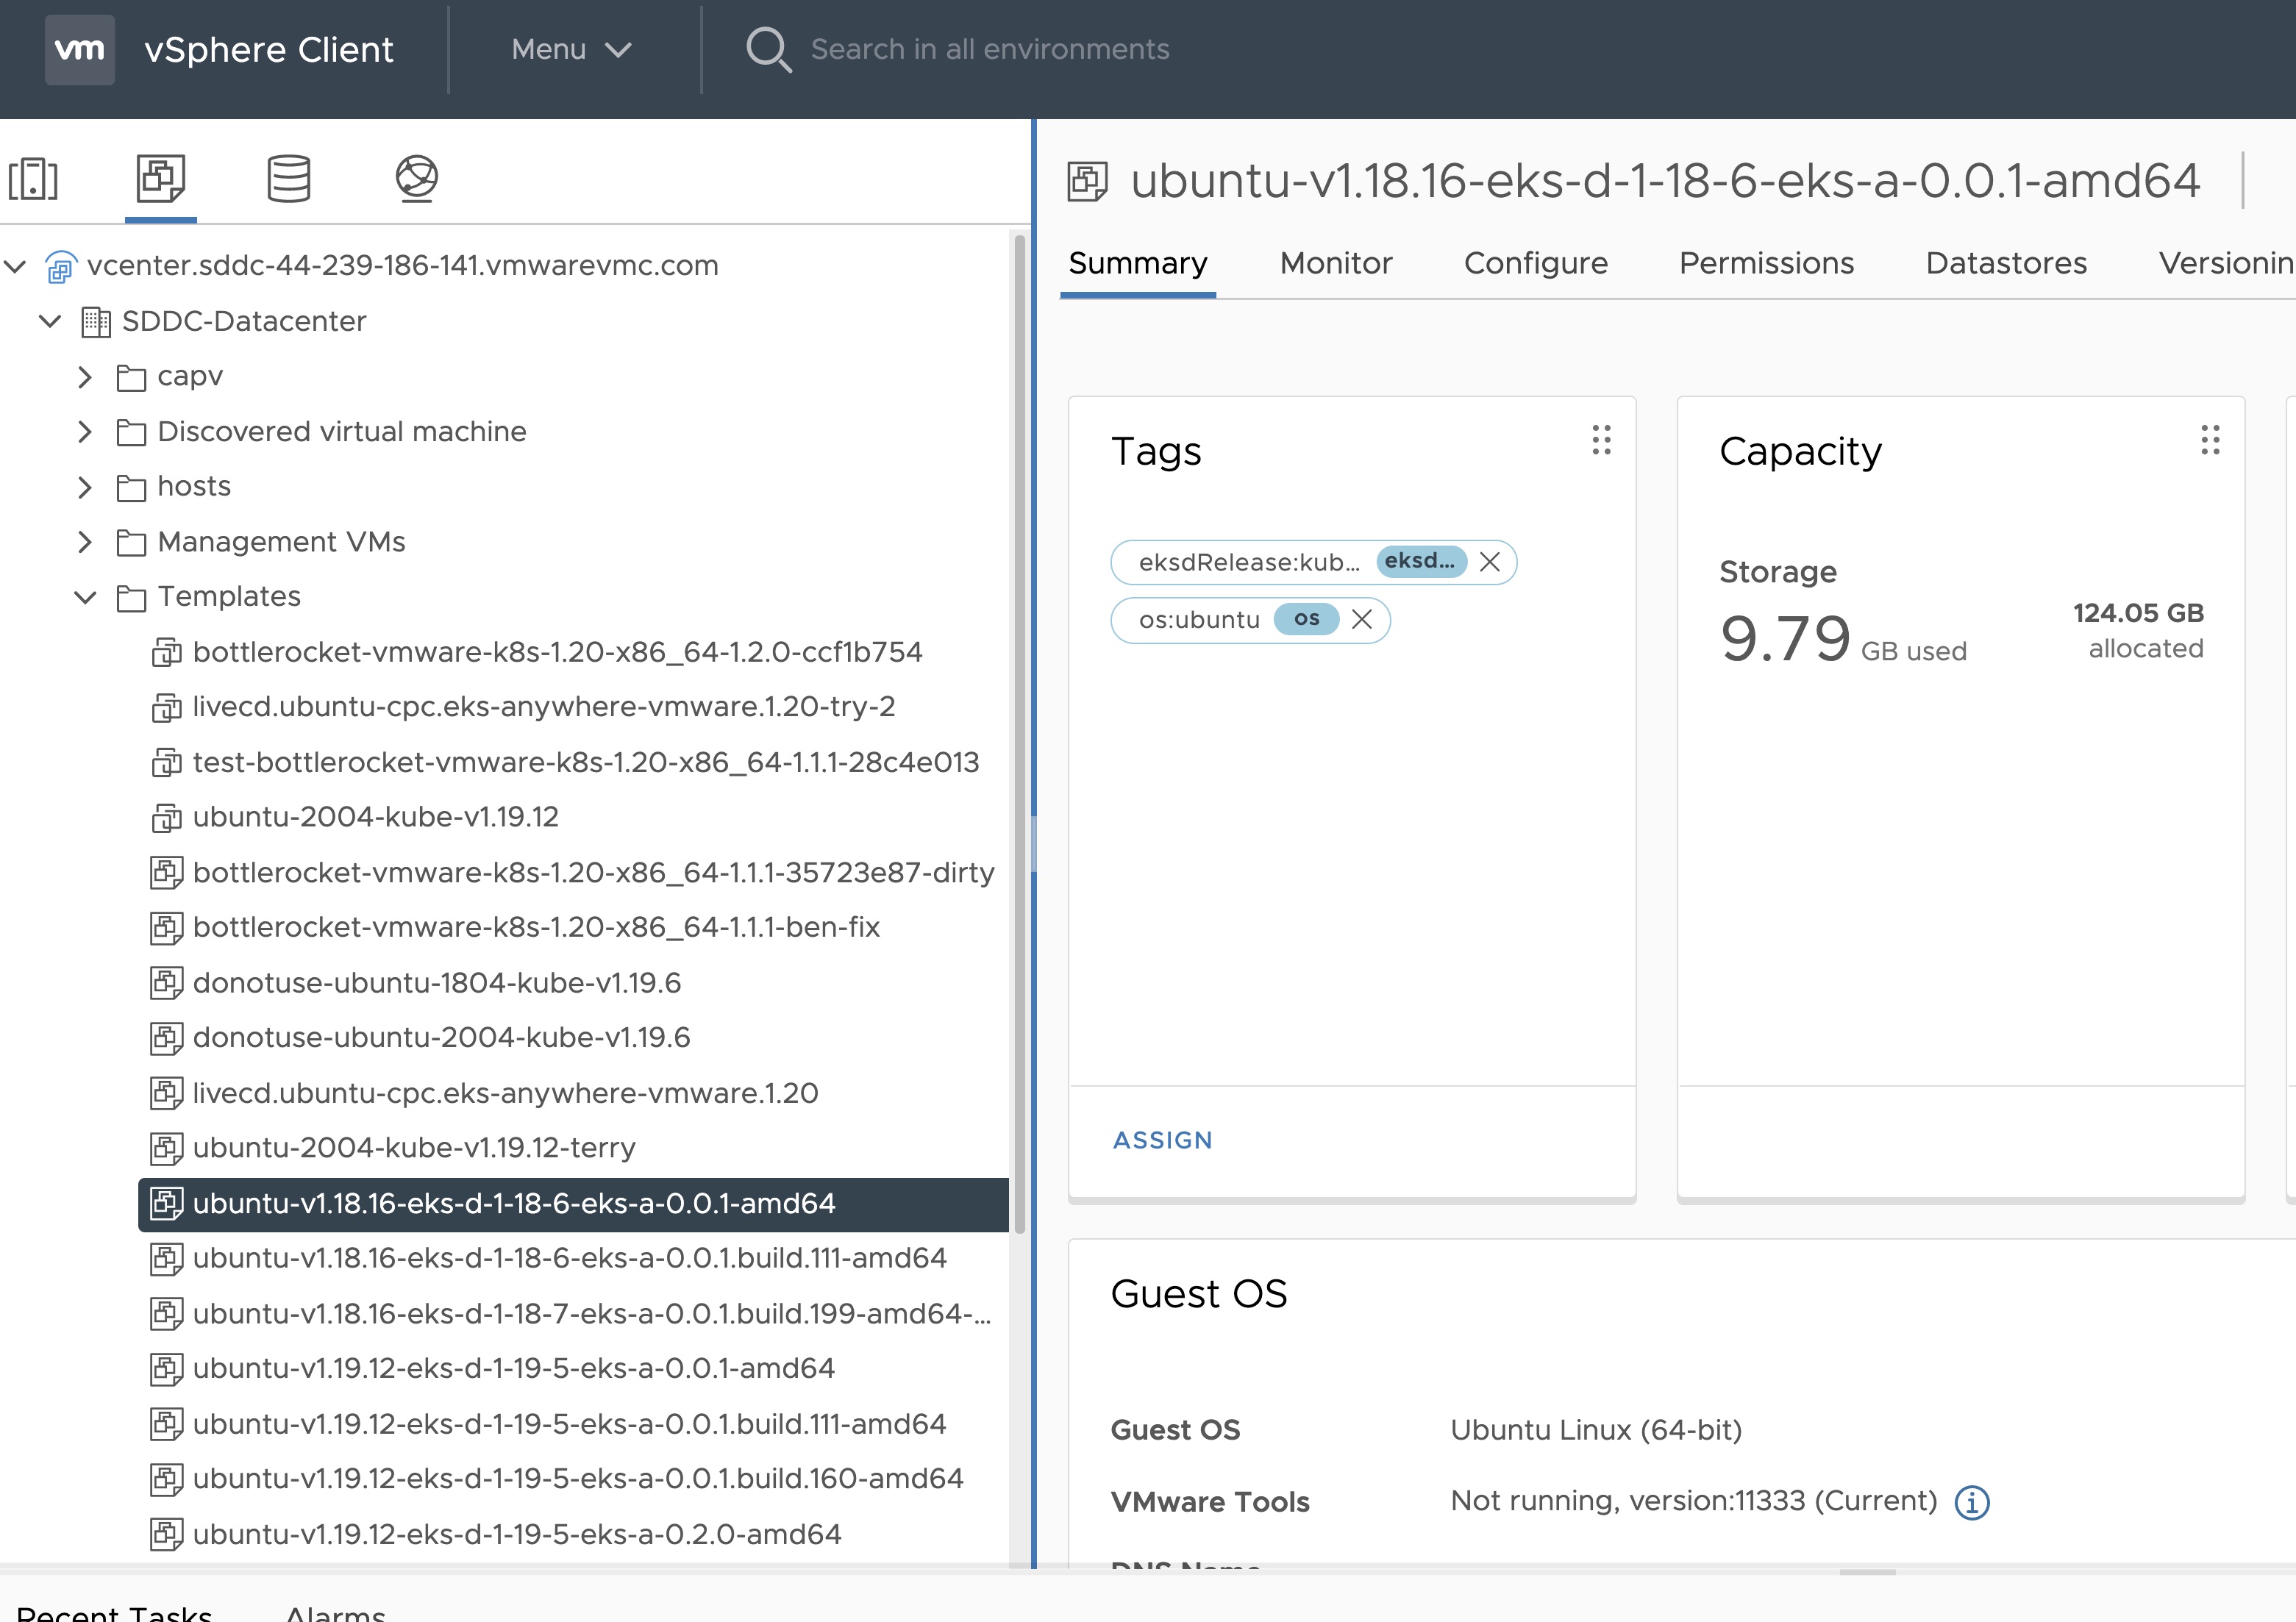
Steps to tag the deployed OVA template:
- Go to the artifacts page and take notes of the tags and values associated with the OVA template you deployed in the previous step.
- In the vSphere Client, select Menu > Tags & Custom Attributes.
- Select the Tags tab and click Tags.
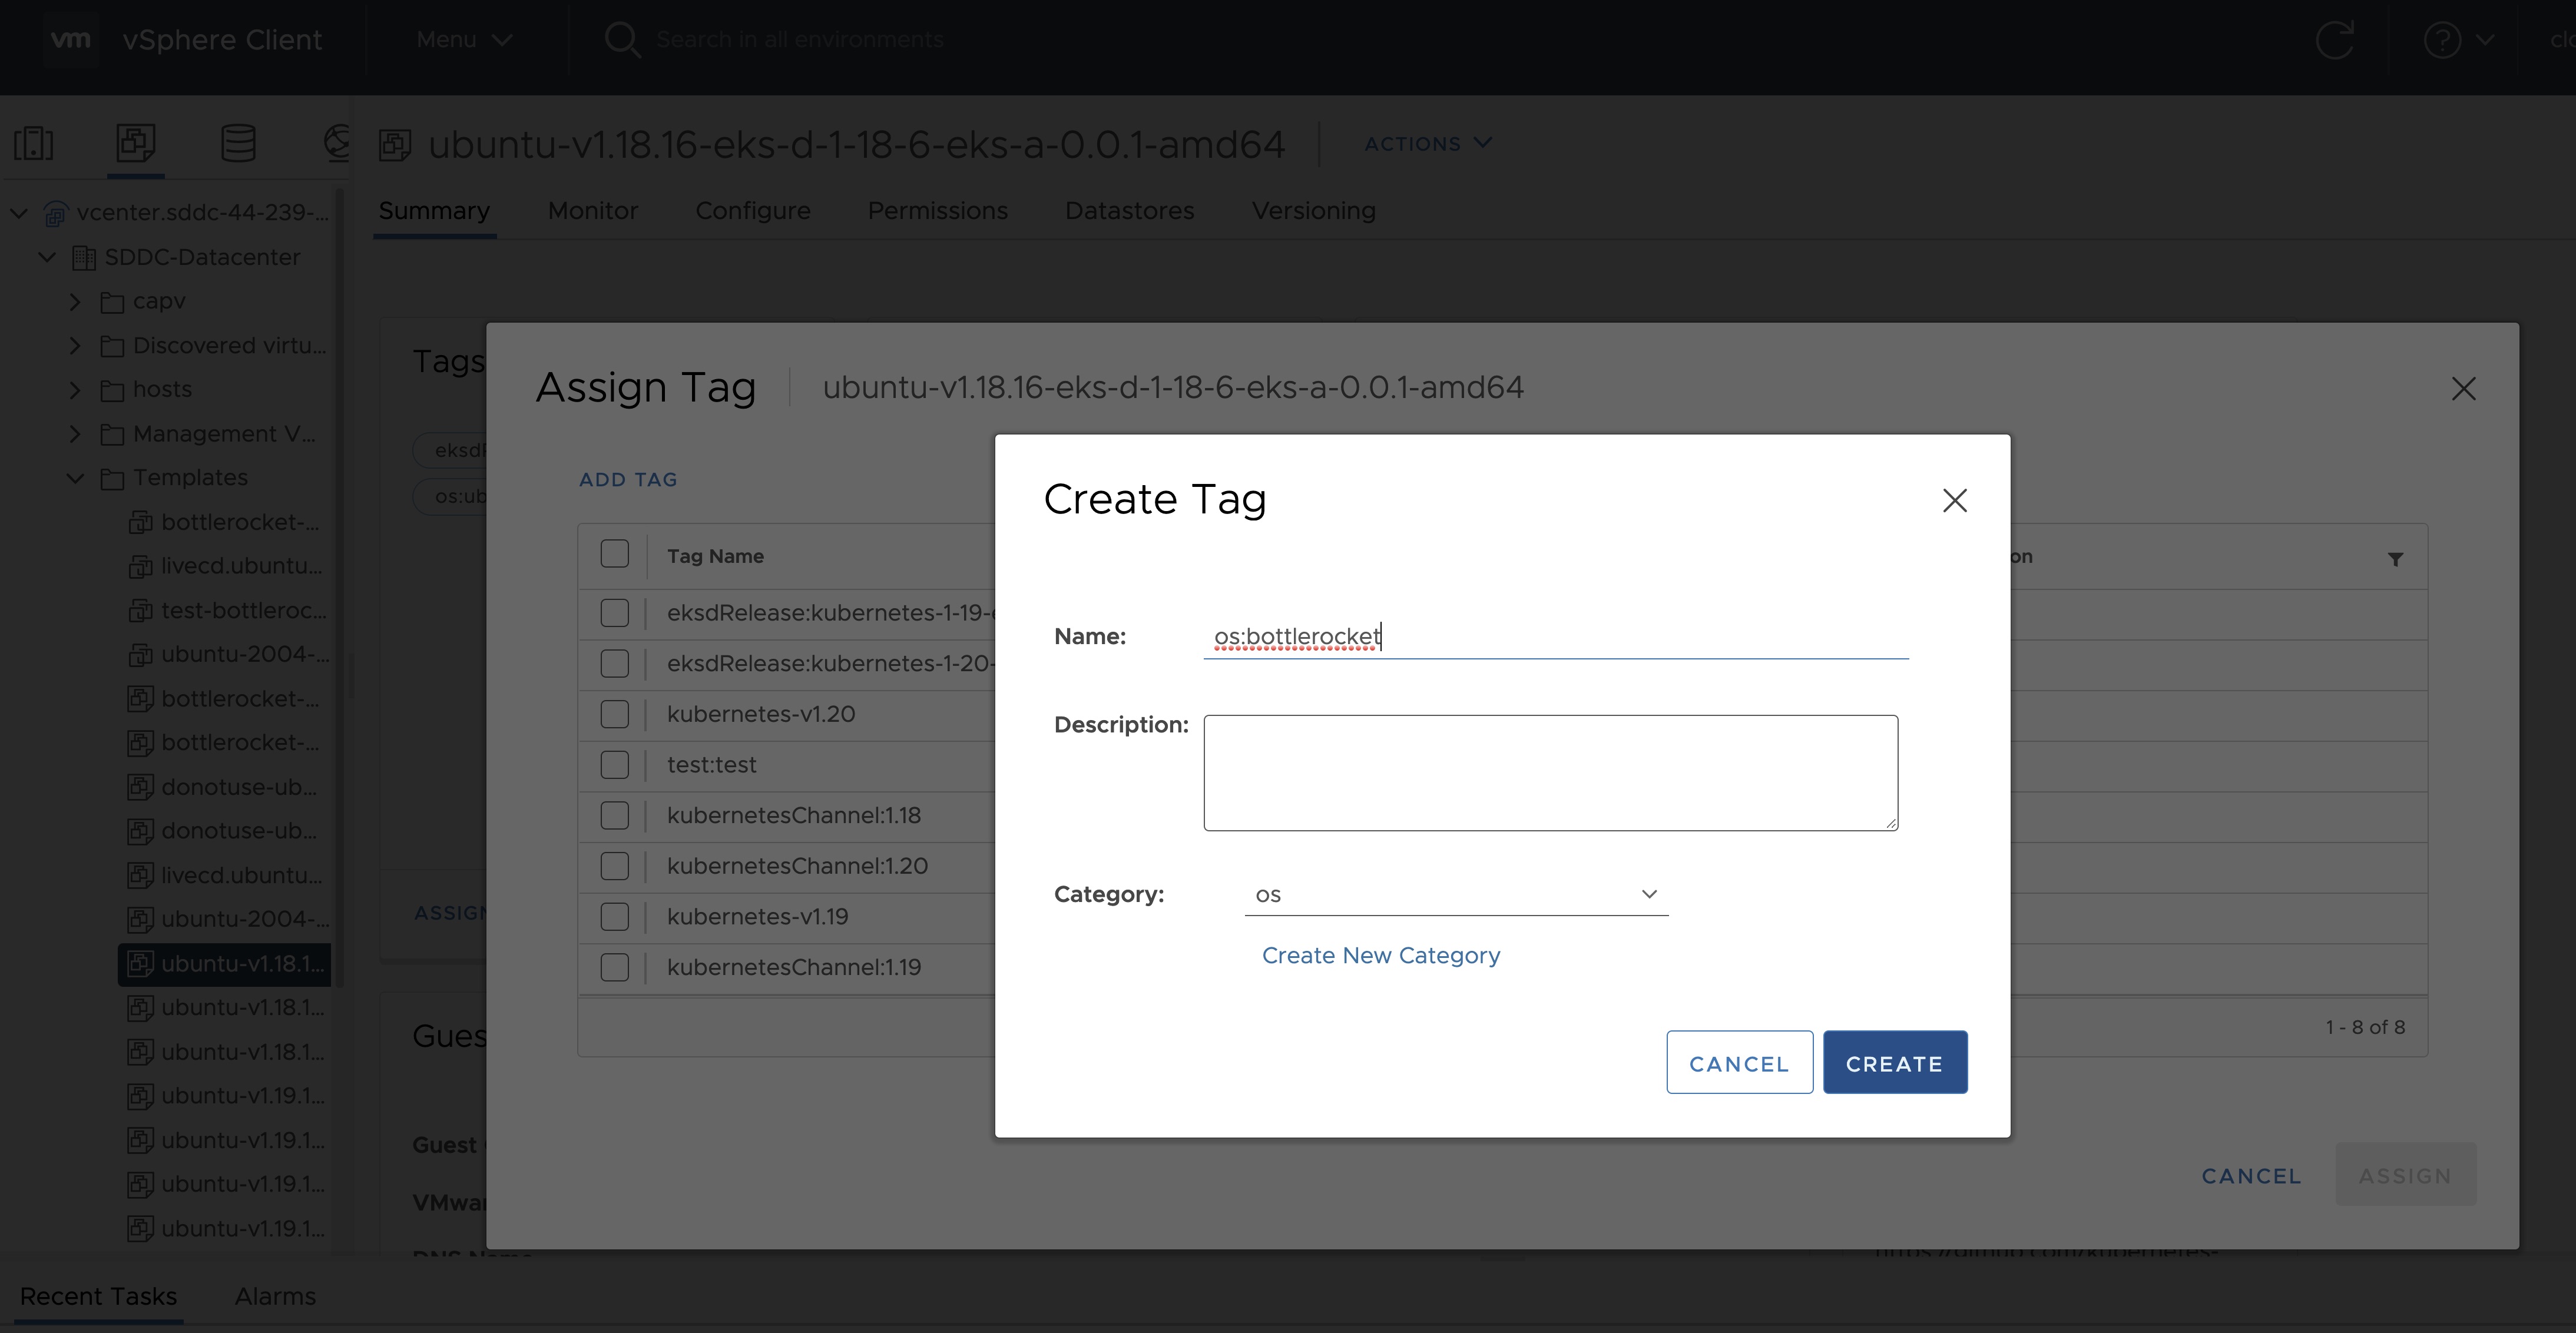
- Click New.
- In the Create Tag dialog box, copy the
ostag name associated with your OVA that you took notes of, which in our case isos:ubuntuand paste it as the name for the first tag required. - Specify the tag category
osif it exist or create it if it does not exist. - Click Create.
- Repeat steps 2-4.
- In the Create Tag dialog box, copy the
ostag name associated with your OVA that you took notes of, which in our case iseksdRelease:kubernetes-1-21-eks-8and paste it as the name for the second tag required. - Specify the tag category
eksdReleaseif it exist or create it if it does not exist. - Click Create.
- Navigate to the VM and Template tab.
- Select the folder that was created.
- Select deployed template and click Actions.
- From the drop-down menu, select Tags and Custom Attributes > Assign Tag.
- Select the tags we created from the list and confirm the operation.
3.3 - Customize OVAs: Ubuntu
There may be a need to make specific configuration changes on the imported ova template before using it to create/update EKS-A clusters.
Set up SSH Access for Imported OVA
SSH user and key need to be configured in order to allow SSH login to the VM template
Clone template to VM
Create an environment variable to hold the name of modified VM/template
export VM=<vm-name>
Clone the imported OVA template to create VM
govc vm.clone -on=false -vm=<full-path-to-imported-template> - folder=<full-path-to-folder-that-will-contain-the-VM> -ds=<datastore> $VM
Configure VM with cloud-init and the VMX GuestInfo datasource
Create a metadata.yaml file
instance-id: cloud-vm
local-hostname: cloud-vm
network:
  version: 2
  ethernets:
    nics:
      match:
        name: ens*
      dhcp4: yes
Create a userdata.yaml file
#cloud-config

users:
  - default
  - name: <username>
    primary_group: <username>
    sudo: ALL=(ALL) NOPASSWD:ALL
    groups: sudo, wheel
    ssh_import_id: None
    lock_passwd: true
    ssh_authorized_keys:
    - <user's ssh public key>
Export environment variable containing the cloud-init metadata and userdata
export METADATA=$(gzip -c9 <metadata.yaml | { base64 -w0 2>/dev/null || base64; }) \
       USERDATA=$(gzip -c9 <userdata.yaml | { base64 -w0 2>/dev/null || base64; })
Assign metadata and userdata to VM’s guestinfo
govc vm.change -vm "${VM}" \
  -e guestinfo.metadata="${METADATA}" \
  -e guestinfo.metadata.encoding="gzip+base64" \
  -e guestinfo.userdata="${USERDATA}" \
  -e guestinfo.userdata.encoding="gzip+base64"
Power the VM on
govc vm.power -on “$VM”
Customize the VM
Once the VM is powered on and fetches an IP address, ssh into the VM using your private key corresponding to the public key specified in userdata.yaml
ssh -i <private-key-file> username@<VM-IP>
At this point, you can make the desired configuration changes on the VM. The following sections describe some of the things you may want to do:
Add a Certificate Authority
Copy your CA certificate under /usr/local/share/ca-certificates and run sudo update-ca-certificates which will place the certificate under the /etc/ssl/certs directory.
Add Authentication Credentials for a Private Registry
If /etc/containerd/config.toml is not present initially, the default configuration can be generated by running the containerd config default > /etc/containerd/config.toml command. To configure a credential for a specific registry, create/modify the /etc/containerd/config.toml as follows:
# explicitly use v2 config format
version = 2

# The registry host has to be a domain name or IP. Port number is also
# needed if the default HTTPS or HTTP port is not used.
[plugins."io.containerd.grpc.v1.cri".registry.configs."registry1-host:port".auth]
  username = ""
  password = ""
  auth = ""
  identitytoken = ""
 # The registry host has to be a domain name or IP. Port number is also
 # needed if the default HTTPS or HTTP port is not used.
[plugins."io.containerd.grpc.v1.cri".registry.configs."registry2-host:port".auth]
  username = ""
  password = ""
  auth = ""
  identitytoken = ""
Restart containerd service with the sudo systemctl restart containerd command.
Convert VM to a Template
After you have customized the VM, you need to convert it to a template.
Reset the machine-id and power off the VM
This step is needed because of a known issue in Ubuntu which results in the clone VMs getting the same DHCP IP
echo -n > /etc/machine-id
rm /var/lib/dbus/machine-id
ln -s /etc/machine-id /var/lib/dbus/machine-id
Power the VM down
govc vm.power -off "$VM"
Take a snapshot of the VM
It is recommended to take a snapshot of the VM as it reduces the provisioning time for the machines and makes cluster creation faster.
If you do snapshot the VM, you will not be able to customize the disk size of your cluster VMs. If you prefer not to take a snapshot, skip this step.
govc snapshot.create -vm "$VM" root
Convert VM to template
govc vm.markastemplate $VM
Tag the template appropriately as described here
Use this customized template to create/upgrade EKS Anywhere clusters
3.4 - Import OVAs
If you want to specify an OVA template, you will need to import OVA files into vSphere before you can use it in your EKS Anywhere cluster. This guide was written using VMware Cloud on AWS, but the VMware OVA import guide can be found here .
Note
If you don’t specify a template in the cluster spec file, EKS Anywhere will use the proper default one for the Kubernetes minor version and OS family you specified in the spec file. If the template doesn’t exist, it will import the appropriate OVA into vSphere and add the necessary tags.
The default OVA for a Kubernetes minor version + OS family will change over time, for example, when a new EKS Distro version is released. In that case, new clusters will use the new OVA (EKS Anywhere will import it automatically).
Warning
Do not power on the imported OVA directly as it can cause some undesired configurations on the OS template and affect cluster creation. If you want to explore or modify the OS, please follow the instructions to customize the OVA.EKS Anywhere supports the following operating system families
- Bottlerocket (default)
- Ubuntu
A list of OVAs for this release can be found on the artifacts page .
Using vCenter Web User Interface
-
Right click on your Datacenter, select Deploy OVF Template
-
Select an OVF template using URL or selecting a local OVF file and click on Next. If you are not able to select an OVF template using URL, download the file and use Local file option.
Note: If you are using Bottlerocket OVAs, please select local file option.
-
Select a folder where you want to deploy your OVF package (most of our OVF templates are under SDDC-Datacenter directory) and click on Next. You cannot have an OVF template with the same name in one directory. For workload VM templates, leave the Kubernetes version in the template name for reference. A workload VM template will support at least one prior Kubernetes major versions.
-
Select any compute resource to run (from cluster-1, 10.2.34.5, etc..) the deployed VM and click on Next
-
Review the details and click Next.
-
Accept the agreement and click Next.
-
Select the appropriate storage (e.g. “WorkloadDatastore“) and click Next.
-
Select destination network (e.g. “sddc-cgw-network-1”) and click Next.
-
Finish.
-
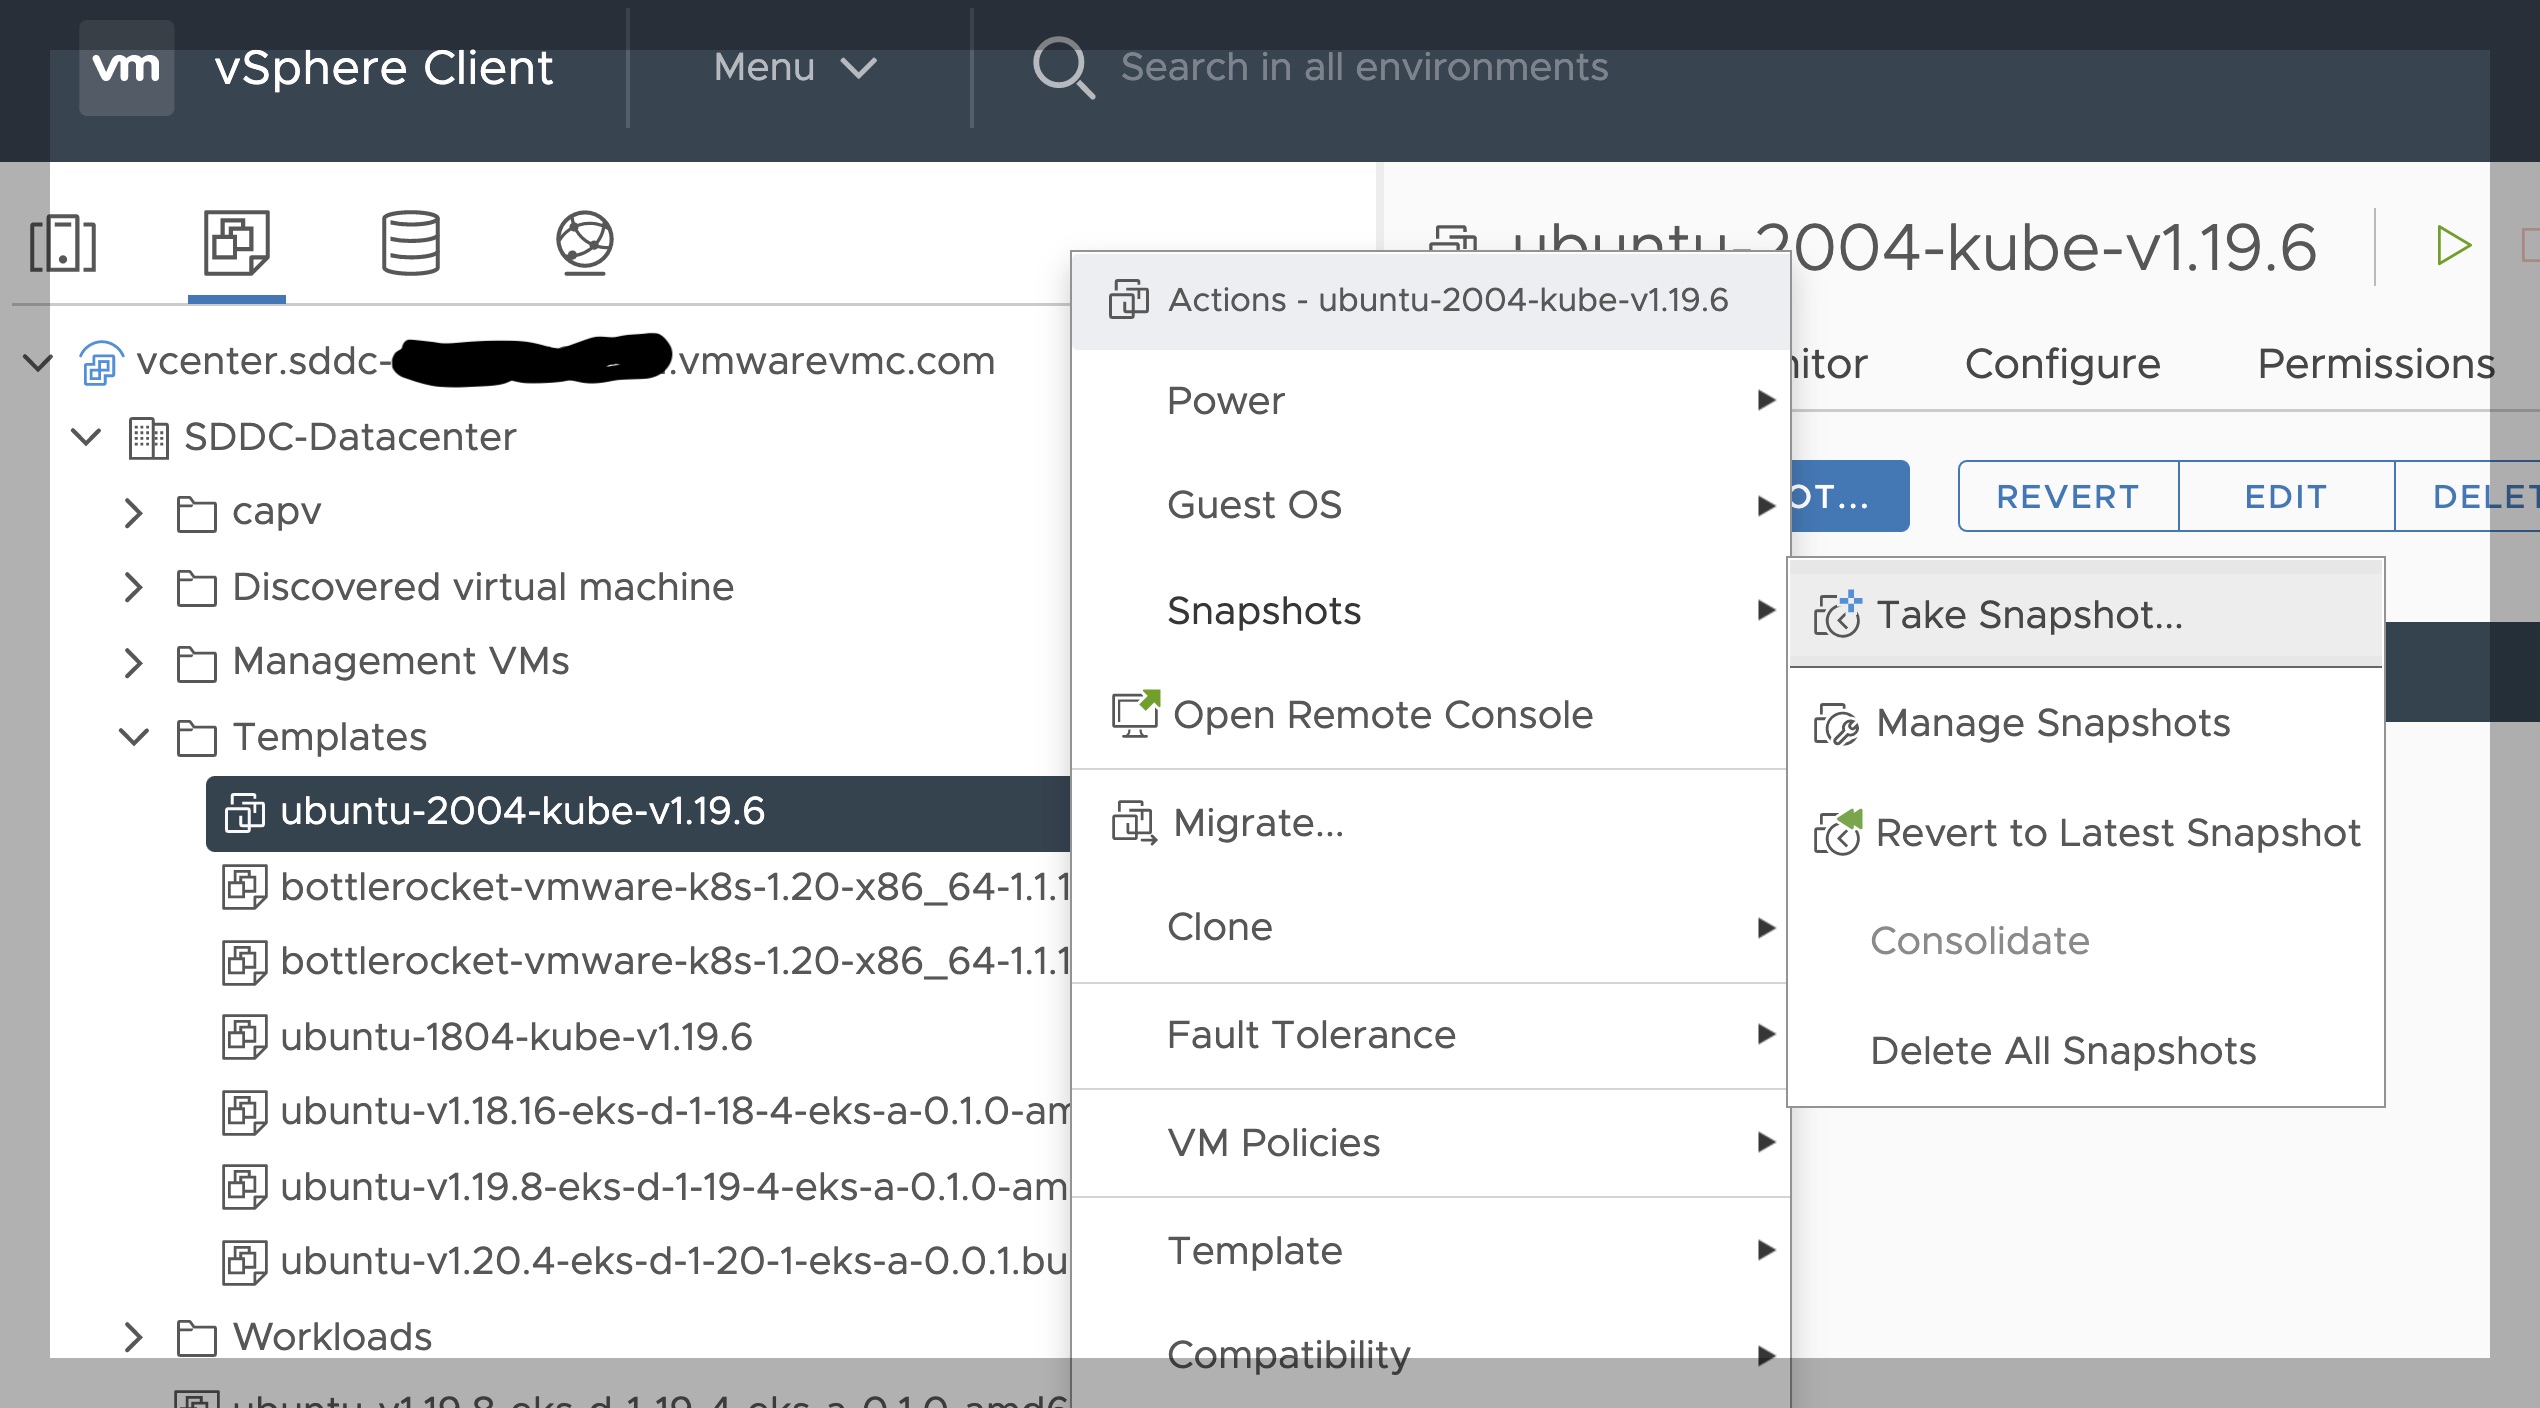
Snapshot the VM. Right click on the imported VM and select Snapshots -> Take Snapshot… (It is highly recommended that you snapshot the VM. This will reduce the time it takes to provision machines and cluster creation will be faster. If you prefer not to take snapshot, skip to step 13)
-
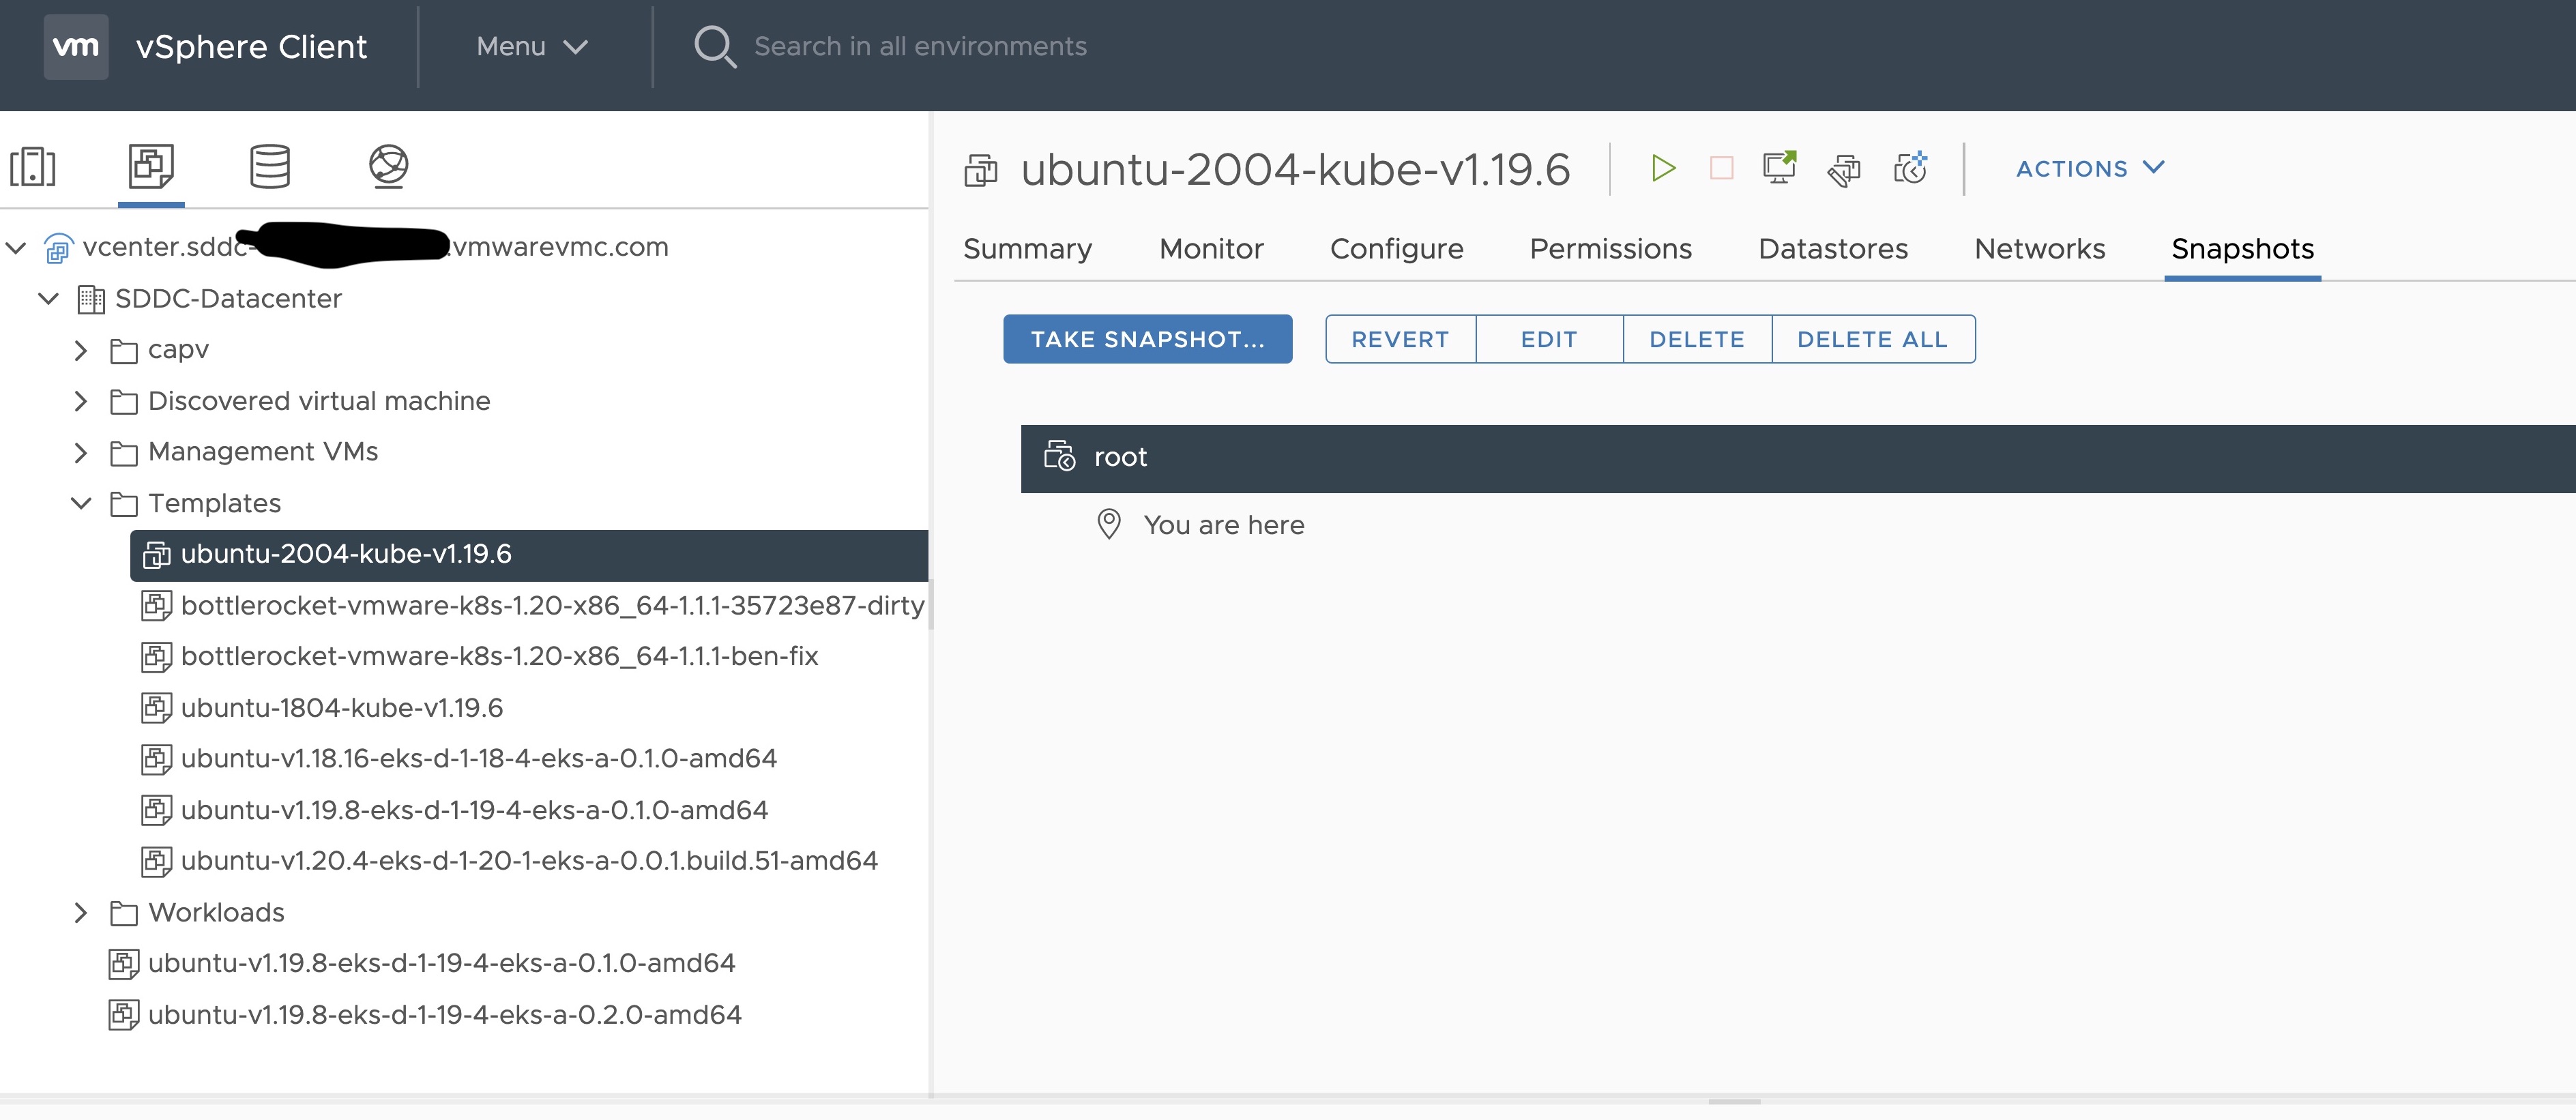
Name your template (e.g. “root”) and click Create.

-
Snapshots for the imported VM should now show up under the Snapshots tab for the VM.
-
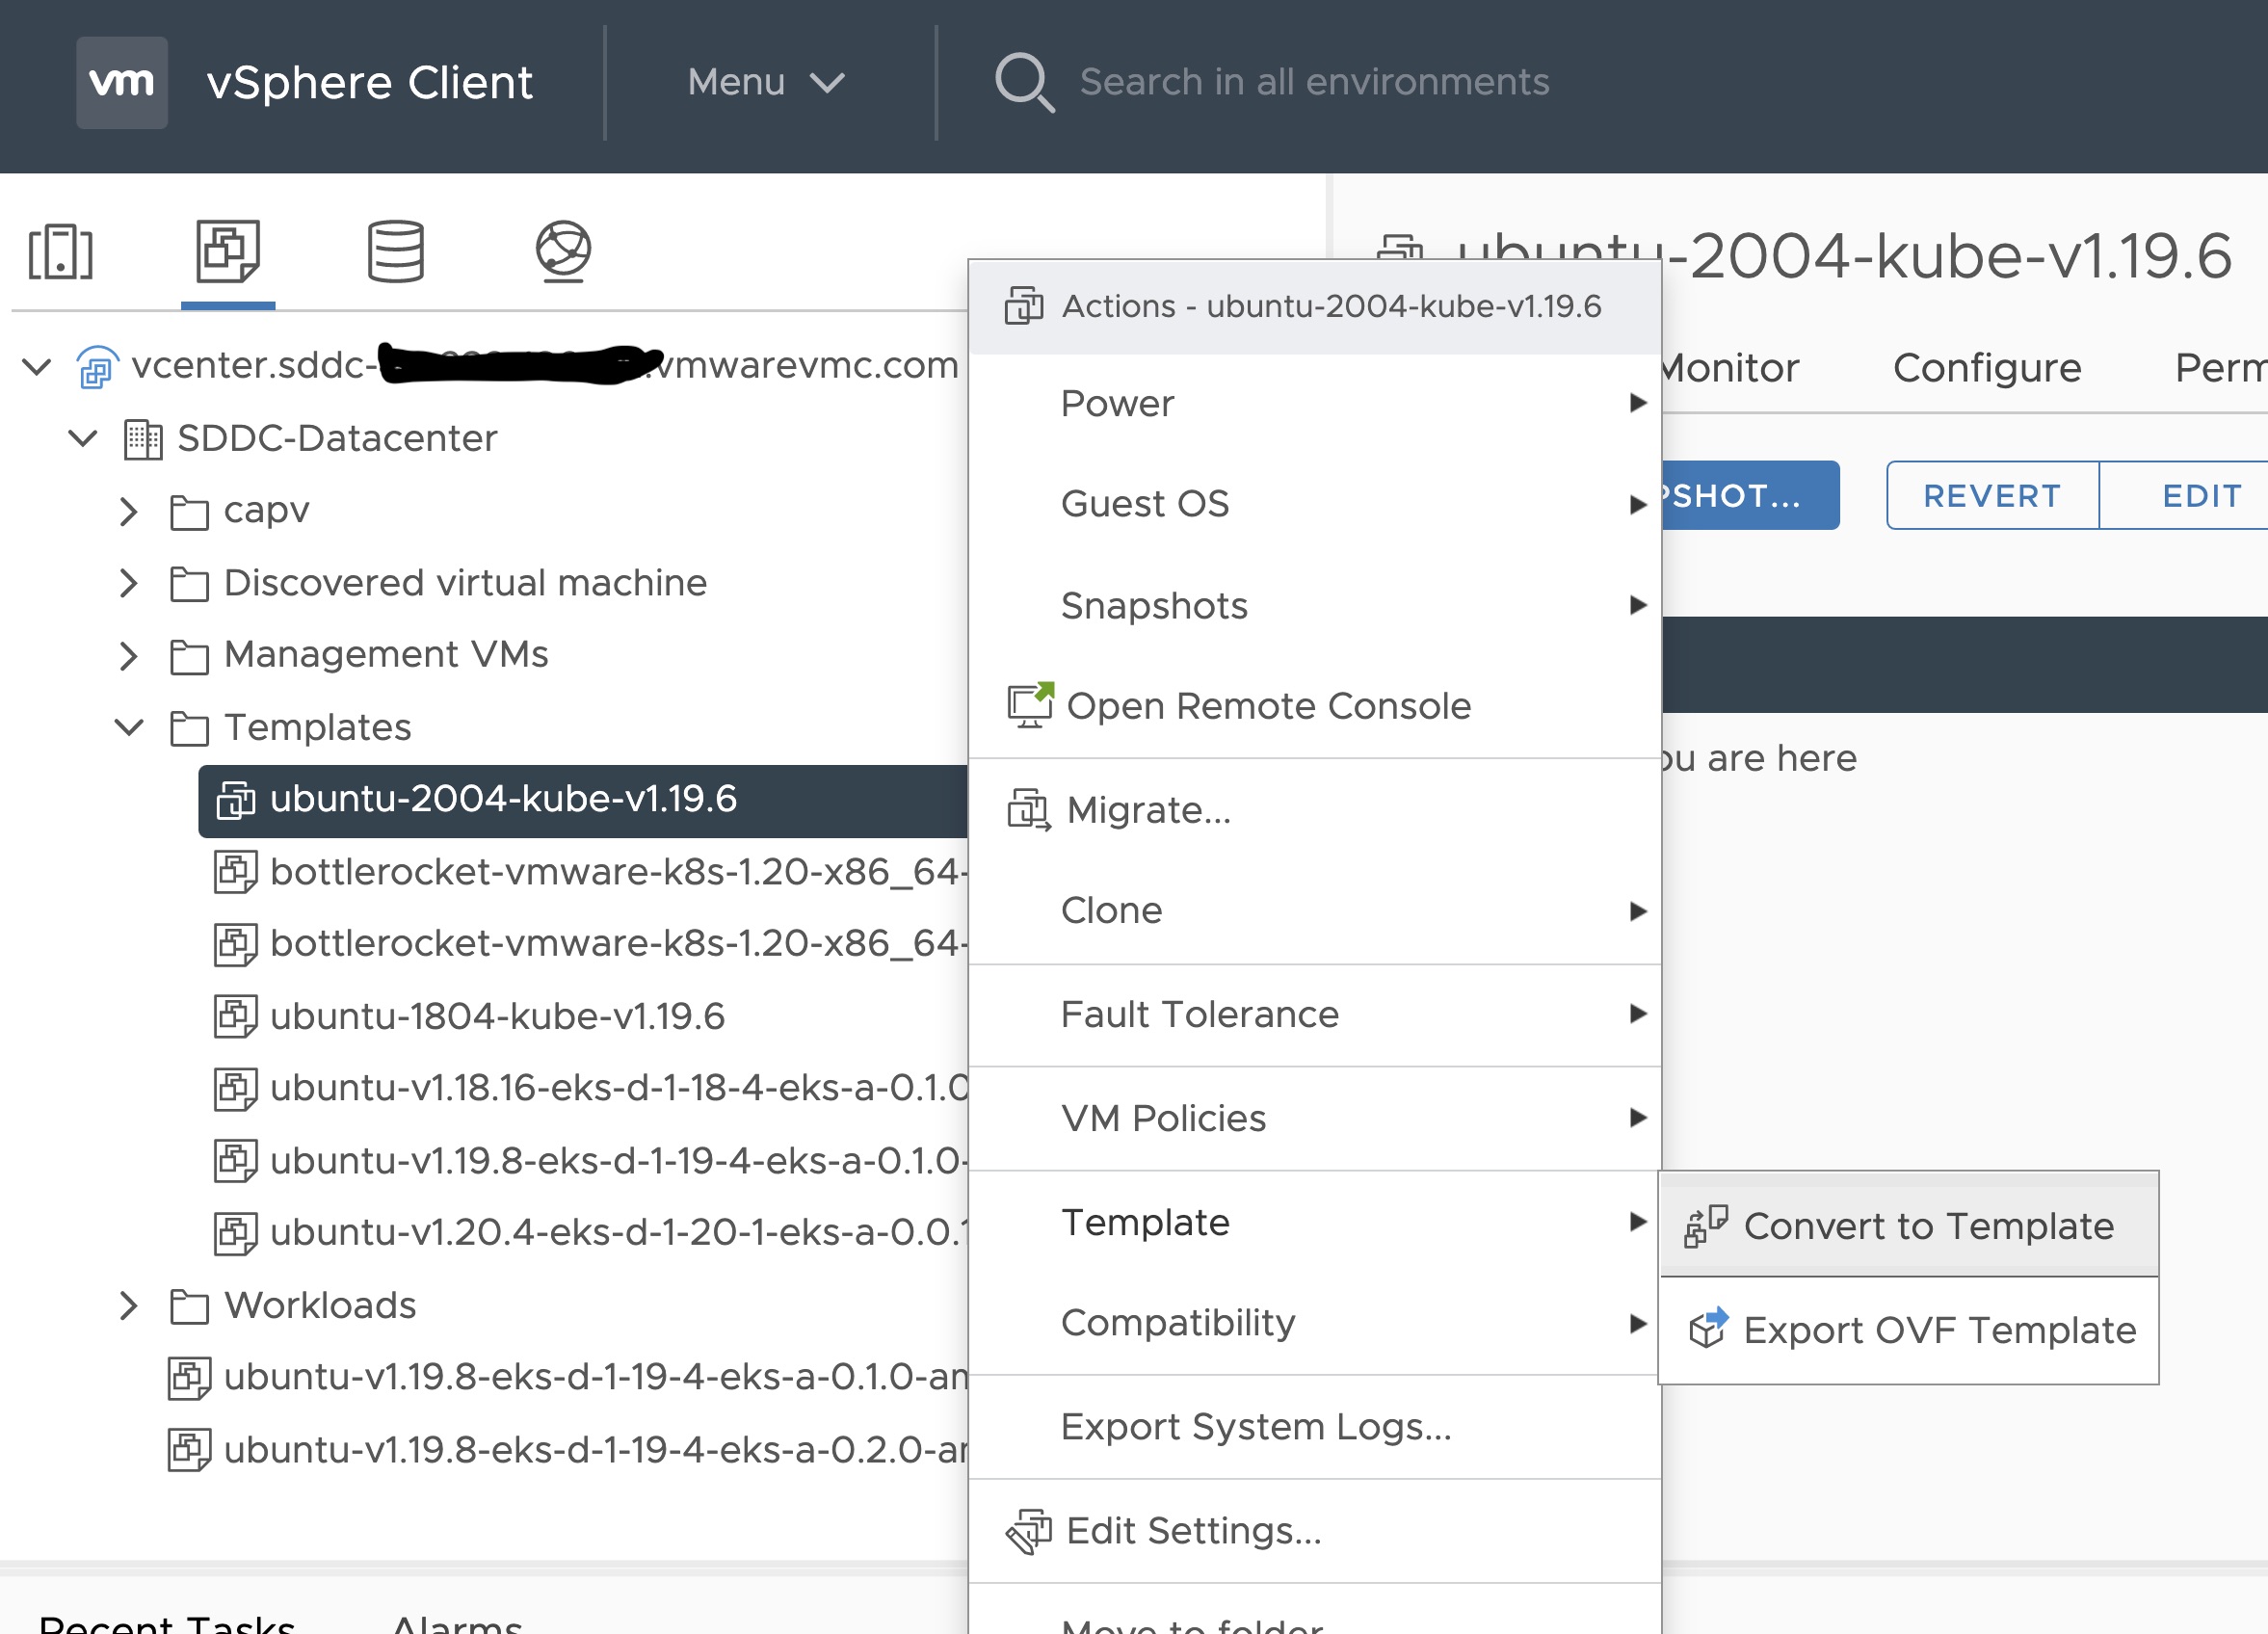
Right click on the imported VM and select Template and Convert to Template
Steps to deploy a template using GOVC (CLI)
To deploy a template using govc, you must first ensure that you have
GOVC installed
. You need to set and export three
environment variables to run govc GOVC_USERNAME, GOVC_PASSWORD and GOVC_URL.
-
Import the template to a content library in vCenter using URL or selecting a local OVA file
Using URL:
govc library.import -k -pull <library name> <URL for the OVA file>Using a file from the local machine:
govc library.import <library name> <path to OVA file on local machine> -
Deploy the template
govc library.deploy -pool <resource pool> -folder <folder location to deploy template> /<library name>/<template name> <name of new VM>2a. If using Bottlerocket template for newer Kubernetes version than 1.20 and 1.21, resize disk 1 to 22G
govc vm.disk.change -vm <template name> -disk.label "Hard disk 1" -size 22G2b. If using Bottlerocket template for Kubernetes version 1.20 or 1.21, resize disk 2 to 20G
govc vm.disk.change -vm <template name> -disk.label "Hard disk 2" -size 20G -
Take a snapshot of the VM (It is highly recommended that you snapshot the VM. This will reduce the time it takes to provision machines and cluster creation will be faster. If you prefer not to take snapshot, skip this step)
govc snapshot.create -vm ubuntu-2004-kube-v1.22.6 root -
Mark the new VM as a template
govc vm.markastemplate <name of new VM>
Important Additional Steps to Tag the OVA
Using vCenter UI
Tag to indicate OS family
- Select the template that was newly created in the steps above and navigate to Summary -> Tags.
- Click Assign -> Add Tag to create a new tag and attach it
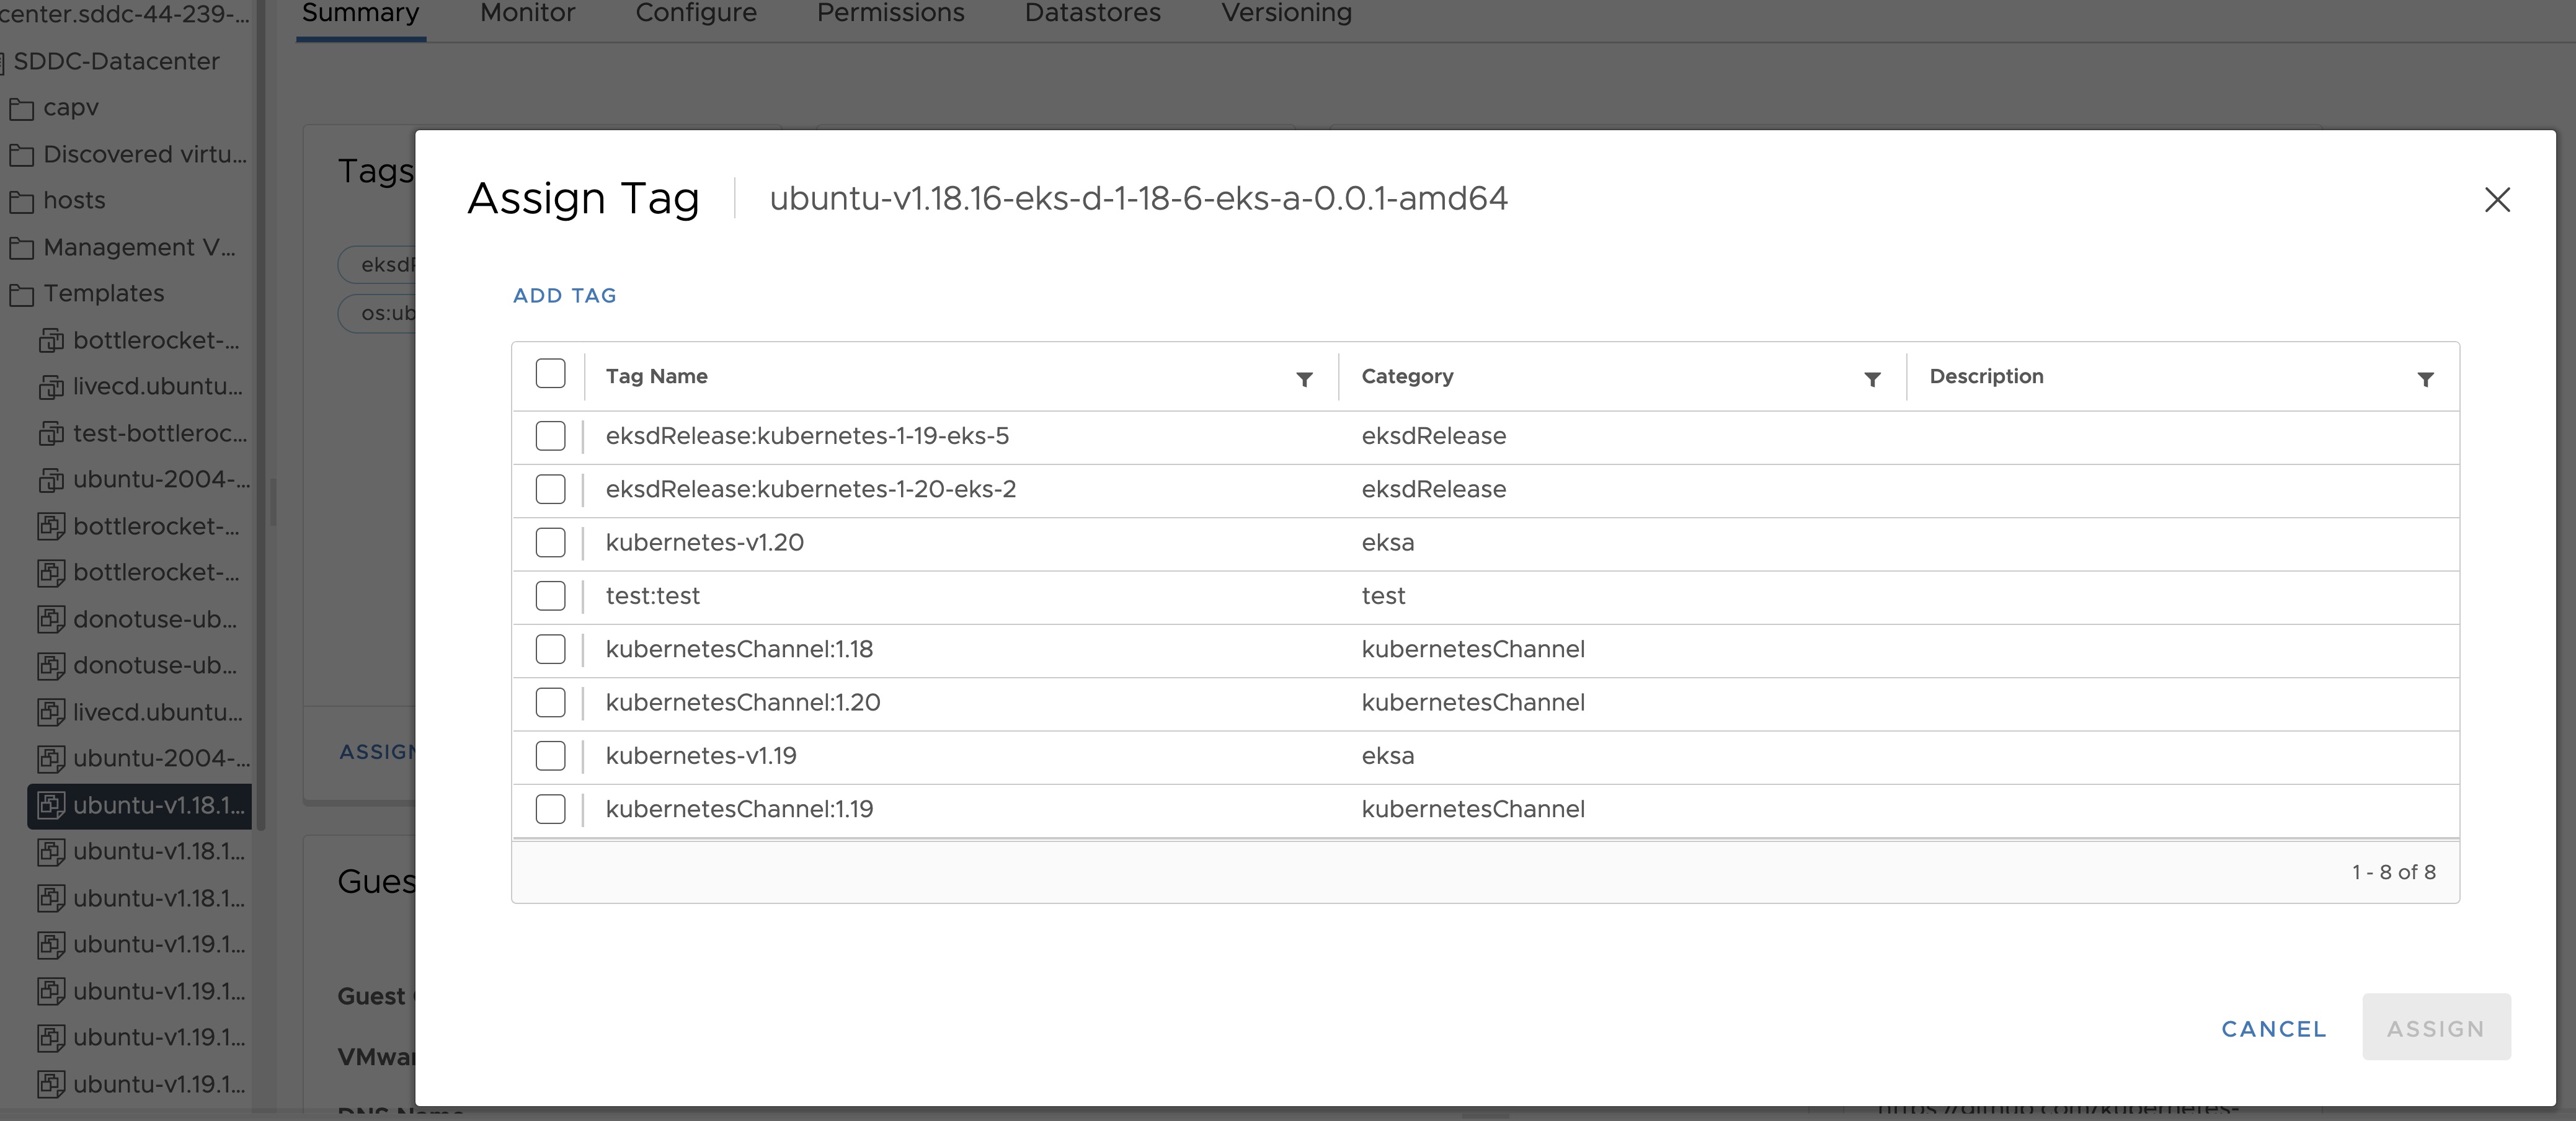
- Name the tag os:ubuntu or os:bottlerocket
Tag to indicate eksd release
- Select the template that was newly created in the steps above and navigate to Summary -> Tags.
- Click Assign -> Add Tag to create a new tag and attach it
- Name the tag eksdRelease:{eksd release for the selected ova}, for example eksdRelease:kubernetes-1-22-eks-6 for the 1.22 ova. You can find the rest of eksd releases in the previous section
. If it’s the first time you add an
eksdReleasetag, you would need to create the category first. Click on “Create New Category” and name iteksdRelease.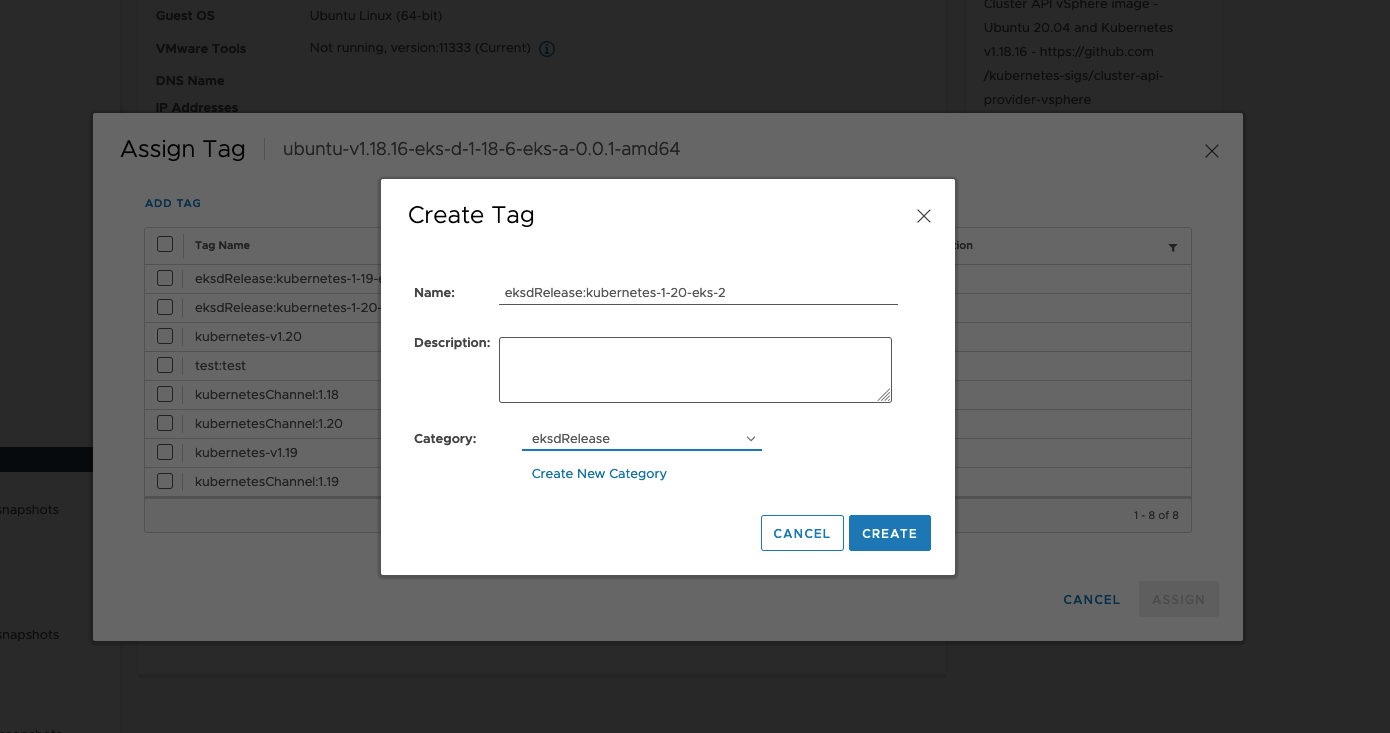
Using govc
Tag to indicate OS family
- Create tag category
govc tags.category.create -t VirtualMachine os
- Create tags os:ubuntu and os:bottlerocket
govc tags.create -c os os:bottlerocket
govc tags.create -c os os:ubuntu
- Attach newly created tag to the template
govc tags.attach os:bottlerocket <Template Path>
govc tags.attach os:ubuntu <Template Path>
- Verify tag is attached to the template
govc tags.ls <Template Path>
Tag to indicate eksd release
- Create tag category
govc tags.category.create -t VirtualMachine eksdRelease
- Create the proper eksd release Tag, depending on your template. You can find the eksd releases in the previous section . For example eksdRelease:kubernetes-1-22-eks-6 for the 1.22 template.
govc tags.create -c eksdRelease eksdRelease:kubernetes-1-22-eks-6
- Attach newly created tag to the template
govc tags.attach eksdRelease:kubernetes-1-22-eks-6 <Template Path>
- Verify tag is attached to the template
govc tags.ls <Template Path>
Note
If the tags above are not applied as shown exactly, eks-a template validations will fail and CLI will abortAfter you are done you can use the template for your workload cluster.
3.5 - Custom DHCP Configuration
If your vSphere deployment is not configured with DHCP, you may want to run your own DHCP server. It may be necessary to turn off DHCP snooping on your switch to get DHCP working across VM servers. If you are running your administration machine in vSphere, it would most likely be easiest to run the DHCP server on that machine. This example is for Ubuntu.
Install
Install DHCP server
sudo apt-get install isc-dhcp-server
Configure /etc/dhcp/dhcpd.conf
Update the ip address range, subnet, mask, etc to suite your configuration similar to this:
default-lease-time 600;
max-lease-time 7200;

ddns-update-style none;

authoritative;

subnet 10.8.105.0 netmask 255.255.255.0 {
range 10.8.105.9  10.8.105.41;
option subnet-mask 255.255.255.0;
option routers 10.8.105.1;
 option domain-name-servers 147.149.1.69;
}
Configure /etc/default/isc-dhcp-server
Add the main NIC device interface to this file, such as eth0 (this example uses ens160).
INTERFACESv4="ens160"
Restart DCHP
service isc-dhcp-server restart
Verify your configuration
This example assumes the ens160 interface:
tcpdump -ni ens160 port 67 -vvvv

tcpdump: listening on ens160, link-type EN10MB (Ethernet), capture size 262144 bytes
09:13:54.297704 IP (tos 0xc0, ttl 64, id 40258, offset 0, flags [DF], proto UDP (17), length 327)
    10.8.105.12.68 > 10.8.105.5.67: [udp sum ok] BOOTP/DHCP, Request from 00:50:56:90:56:cf, length 299, xid 0xf7a5aac5, secs 50310, Flags [none] (0x0000)
          Client-IP 10.8.105.12
          Client-Ethernet-Address 00:50:56:90:56:cf
          Vendor-rfc1048 Extensions
            Magic Cookie 0x63825363
            DHCP-Message Option 53, length 1: Request
            Client-ID Option 61, length 19: hardware-type 255, 2d:1a:a1:33:00:02:00:00:ab:11:f2:c8:ef:ba:aa:5a:2f:33
            Parameter-Request Option 55, length 11:
              Subnet-Mask, Default-Gateway, Hostname, Domain-Name
              Domain-Name-Server, MTU, Static-Route, Classless-Static-Route
              Option 119, NTP, Option 120
            MSZ Option 57, length 2: 576
            Hostname Option 12, length 15: "prod-etcd-m8ctd"
            END Option 255, length 0
09:13:54.299762 IP (tos 0x0, ttl 64, id 56218, offset 0, flags [DF], proto UDP (17), length 328)
    10.8.105.5.67 > 10.8.105.12.68: [bad udp cksum 0xe766 -> 0x502f!] BOOTP/DHCP, Reply, length 300, xid 0xf7a5aac5, secs 50310, Flags [none] (0x0000)
          Client-IP 10.8.105.12
          Your-IP 10.8.105.12
          Server-IP 10.8.105.5
          Client-Ethernet-Address 00:50:56:90:56:cf
          Vendor-rfc1048 Extensions
            Magic Cookie 0x63825363
            DHCP-Message Option 53, length 1: ACK
            Server-ID Option 54, length 4: 10.8.105.5
            Lease-Time Option 51, length 4: 600
            Subnet-Mask Option 1, length 4: 255.255.255.0
            Default-Gateway Option 3, length 4: 10.8.105.1
            Domain-Name-Server Option 6, length 4: 147.149.1.69
            END Option 255, length 0
            PAD Option 0, length 0, occurs 26
3.6 -
- public.ecr.aws
- anywhere-assets.eks.amazonaws.com (to download the EKS Anywhere binaries, manifests and OVAs)
- distro.eks.amazonaws.com (to download EKS Distro binaries and manifests)
- d2glxqk2uabbnd.cloudfront.net (for EKS Anywhere and EKS Distro ECR container images)
- api.github.com (only if GitOps is enabled)
4 - Security best practices
If you discover a potential security issue in this project, we ask that you notify AWS/Amazon Security via our vulnerability reporting page . Please do not create a public GitHub issue for security problems.
This guide provides advice about best practices for EKS Anywhere specific security concerns. For a more complete treatment of Kubernetes security generally please refer to the official Kubernetes documentation on Securing a Cluster and the Amazon EKS Best Practices Guide for Security .
The Shared Responsibility Model and EKS-A
AWS Cloud Services follow the Shared Responsibility Model, where AWS is responsible for security “of” the cloud, while the customer is responsible for security “in” the cloud. However, EKS Anywhere is an open-source tool and the distribution of responsibility differs from that of a managed cloud service like EKS.
AWS Responsibilities
AWS is responsible for building and delivering a secure tool. This tool will provision an initially secure Kubernetes cluster.
AWS is responsible for vetting and securely sourcing the services and tools packaged with EKS Anywhere and the cluster it creates (such as CoreDNS, Cilium, Flux, CAPI, and govc).
The EKS Anywhere build and delivery infrastructure, or supply chain, is secured to the standard of any AWS service and AWS takes responsibility for the secure and reliable delivery of a quality product which provisions a secure and stable Kubernetes cluster.
When the eksctl anywhere plugin is executed, EKS Anywhere components are automatically downloaded from AWS.
eksctl will then perform checksum verification on the components to ensure their authenticity.
AWS is responsible for the secure development and testing of the EKS Anywhere controller and associated custom resource definitions.
AWS is responsible for the secure development and testing of the EKS Anywhere CLI, and ensuring it handles sensitive data and cluster resources securely.
End user responsibilities
The end user is responsible for the entire EKS Anywhere cluster after it has been provisioned. AWS provides a mechanism to upgrade the cluster in-place, but it is the responsibility of the end user to perform that upgrade using the provided tools. End users are responsible for operating their clusters in accordance with Kubernetes security best practices, and for the ongoing security of the cluster after it has been provisioned. This includes but is not limited to:
- creation or modification of RBAC roles and bindings
- creation or modification of namespaces
- modification of the default container network interface plugin
- configuration of network ingress and load balancing
- use and configuration of container storage interfaces
- the inclusion of add-ons and other services
End users are also responsible for:
-
The hardware and software which make up the infrastructure layer (such as vSphere, ESXi, physical servers, and physical network infrastructure).
-
The ongoing maintenance of the cluster nodes, including the underlying guest operating systems. Additionally, while EKS Anywhere provides a streamlined process for upgrading a cluster to a new Kubernetes version, it is the responsibility of the user to perform the upgrade as necessary.
-
Any applications which run “on” the cluster, including their secure operation, least privilege, and use of well-known and vetted container images.
EKS Anywhere Security Best Practices
This section captures EKS Anywhere specific security best practices. Please read this section carefully and follow any guidance to ensure the ongoing security and reliability of your EKS Anywhere cluster.
Critical Namespaces
EKS Anywhere creates and uses resources in several critical namespaces. All of the EKS Anywhere managed namespaces should be treated as sensitive and access should be limited to only the most trusted users and processes. Allowing additional access or modifying the existing RBAC resources could potentially allow a subject to access the namespace and the resources that it contains. This could lead to the exposure of secrets or the failure of your cluster due to modification of critical resources. Here are rules you should follow when dealing with critical namespaces:
-
Avoid creating Roles in these namespaces or providing users access to them with ClusterRoles . For more information about creating limited roles for day-to-day administration and development, please see the official introduction to Role Based Access Control (RBAC) .
-
Do not modify existing Roles in these namespaces, bind existing roles to additional subjects , or create new Roles in the namespace.
-
Do not modify existing ClusterRoles or bind them to additional subjects.
-
Avoid using the cluster-admin role, as it grants permissions over all namespaces.
-
No subjects except for the most trusted administrators should be permitted to perform ANY action in the critical namespaces.
The critical namespaces include:
eksa-systemcapv-systemflux-systemcapi-systemcapi-webhook-systemcapi-kubeadm-control-plane-systemcapi-kubeadm-bootstrap-systemcert-managerkube-system(as with any Kubernetes cluster, this namespace is critical to the functioning of your cluster and should be treated with the highest level of sensitivity.)
Secrets
EKS Anywhere stores sensitive information, like the vSphere credentials and GitHub Personal Access Token, in the cluster as native Kubernetes secrets
.
These secret objects are namespaced, for example in the eksa-system and flux-system namespace, and limiting access to the sensitive namespaces will ensure that these secrets will not be exposed.
Additionally, limit access to the underlying node. Access to the node could allow access to the secret content.
EKS Anywhere does not currently support encryption-at-rest for Kubernetes secrets. EKS Anywhere support for Key Management Services (KMS) is planned.
The EKS Anywhere kubeconfig file
eksctl anywhere create cluster creates an EKS Anywhere-based Kubernetes cluster and outputs a kubeconfig
file with administrative privileges to the $PWD/$CLUSTER_NAME directory.
By default, this kubeconfig file uses certificate-based authentication and contains the user certificate data for the administrative user.
The kubeconfig file grants administrative privileges over your cluster to the bearer and the certificate key should be treated as you would any other private key or administrative password.
The EKS Anywhere-generated kubeconfig file should only be used for interacting with the cluster via eksctl anywhere commands, such as upgrade, and for the most privileged administrative tasks.
For more information about creating limited roles for day-to-day administration and development, please see the official introduction to Role Based Access Control (RBAC)
.
GitOps
GitOps enabled EKS Anywhere clusters maintain a copy of their cluster configuration in the user provided Git repository. This configuration acts as the source of truth for the cluster. Changes made to this configuration will be reflected in the cluster configuration.
AWS recommends that you gate any changes to this repository with mandatory pull request reviews. Carefully review pull requests for changes which could impact the availability of the cluster (such as scaling nodes to 0 and deleting the cluster object) or contain secrets.
GitHub Personal Access Token
Treat the GitHub PAT used with EKS Anywhere as you would any highly privileged secret, as it could potentially be used to make changes to your cluster by modifying the contents of the cluster configuration file through the GitHub.com API.
- Never commit the PAT to a Git repository
- Never share the PAT via untrusted channels
- Never grant non-administrative subjects access to the
flux-systemnamespace where the PAT is stored as a native Kubernetes secret.
Executing EKS Anywhere
Ensure that you execute eksctl anywhere create cluster on a trusted workstation in order to protect the values of sensitive environment variables and the EKS Anywhere generated kubeconfig file.
SSH Access to Cluster Nodes and ETCD Nodes
EKS Anywhere provides the option to configure an ssh authorized key for access to underlying nodes in a cluster, via vsphereMachineConfig.Users.sshAuthorizedKeys.
This grants the associated private key the ability to connect to the cluster via ssh as the user capv with sudo permissions.
The associated private key should be treated as extremely sensitive, as sudo access to the cluster and ETCD nodes can permit access to secret object data and potentially confer arbitrary control over the cluster.
VMWare OVAs
Only download OVAs for cluster nodes from official sources, and do not allow untrusted users or processes to modify the templates used by EKS Anywhere for provisioning nodes.
Benchmark tests for cluster hardening
EKS Anywhere creates clusters with server hardening configurations out of the box, via the use of security flags and opinionated default templates. You can verify the security posture of your EKS Anywhere cluster by using a tool called kube-bench
, that checks whether Kubernetes is deployed securely.
kube-bench runs checks documented in the CIS Benchmark for Kubernetes
, such as, pod specification file permissions, disabling insecure arguments, and so on.
Refer to the EKS Anywhere CIS Self-Assessment Guide for more information on how to evaluate the security configurations of your EKS Anywhere cluster.
4.1 - CIS Self-Assessment Guide
The CIS Benchmark self-assessment guide serves to help EKS Anywhere users evaluate the level of security of the hardened cluster configuration against Kubernetes benchmark controls from the Center for Information Security (CIS). This guide will walk through the various controls and provide updated example commands to audit compliance in EKS Anywhere clusters.
You can verify the security posture of your EKS Anywhere cluster by using a tool called kube-bench
. The ideal way to run the benchmark tests on your EKS Anywhere cluster is to apply the Kube-bench Job YAMLs
to the cluster. This runs the kube-bench tests on a Pod on the cluster, and the logs of the Pod provide the test results.
Kube-bench currently does not support unstacked etcd topology (which is the default for EKS Anywhere), so the following checks are skipped in the default kube-bench Job YAML. If you created your EKS Anywhere cluster with stacked etcd configuration, you can apply the stacked etcd Job YAML
instead.
| Check number | Check description |
|---|---|
| 1.1.7 | Ensure that the etcd pod specification file permissions are set to 644 or more restrictive |
| 1.1.8 | Ensure that the etcd pod specification file ownership is set to root:root |
| 1.1.11 | Ensure that the etcd data directory permissions are set to 700 or more restrictive |
| 1.1.12 | Ensure that the etcd data directory ownership is set to etcd:etcd |
The following tests are also skipped, because they are not applicable or enforce settings that might make the cluster unstable.
| Check number | Check description | Reason for skipping |
|---|---|---|
| Controlplane node configuration | ||
| 1.2.6 | Ensure that the –kubelet-certificate-authority argument is set as appropriate | When generating serving certificates, functionality could break in conjunction with hostname overrides which are required for certain cloud providers |
| 1.2.16 | Ensure that the admission control plugin PodSecurityPolicy is set | Enabling Pod Security Policy can cause applications to unexpectedly fail |
| 1.2.32 | Ensure that the –encryption-provider-config argument is set as appropriate | Enabling encryption changes how data can be recovered as data is encrypted |
| 1.2.33 | Ensure that encryption providers are appropriately configured | Enabling encryption changes how data can be recovered as data is encrypted |
| Worker node configuration | ||
| 4.2.6 | Ensure that the –protect-kernel-defaults argument is set to true | System level configurations are required before provisioning the cluster in order for this argument to be set to true |
| 4.2.10 | Ensure that the –tls-cert-file and –tls-private-key-file arguments are set as appropriate | When generating serving certificates, functionality could break in conjunction with hostname overrides which are required for certain cloud providers |
Note
Running kube-bench on Bottlerocket controlplane nodes currently produces false negatives with respect to pod specification file (manifest) permissions, since the default configuration does not include the paths in which Bottlerocket places these manifests. This issue is being tracked here .5 - Packages
Curated package list
| Name | Description | Versions | GitHub |
|---|---|---|---|
| Harbor | Harbor is an open source trusted cloud native registry project that stores, signs, and scans content. | v2.5.0 | https://github.com/goharbor/harbor
https://github.com/goharbor/harbor-helm |
5.1 - Harbor configuration
Harbor is an open source trusted cloud native registry project that stores, signs, and scans content. Harbor extends the open source Docker Distribution by adding the functionalities usually required by users such as security, identity and management. Having a registry closer to the build and run environment can improve the image transfer efficiency. Harbor supports replication of images between registries, and also offers advanced security features such as user management, access control and activity auditing.
Configuration options for Harbor
5.1.1 - v2.5.0
Trivy, Notary and Chartmuseum are not supported at this moment.
Configuring Harbor in EKS Anywhere package spec
The following table lists the configurable parameters of the Harbor package spec and the default values.
| Parameter | Description | Default |
|---|---|---|
| General | ||
externalURL |
The external URL for Harbor core service | https://127.0.0.1:30003 |
imagePullPolicy |
The image pull policy | IfNotPresent |
logLevel |
The log level: debug, info, warning, error or fatal |
info |
harborAdminPassword |
The initial password of Harbor admin. Change it from portal after launching Harbor | Harbor12345 |
secretKey |
The key used for encryption. Must be a string of 16 chars | "" |
| Expose | ||
expose.type |
How to expose the service: nodePort or loadBalancer, other values will be ignored and the creation of service will be skipped. |
nodePort |
expose.tls.enabled |
Enable TLS or not. | true |
expose.tls.certSource |
The source of the TLS certificate. Set as auto, secret or none and fill the information in the corresponding section: 1) auto: generate the TLS certificate automatically 2) secret: read the TLS certificate from the specified secret. The TLS certificate can be generated manually or by cert manager 3) none: configure no TLS certificate. |
secret |
expose.tls.auto.commonName |
The common name used to generate the certificate, it’s necessary when expose.tls.certSource is set to auto |
|
expose.tls.secret.secretName |
The name of secret which contains keys named: tls.crt - the certificate; tls.key - the private key |
harbor-tls-secret |
expose.nodePort.name |
The name of NodePort service | harbor |
expose.nodePort.ports.http.port |
The service port Harbor listens on when serving HTTP | 80 |
expose.nodePort.ports.http.nodePort |
The node port Harbor listens on when serving HTTP | 30002 |
expose.nodePort.ports.https.port |
The service port Harbor listens on when serving HTTPS | 443 |
expose.nodePort.ports.https.nodePort |
The node port Harbor listens on when serving HTTPS | 30003 |
expose.loadBalancer.name |
The name of service | harbor |
expose.loadBalancer.IP |
The IP of the loadBalancer. It only works when loadBalancer supports assigning IP | "" |
expose.loadBalancer.ports.httpPort |
The service port Harbor listens on when serving HTTP | 80 |
expose.loadBalancer.ports.httpsPort |
The service port Harbor listens on when serving HTTPS | 30002 |
expose.loadBalancer.annotations |
The annotations attached to the loadBalancer service | {} |
expose.loadBalancer.sourceRanges |
List of IP address ranges to assign to loadBalancerSourceRanges | [] |
| Internal TLS | ||
internalTLS.enabled |
Enable TLS for the components (core, jobservice, portal, registry) | true |
| Persistence | ||
persistence.resourcePolicy |
Setting it to keep to avoid removing PVCs during a helm delete operation. Leaving it empty will delete PVCs after the chart deleted. Does not affect PVCs created for internal database and redis components. |
keep |
persistence.persistentVolumeClaim.registry.size |
The size of the volume | 5Gi |
persistence.persistentVolumeClaim.registry.storageClass |
Specify the storageClass used to provision the volume. Or the default StorageClass will be used (the default). Set it to - to disable dynamic provisioning |
"" |
persistence.persistentVolumeClaim.jobservice.size |
The size of the volume | 1Gi |
persistence.persistentVolumeClaim.jobservice.storageClass |
Specify the storageClass used to provision the volume. Or the default StorageClass will be used (the default). Set it to - to disable dynamic provisioning |
"" |
persistence.persistentVolumeClaim.database.size |
The size of the volume. If external database is used, the setting will be ignored | 1Gi |
persistence.persistentVolumeClaim.database.storageClass |
Specify the storageClass used to provision the volume. Or the default StorageClass will be used (the default). Set it to - to disable dynamic provisioning. If external database is used, the setting will be ignored |
"" |
persistence.persistentVolumeClaim.redis.size |
The size of the volume. If external Redis is used, the setting will be ignored | 1Gi |
persistence.persistentVolumeClaim.redis.storageClass |
Specify the storageClass used to provision the volume. Or the default StorageClass will be used (the default). Set it to - to disable dynamic provisioning. If external Redis is used, the setting will be ignored |
"" |
6 - What's New?
v0.9.0
Added
- Adding support to EKS Anywhere for a generic git provider as the source of truth for GitOps configuration management. #9
- Allow users to configure Cloud Provider and CSI Driver with different credentials. #1730
- Support to install, configure and maintain operational components that are secure and tested by Amazon on EKS Anywhere clusters.#2083
- A new Workshop section has been added to EKS Anywhere documentation.
- Added support for curated packages behind a feature flag #1893
Fixed
- Fix issue specifying proxy configuration for helm template command #2009
v0.8.2
Fixed
- Fix issue with upgrading cluster from a previous minor version #1819
v0.8.1
Fixed
- Fix issue with downloading artifacts #1753
v0.8.0
Added
- SSH keys and Users are now mutable #1208
- OIDC configuration is now mutable #676
- Add support for Cilium’s policy enforcement mode #726
Changed
- Install Cilium networking through Helm instead of static manifest
v0.7.2 - 2022-02-28
Fixed
- Fix issue with downloading artifacts #1327
v0.7.1 - 2022-02-25
Added
- Support for taints in worker node group configurations #189
- Support for taints in control plane configurations #189
- Support for labels in worker node group configuration #486
- Allow removal of worker node groups using the
eksctl anywhere upgradecommand #1054
v0.7.0 - 2022-01-27
Added
- Support for
aws-iam-authenticatoras an authentication option in EKS-A clusters #90 - Support for multiple worker node groups in EKS-A clusters #840
- Support for IAM Role for Service Account (IRSA) #601
- New command
upgrade plan clusterlists core component changes affected byupgrade cluster#499 - Support for workload cluster’s control plane and etcd upgrade through GitOps #1007
- Upgrading a Flux managed cluster previously required manual steps. These steps have now been automated. #759 , #1019
- Cilium CNI will now be upgraded by the
upgrade clustercommand #326
Changed
- EKS-A now uses Cluster API (CAPI) v1.0.1 and v1beta1 manifests, upgrading from v0.3.23 and v1alpha3 manifests.
- Kubernetes components and etcd now use TLS_ECDHE_RSA_WITH_AES_128_GCM_SHA256 as the configured TLS cipher suite #657 , #759
- Automated git repository structure changes during Flux component
upgradeworkflow #577
v0.6.0 - 2021-10-29
Added
- Support to create and manage workload clusters #94
- Support for upgrading eks-anywhere components #93
, Cluster upgrades
- IMPORTANT: Currently upgrading existing flux manged clusters requires performing a few additional steps
. The fix for upgrading the existing clusters will be published in
0.6.1release to improve the upgrade experience.
- IMPORTANT: Currently upgrading existing flux manged clusters requires performing a few additional steps
. The fix for upgrading the existing clusters will be published in
- k8s CIS compliance #193
- Support bundle improvements #92
- Ability to upgrade control plane nodes before worker nodes #100
- Ability to use your own container registry #98
- Make namespace configurable for anywhere resources #177
Fixed
- Fix ova auto-import issue for multi-datacenter environments #437
- OVA import via EKS-A CLI sometimes fails #254
- Add proxy configuration to etcd nodes for bottlerocket #195
Removed
- overrideClusterSpecFile field in cluster config
v0.5.0
Added
- Initial release of EKS-A
7 - Frequently Asked Questions
AuthN / AuthZ
How do my applications running on EKS Anywhere authenticate with AWS services using IAM credentials?
You can now leverage the IAM Role for Service Account (IRSA) feature by following the IRSA reference guide for details.
Does EKS Anywhere support OIDC (including Azure AD and AD FS)?
Yes, EKS Anywhere can create clusters that support API server OIDC authentication. This means you can federate authentication through AD FS locally or through Azure AD, along with other IDPs that support the OIDC standard. In order to add OIDC support to your EKS Anywhere clusters, you need to configure your cluster by updating the configuration file before creating the cluster. Please see the OIDC reference for details.
Does EKS Anywhere support LDAP?
EKS Anywhere does not support LDAP out of the box. However, you can look into the Dex LDAP Connector .
Can I use AWS IAM for Kubernetes resource access control on EKS Anywhere?
Yes, you can install the aws-iam-authenticator on your EKS Anywhere cluster to achieve this.
Miscellaneous
Can I connect my EKS Anywhere cluster to EKS?
Yes, you can install EKS Connector to connect your EKS Anywhere cluster to AWS EKS. EKS Connector is a software agent that you can install on the EKS Anywhere cluster that enables the cluster to communicate back to AWS. Once connected, you can immediately see the EKS Anywhere cluster with workload and cluster configuration information on the EKS console, alongside your EKS clusters.
How does the EKS Connector authenticate with AWS?
During start-up, the EKS Connector generates and stores an RSA key-pair as Kubernetes secrets. It also registers with AWS using the public key and the activation details from the cluster registration configuration file. The EKS Connector needs AWS credentials to receive commands from AWS and to send the response back. Whenever it requires AWS credentials, it uses its private key to sign the request and invokes AWS APIs to request the credentials.
How does the EKS Connector authenticate with my Kubernetes cluster?
The EKS Connector acts as a proxy and forwards the EKS console requests to the Kubernetes API server on your cluster. In the initial release, the connector uses impersonation with its service account secrets to interact with the API server. Therefore, you need to associate the connector’s service account with a ClusterRole, which gives permission to impersonate AWS IAM entities.
How do I enable an AWS user account to view my connected cluster through the EKS console?
For each AWS user or other IAM identity, you should add cluster role binding to the Kubernetes cluster with the appropriate permission for that IAM identity. Additionally, each of these IAM entities should be associated with the IAM policy to invoke the EKS Connector on the cluster.
Can I use Amazon Controllers for Kubernetes (ACK) on EKS Anywhere?
Yes, you can leverage AWS services from your EKS Anywhere clusters on-premises through Amazon Controllers for Kubernetes (ACK) .
Can I deploy EKS Anywhere on other clouds?
EKS Anywhere can be installed on any infrastructure with the required VMware vSphere versions. See EKS Anywhere vSphere prerequisite documentation.
How can I manage EKS Anywhere at scale?
You can perform cluster life cycle and configuration management at scale through GitOps-based tools. EKS Anywhere offers git-driven cluster management through the integrated Flux Controller. See Manage cluster with GitOps documentation for details.
Can I run EKS Anywhere on ESXi?
No. EKS Anywhere is dependent on the vSphere cluster API provider CAPV and it uses the vCenter API. There would need to be a change to the upstream project to support ESXi.
8 - Troubleshooting
Read more about troubleshooting in the tasks section.
9 - Support
EKS Anywhere support licenses are available to AWS customers who pay for enterprise support. If you would like business support for your EKS Anywhere clusters please contact your Technical Account Manager (TAM) for details.
EKS Anywhere is an open source project and it is supported by the community. If you have a problem, open an issue and someone will get back to you as soon as possible. If you discover a potential security issue in this project, we ask that you notify AWS/Amazon Security via our vulnerability reporting page . Please do not create a public GitHub issue for security problems.
10 - Artifacts
OVAs
Bottlerocket
Bottlerocket vends its VMware variant OVAs using a secure distribution tool called tuftool. Please follow instructions down below to download Bottlerocket OVA.
- Install Rust and Cargo
curl https://sh.rustup.rs -sSf | sh
- Install tuftool using Cargo
CARGO_NET_GIT_FETCH_WITH_CLI=true cargo install --force tuftool
- Download the root role tuftool will use to download the OVA
curl -O "https://cache.bottlerocket.aws/root.json"
sha512sum -c <<<"e9b1ea5f9b4f95c9b55edada4238bf00b12845aa98bdd2d3edb63ff82a03ada19444546337ec6d6806cbf329027cf49f7fde31f54d551c5e02acbed7efe75785  root.json"
- Export the desired Kubernetes Version. EKS Anywhere currently supports 1.22, 1.21 and 1.20
export KUBEVERSION="1.22"
- Download the OVA
OVA="bottlerocket-vmware-k8s-${KUBEVERSION}-x86_64-v1.7.2.ova"
tuftool download . --target-name "${OVA}" \
   --root ./root.json \
   --metadata-url "https://updates.bottlerocket.aws/2020-07-07/vmware-k8s-${KUBEVERSION}/x86_64/" \
   --targets-url "https://updates.bottlerocket.aws/targets/"
Bottlerocket Tags
OS Family - os:bottlerocket
EKS-D Release
1.22 - eksdRelease:kubernetes-1-22-eks-6
1.21 - eksdRelease:kubernetes-1-21-eks-13
1.20 - eksdRelease:kubernetes-1-20-eks-15
Ubuntu with Kubernetes 1.22
- https://anywhere-assets.eks.amazonaws.com/releases/bundles/10/artifacts/ova/1-22/ubuntu-v1.22.6-eks-d-1-22-6-eks-a-10-amd64.ova
os:ubuntueksdRelease:kubernetes-1-22-eks-6
Ubuntu with Kubernetes 1.21
- https://anywhere-assets.eks.amazonaws.com/releases/bundles/10/artifacts/ova/1-21/ubuntu-v1.21.9-eks-d-1-21-13-eks-a-10-amd64.ova
os:ubuntueksdRelease:kubernetes-1-21-eks-13
Ubuntu with Kubernetes 1.20
- https://anywhere-assets.eks.amazonaws.com/releases/bundles/10/artifacts/ova/1-20/ubuntu-v1.20.15-eks-d-1-20-15-eks-a-10-amd64.ova
os:ubuntueksdRelease:kubernetes-1-20-eks-15
Building your own Ubuntu OVA
The EKS Anywhere project OVA building process leverages upstream image-builder repository. If you want to build an OVA with a custom Ubuntu base image to use for an EKS Anywhere cluster, please follow the instructions below.
Having access to a vSphere environment and docker running locally are prerequisites for building your own images.
Required vSphere Permissions
Virtual machine
Inventory:
- Create new
Configuration:
- Change configuration
- Add new disk
- Add or remove device
- Change memory
- Change settings
- Set annotation
Interaction:
- Power on
- Power off
- Console interaction
- Configure CD media
- Device connection
Snapshot management:
- Create snapshot
Provisioning
- Mark as template
Resource Pool
- Assign vm to resource pool
Datastore
- Allocate space
- Browse data
- Low level file operations
Network
- Assign network to vm
Steps to build an OVA
- Spin up a builder-base docker container and exec into it. Please use the most recent tag for the image on its repository here
docker exec -it public.ecr.aws/eks-distro-build-tooling/builder-base:latest bash
- Clone the eks-anywhere-build-tooling repo.
git clone https://github.com/aws/eks-anywhere-build-tooling.git
- Navigate to the image-builder directory.
cd eks-anywhere-build-tooling/projects/kubernetes-sigs/image-builder
- Get the vSphere connection details and create a json file named
vsphere.jsonwith the following template.
{
    "cluster": "<vSphere cluster name>",
    "datacenter": "<datacenter name on vSphere>",
    "datastore": "<datastore to be used on vSphere>",
    "folder": "<folder path to use for building ova>",
    "network": "<dhcp enabled network name>",
    "resource_pool": "<vSphere resource pool to use>",
    "vcenter_server": "<vSphere server URL>",
    "username": "<vSphere username>",
    "password": "<vSphere password>",
    "template": "",
    "insecure_connection": "false",
    "linked_clone": "false",
    "convert_to_template": "false",
    "create_snapshot": "true"
}
- Export the vSphere connection data file, escaping all the quotes
export VSPHERE_CONNECTION_DATA=\"$(cat vsphere.json | jq -c . | sed 's/"/\\"/g')\"
- Download the most recent release bundle manifest and get the latest URLs for
etcdadmandcrictlfor the intended Kubernetes version.
wget https://anywhere-assets.eks.amazonaws.com/bundle-release.yaml
- Export the CRICTL_URL and ETCADM_HTTP_SOURCE environment variables with the URLs from previous step.
export CRICTL_URL=<crictl url>
export ETCDADM_HTTP_SOURCE=<etcdadm url>
- Create a library on vSphere for image-builder.
govc library.create "CodeBuild"
- Update the Ubuntu configuration file with the new custom ISO URL and its checksum at
image-builder/images/capi/packer/ova/ubuntu-2004.json - Setup image-builder and run the OVA build for the Kubernetes version.
RELEASE_BRANCH=1-22 make release-ova-ubuntu-2004
Images
The various images for EKS Anywhere can be found in the EKS Anywhere ECR repository . The various images for EKS Distro can be found in the EKS Distro ECR repository .
11 - Ports and protocols
EKS Anywhere requires that various ports on control plane and worker nodes be open. Some Kubernetes-specific ports need open access only from other Kubernetes nodes, while others are exposed externally. Beyond Kubernetes ports, someone managing an EKS Anywhere cluster must also have external access to ports on the underlying EKS Anywhere provider (such as VMware) and to external tooling (such as Jenkins).
If you are responsible for network firewall rules between nodes on your EKS Anywhere clusters, the following tables describe both Kubernetes and EKS Anywhere-specific ports you should be aware of.
Kubernetes control plane
The following table represents the ports published by the Kubernetes project that must be accessible on any Kubernetes control plane.
| Protocol | Direction | Port Range | Purpose | Used By |
|---|---|---|---|---|
| TCP | Inbound | 6443 | Kubernetes API server | All |
| TCP | Inbound | 10250 | Kubelet API | Self, Control plane |
| TCP | Inbound | 10259 | kube-scheduler | Self |
| TCP | Inbound | 10257 | kube-controller-manager | Self |
Although etcd ports are included in control plane section, you can also host your own etcd cluster externally or on custom ports.
| Protocol | Direction | Port Range | Purpose | Used By |
|---|---|---|---|---|
| TCP | Inbound | 2379-2380 | etcd server client API | kube-apiserver, etcd |
Use the following to access the SSH service on the control plane and etcd nodes:
| Protocol | Direction | Port Range | Purpose | Used By |
|---|---|---|---|---|
| TCP | Inbound | 22 | SSHD server | SSH clients |
Kubernetes worker nodes
The following table represents the ports published by the Kubernetes project that must be accessible from worker nodes.
| Protocol | Direction | Port Range | Purpose | Used By |
|---|---|---|---|---|
| TCP | Inbound | 10250 | Kubelet API | Self, Control plane |
| TCP | Inbound | 30000-32767 | NodePort Services | All |
The API server port that is sometimes switched to 443. Alternatively, the default port is kept as is and API server is put behind a load balancer that listens on 443 and routes the requests to API server on the default port.
Use the following to access the SSH service on the worker nodes:
| Protocol | Direction | Port Range | Purpose | Used By |
|---|---|---|---|---|
| TCP | Inbound | 22 | SSHD server | SSH clients |
VMware provider
The following table displays ports that need to be accessible from the VMware provider running EKS Anywhere:
| Protocol | Direction | Port Range | Purpose | Used By |
|---|---|---|---|---|
| TCP | Inbound | 443 | vCenter Server | vCenter API endpoint |
| TCP | Inbound | 6443 | Kubernetes API server | Kubernetes API endpoint |
| TCP | Inbound | 2379 | Manager | Etcd API endpoint |
| TCP | Inbound | 2380 | Manager | Etcd API endpoint |
Control plane management tools
A variety of control plane management tools are available to use with EKS Anywhere. One example is Jenkins.
| Protocol | Direction | Port Range | Purpose | Used By |
|---|---|---|---|---|
| TCP | Inbound | 8080 | Jenkins Server | HTTP Jenkins endpoint |
| TCP | Inbound | 8443 | Jenkins Server | HTTPS Jenkins endpoint |
12 - eksctl anywhere CLI reference
The eksctl CLI, with the EKS Anywhere plugin added, lets you create and manage EKS Anywhere clusters.
While a cluster is running, most EKS Anywhere administration can be done using kubectl or other native Kubernetes tools.
Use this page as a reference to useful eksctl anywhere command examples for working with EKS Anywhere clusters.
Available eksctl anywhere commands include:
create clusterTo create an EKS Anywhere clusterdelete clusterTo delete an EKS Anywhere clustergenerate[clusterconfig|support-bundle|support-bundle-config] To generate cluster and support configshelpTo get help informationupgradeTo upgrade a workload clusterversionTo get the EKS Anywhere version
Options used with multiple commands include:
-hor--helpTo get help for a command or subcommand-v intor--verbosity intTo set log level verbosity from 0-9-ffilenameor–filename filename` To identify the filename containing the cluster config--force-cleanupTo force deletion of previously created bootstrap cluster-w stringor--w-config stringTo identify the kubeconfig file when needed to create a support bundle or upgrade a cluster
Other available options and arguments are listed with the command examples that follow.
eksctl anywhere generate
With eksctl anywhere generate, you can output sets of cluster resources to create a new cluster
or troubleshoot an existing cluster.
Here are some examples.
eksctl anywhere generate clusterconfig
Using eksctl anywhere generate clusterconfig you can generate a cluster configuration
for a specific provider (-p or --providerprovider_name). Here are examples:
Generate a configuration file to create an EKS Anywhere cluster for a vsphere provider:
export CLUSTER_NAME=vsphere01
eksctl anywhere generate clusterconfig ${CLUSTER_NAME} -p vsphere > ${CLUSTER_NAME}.yaml
Generate a configuration file to create an EKS Anywhere cluster for a Docker provider:
export CLUSTER_NAME=docker01
eksctl anywhere generate clusterconfig ${CLUSTER_NAME} -p docker > ${CLUSTER_NAME}.yaml
Once you have generated the yaml configuration file, edit that file to add configuration information before you use the file to create your cluster. See local and production cluster creation procedures for details.
eksctl anywhere generate support-bundle-config
If you would like to customize your support bundle, you can generate a support bundle configuration file (support-bundle-config),
edit that file to choose the data you want to gather,
then gather the selected data into a support bundle (support-bundle).
Generate a support bundle config file (then edit that file to select the log data you want to gather):
export CLUSTER_NAME=vsphere01
eksctl anywhere generate support-bundle-config > ${CLUSTER_NAME}_bundle_config.yaml
eksctl anywhere generate support-bundle
Once you have a bundle config file, generate a support bundle from an existing EKS Anywhere cluster. Additional options available for this command include:
--bundle-config stringTo identify the bundle config file to use to generate the support bundle--since stringTo collect pod logs in the latest duration like 5s, 2m, or 3h.--since-time stringTo collect pod logs after a specific datetime(RFC3339) like 2021-06-28T15:04:05Z
Here is an example:
export CLUSTER_NAME=vsphere01
eksctl anywhere generate support-bundle --bundle-config ${CLUSTER_NAME}_bundle_config.yaml \
   -w KUBECONFIG=${PWD}/${CLUSTER_NAME}/${CLUSTER_NAME}-eks-a-cluster.kubeconfig \
   --since 2h -f ${CLUSTER_NAME}_bundle.yaml
The example just shown:
- Uses
${CLUSTER_NAME}_bundle.yamlas the file to hold the results - Collects pod logs for the past two hours (2h)
- Identifies the bundle config file to use (
${CLUSTER_NAME}_bundle_config.yaml) - Identifies the
.kubeconfigfile to use for a workload cluster
To change the command to generate a support bundle that gathers pod logs starting from a specific date (September 8, 2021) and time (1:27 PM):
export CLUSTER_NAME=vsphere01
eksctl anywhere generate support-bundle --bundle-config ${CLUSTER_NAME}_bundle_config.yaml \
   -w KUBECONFIG=${PWD}/${CLUSTER_NAME}/${CLUSTER_NAME}-eks-a-cluster.kubeconfig \
   --since-time 2021-09-8T13:27:00Z 2h -f ${CLUSTER_NAME}_bundle.yaml
eksctl anywhere create cluster
Create an EKS Anywhere cluster from a cluster configuration file you generated (and modified) earlier.
This example sets verbosity to most verbose (-v 9):
export CLUSTER_NAME=vsphere01
eksctl anywhere create cluster -v 9 -f ${CLUSTER_NAME}.yaml
See local and production cluster creation procedures for details.
eksctl anywhere upgrade cluster
Upgrade an existing EKS Anywhere cluster. This example uses maximum verbosity and forces a cleanup of the previously created bootstrap cluster:
export CLUSTER_NAME=vsphere01
eksctl anywhere upgrade cluster -f ${CLUSTER_NAME}.yaml --force-cleanup -v9 \
   -w KUBECONFIG=${PWD}/${CLUSTER_NAME}/${CLUSTER_NAME}-eks-a-cluster.kubeconfig
For more information on this and other ways to upgrade a cluster, see Upgrade cluster .
eksctl anywhere delete cluster
Delete an existing EKS Anywhere cluster. This example deletes all VMs and the forces the deletion of the previously created bootstrap cluster:
export CLUSTER_NAME=vsphere01
eksctl anywhere delete cluster -f ${CLUSTER_NAME}.yaml \
   --force-cleanup \
   -w KUBECONFIG=${PWD}/${CLUSTER_NAME}/${CLUSTER_NAME}-eks-a-cluster.kubeconfig
For more information on deleting a cluster, see Delete cluster .
eksctl anywhere version
View the version of eksctl anywhere:
eksctl anywhere version
v0.5.0
eksctl anywhere help
Use eksctl anywhere help or the -h option to see general options or options specific to a particular set of commands.
View general help information using help:
eksctl anywhere help

Use eksctl anywhere to build your own self-managing cluster on your hardware with the best of Amazon EKS

Usage:
  eksctl anywhere [command]

Available Commands:
  create      Create resources
  delete      Delete resources
  generate    Generate resources
  help        Help about any command
  upgrade     Upgrade resources
  version     Get the eksctl version

Flags:
  -h, --help            help for eksctl
  -v, --verbosity int   Set the log level verbosity

Use "eksctl [command] --help" for more information about a command.
...
Display help options for generating a support bundle:
eksctl anywhere generate support-bundle -h

This command is used to create a support bundle to troubleshoot a cluster

Usage:
  eksctl anywhere generate support-bundle -f my-cluster.yaml [flags]

Flags:
      --bundle-config string   Bundle Config file to use when generating support bundle
  -f, --filename string        Filename that contains EKS-A cluster configuration
  -h, --help                   help for support-bundle
      --since string           Collect pod logs in the latest duration like 5s, 2m, or 3h.
      --since-time string      Collect pod logs after a specific datetime(RFC3339) like 2021-06-28T15:04:05Z
  -w, --w-config string        Kubeconfig file to use when creating support bundle for a workload cluster

Global Flags:
  -v, --verbosity int   Set the log level verbosity
Display options for creating a cluster:
eksctl anywhere create cluster -h
This command is used to create workload clusters

Usage:
  eksctl anywhere create cluster [flags]

Flags:
  -f, --filename string   Filename that contains EKS-A cluster configuration
      --force-cleanup     Force deletion of previously created bootstrap cluster
  -h, --help              help for cluster

Global Flags:
  -v, --verbosity int   Set the log level verbosity