This is the multi-page printable view of this section. Click here to print.
Tasks
- 1: Workload management
- 1.1: Deploy test workload
- 1.2: Add an external load balancer
- 1.2.1: RECOMMENDED: Kube-Vip for Service-type Load Balancer
- 1.2.1.1: Kube-Vip ARP Mode
- 1.2.1.2: Kube-Vip BGP Mode
- 1.2.2: Alternative: MetalLB Service-type Load Balancer
- 1.3: Add an ingress controller
- 1.4: Secure connectivity with CNI and Network Policy
- 2: Cluster management
- 2.1: Cluster management overview
- 2.2: Etcd Backup and Restore
- 2.3: Verify cluster
- 2.4: Add cluster integrations
- 2.5: Connect cluster to console
- 2.6: License cluster
- 2.7: Scale cluster
- 2.8: Upgrade cluster
- 2.9: Authenticate cluster with AWS IAM Authenticator
- 2.10: Manage cluster with GitOps
- 2.11: Manage cluster with Terraform
- 2.12: Delete cluster
- 3: Cluster troubleshooting
- 4: EKS Anywhere curated package management
- 4.1: Harbor
1 - Workload management
1.1 - Deploy test workload
We’ve created a simple test application for you to verify your cluster is working properly. You can deploy it with the following command:
kubectl apply -f "https://anywhere.eks.amazonaws.com/manifests/hello-eks-a.yaml"
To see the new pod running in your cluster, type:
kubectl get pods -l app=hello-eks-a
Example output:
NAME                                     READY   STATUS    RESTARTS   AGE
hello-eks-a-745bfcd586-6zx6b   1/1     Running   0          22m
To check the logs of the container to make sure it started successfully, type:
kubectl logs -l app=hello-eks-a
There is also a default web page being served from the container. You can forward the deployment port to your local machine with
kubectl port-forward deploy/hello-eks-a 8000:80
Now you should be able to open your browser or use curl to http://localhost:8000
to view the page example application.
curl localhost:8000
Example output:
⬡⬢⬡⬢⬡⬢⬡⬢⬡⬢⬡⬢⬡⬢⬡⬢⬡⬢⬡⬢⬡⬢⬡⬢⬡⬢⬡⬢⬡⬢⬡⬢⬡⬢⬡⬢⬡⬢⬡⬢⬡⬢⬡⬢⬡⬢⬡⬢⬡⬢⬡⬢⬡⬢⬡⬢⬡⬢⬡⬢⬡⬢⬡⬢

Thank you for using

███████╗██╗  ██╗███████╗
██╔════╝██║ ██╔╝██╔════╝
█████╗  █████╔╝ ███████╗
██╔══╝  ██╔═██╗ ╚════██║
███████╗██║  ██╗███████║
╚══════╝╚═╝  ╚═╝╚══════╝

 █████╗ ███╗   ██╗██╗   ██╗██╗    ██╗██╗  ██╗███████╗██████╗ ███████╗
██╔══██╗████╗  ██║╚██╗ ██╔╝██║    ██║██║  ██║██╔════╝██╔══██╗██╔════╝
███████║██╔██╗ ██║ ╚████╔╝ ██║ █╗ ██║███████║█████╗  ██████╔╝█████╗
██╔══██║██║╚██╗██║  ╚██╔╝  ██║███╗██║██╔══██║██╔══╝  ██╔══██╗██╔══╝
██║  ██║██║ ╚████║   ██║   ╚███╔███╔╝██║  ██║███████╗██║  ██║███████╗
╚═╝  ╚═╝╚═╝  ╚═══╝   ╚═╝    ╚══╝╚══╝ ╚═╝  ╚═╝╚══════╝╚═╝  ╚═╝╚══════╝

You have successfully deployed the hello-eks-a pod hello-eks-a-c5b9bc9d8-qp6bg

For more information check out
https://anywhere.eks.amazonaws.com

⬡⬢⬡⬢⬡⬢⬡⬢⬡⬢⬡⬢⬡⬢⬡⬢⬡⬢⬡⬢⬡⬢⬡⬢⬡⬢⬡⬢⬡⬢⬡⬢⬡⬢⬡⬢⬡⬢⬡⬢⬡⬢⬡⬢⬡⬢⬡⬢⬡⬢⬡⬢⬡⬢⬡⬢⬡⬢⬡⬢⬡⬢⬡⬢
If you would like to expose your applications with an external load balancer or an ingress controller, you can follow the steps in Adding an external load balancer .
1.2 - Add an external load balancer
A production-quality Kubernetes cluster requires planning and preparation for various networking features.
The purpose of this document is to walk you through getting set up with a recommended Kubernetes Load Balancer for EKS Anywhere. Load Balancing is essential in order to maximize availability and scalability. It enables efficient distribution of incoming network traffic among multiple backend services.
1.2.1 - RECOMMENDED: Kube-Vip for Service-type Load Balancer
We recommend using Kube-Vip cloud controller to expose your services as service-type Load Balancer. Detailed information about Kube-Vip can be found here .
There are two ways Kube-Vip can manage virtual IP addresses on your network. Please see the following guides for ARP or BGP mode depending on your on-prem networking preferences.
Setting up Kube-Vip for Service-type Load Balancer
Kube-Vip Service-type Load Balancer can be set up in either ARP mode or BGP mode
1.2.1.1 - Kube-Vip ARP Mode
In ARP mode, kube-vip will perform leader election and assign the Virtual IP to the leader. This node will inherit the VIP and become the load-balancing leader within the cluster.
Setting up Kube-Vip for Service-type Load Balancer in ARP mode
-
Enable strict ARP in kube-proxy as it’s required for kube-vip
kubectl get configmap kube-proxy -n kube-system -o yaml | \ sed -e "s/strictARP: false/strictARP: true/" | \ kubectl apply -f - -n kube-system -
Create a configMap to specify the IP range for load balancer. You can use either a CIDR block or an IP range
CIDR=192.168.0.0/24 # Use your CIDR range here kubectl create configmap --namespace kube-system kubevip --from-literal cidr-global=${CIDR}IP_START=192.168.0.0 # Use the starting IP in your range IP_END=192.168.0.255 # Use the ending IP in your range kubectl create configmap --namespace kube-system kubevip --from-literal range-global=${IP_START}-${IP_END} -
Deploy kubevip-cloud-provider
kubectl apply -f https://kube-vip.io/manifests/controller.yaml -
Create ClusterRoles and RoleBindings for kube-vip Daemonset
kubectl apply -f https://kube-vip.io/manifests/rbac.yaml -
Create the kube-vip Daemonset
An example manifest has been included at the end of this document which you can use in place of this step.
alias kube-vip="docker run --network host --rm plndr/kube-vip:v0.3.5" kube-vip manifest daemonset --services --inCluster --arp --interface eth0 | kubectl apply -f - -
Deploy the Hello EKS Anywhere test application.
kubectl apply -f https://anywhere.eks.amazonaws.com/manifests/hello-eks-a.yaml -
Expose the hello-eks-a service
kubectl expose deployment hello-eks-a --port=80 --type=LoadBalancer --name=hello-eks-a-lb -
Describe the service to get the IP. The external IP will be the one in CIDR range specified in step 4
EXTERNAL_IP=$(kubectl get svc hello-eks-a-lb -o jsonpath='{.spec.loadBalancerIP}') -
Ensure the load balancer is working by curl’ing the IP you got in step 8
curl ${EXTERNAL_IP}
You should see something like this in the output
   ⬡⬢⬡⬢⬡⬢⬡⬢⬡⬢⬡⬢⬡⬢⬡⬢⬡⬢⬡⬢⬡⬢⬡⬢⬡⬢⬡⬢⬡⬢⬡⬢⬡⬢⬡⬢⬡⬢⬡⬢⬡⬢⬡⬢⬡⬢⬡⬢⬡⬢⬡⬢⬡

   Thank you for using

   ███████╗██╗  ██╗███████╗
   ██╔════╝██║ ██╔╝██╔════╝
   █████╗  █████╔╝ ███████╗
   ██╔══╝  ██╔═██╗ ╚════██║
   ███████╗██║  ██╗███████║
   ╚══════╝╚═╝  ╚═╝╚══════╝

    █████╗ ███╗   ██╗██╗   ██╗██╗    ██╗██╗  ██╗███████╗██████╗ ███████╗
   ██╔══██╗████╗  ██║╚██╗ ██╔╝██║    ██║██║  ██║██╔════╝██╔══██╗██╔════╝
   ███████║██╔██╗ ██║ ╚████╔╝ ██║ █╗ ██║███████║█████╗  ██████╔╝█████╗
   ██╔══██║██║╚██╗██║  ╚██╔╝  ██║███╗██║██╔══██║██╔══╝  ██╔══██╗██╔══╝
   ██║  ██║██║ ╚████║   ██║   ╚███╔███╔╝██║  ██║███████╗██║  ██║███████╗
   ╚═╝  ╚═╝╚═╝  ╚═══╝   ╚═╝    ╚══╝╚══╝ ╚═╝  ╚═╝╚══════╝╚═╝  ╚═╝╚══════╝

   You have successfully deployed the hello-eks-a pod hello-eks-a-c5b9bc9d8-fx2fr

   For more information check out
   https://anywhere.eks.amazonaws.com

⬡⬢⬡⬢⬡⬢⬡⬢⬡⬢⬡⬢⬡⬢⬡⬢⬡⬢⬡⬢⬡⬢⬡⬢⬡⬢⬡⬢⬡⬢⬡⬢⬡⬢⬡⬢⬡⬢⬡⬢⬡⬢⬡⬢⬡⬢⬡⬢⬡⬢⬡⬢⬡
Here is an example manifest for kube-vip from step 5. Also available here
apiVersion: apps/v1
kind: DaemonSet
metadata:
  creationTimestamp: null
  name: kube-vip-ds
  namespace: kube-system
spec:
  selector:
    matchLabels:
      name: kube-vip-ds
  template:
    metadata:
      creationTimestamp: null
      labels:
        name: kube-vip-ds
    spec:
      containers:
      - args:
        - manager
        env:
        - name: vip_arp
          value: "true"
        - name: vip_interface
          value: eth0
        - name: port
          value: "6443"
        - name: vip_cidr
          value: "32"
        - name: svc_enable
          value: "true"
        - name: vip_startleader
          value: "false"
        - name: vip_addpeerstolb
          value: "true"
        - name: vip_localpeer
          value: ip-172-20-40-207:172.20.40.207:10000
        - name: vip_address
        image: plndr/kube-vip:v0.3.5
        imagePullPolicy: Always
        name: kube-vip
        resources: {}
        securityContext:
          capabilities:
            add:
            - NET_ADMIN
            - NET_RAW
            - SYS_TIME
      hostNetwork: true
      serviceAccountName: kube-vip
  updateStrategy: {}
status:
  currentNumberScheduled: 0
  desiredNumberScheduled: 0
  numberMisscheduled: 0
  numberReady: 0
1.2.1.2 - Kube-Vip BGP Mode
In BGP mode, kube-vip will assign the Virtual IP to all running Pods. All nodes, therefore, will advertise the VIP address.
Prerequisites
- BGP-capable network switch connected to EKS-A cluster
- Vendor-specific BGP configuration on switch
Required BGP settings on network vendor equipment are described in BGP Configuration on Network Switch Side section below.
Setting up Kube-Vip for Service-type Load Balancer in BGP mode
-
Create a configMap to specify the IP range for load balancer. You can use either a CIDR block or an IP range
CIDR=192.168.0.0/24 # Use your CIDR range here kubectl create configmap --namespace kube-system kubevip --from-literal cidr-global=${CIDR}IP_START=192.168.0.0 # Use the starting IP in your range IP_END=192.168.0.255 # Use the ending IP in your range kubectl create configmap --namespace kube-system kubevip --from-literal range-global=${IP_START}-${IP_END} -
Deploy kubevip-cloud-provider
kubectl apply -f https://kube-vip.io/manifests/controller.yaml -
Create ClusterRoles and RoleBindings for kube-vip Daemonset
kubectl apply -f https://kube-vip.io/manifests/rbac.yaml -
Create the kube-vip Daemonset
alias kube-vip="docker run --network host --rm plndr/kube-vip:latest"
kube-vip manifest daemonset \
    --interface lo \
    --localAS <AS#> \
    --sourceIF <src interface> \
    --services \
    --inCluster \
    --bgp \
    --bgppeers <bgp-peer1>:<peerAS>::<bgp-multiphop-true-false>,<bgp-peer2>:<peerAS>::<bgp-multihop-true-false> | kubectl apply -f -
Explanation of the options provided above to kube-vip for manifest generation:
--interface — This interface needs to be set to the loopback in order to suppress ARP responses from worker nodes that get the LoadBalancer VIP assigned
--localAS — Local Autonomous System ID
--sourceIF — source interface on the worker node which will be used to communicate BGP with the switch
--services — Service Type LoadBalancer (not Control Plane)
--inCluster — Defaults to looking inside the Pod for the token
--bgp — Enables BGP peering from kube-vip
--bgppeers — Comma separated list of BGP peers in the format <address:AS:password:multihop>
Below is an example Daemonset creation command.
kube-vip manifest daemonset \
    --interface $INTERFACE \
    --localAS 65200 \
    --sourceIF eth0 \
    --services \
    --inCluster \
    --bgp \
    --bgppeers 10.69.20.2:65000::false,10.69.20.3:65000::false
Below is the manifest generated with these example values.
apiVersion: apps/v1 kind: DaemonSet metadata: creationTimestamp: null name: kube-vip-ds namespace: kube-system spec: selector: matchLabels: name: kube-vip-ds template: metadata: creationTimestamp: null labels: name: kube-vip-ds spec: containers: - args: - manager env: - name: vip_arp value: "false" - name: vip_interface value: lo - name: port value: "6443" - name: vip_cidr value: "32" - name: svc_enable value: "true" - name: cp_enable value: "false" - name: vip_startleader value: "false" - name: vip_addpeerstolb value: "true" - name: vip_localpeer value: docker-desktop:192.168.65.3:10000 - name: bgp_enable value: "true" - name: bgp_routerid - name: bgp_source_if value: eth0 - name: bgp_as value: "65200" - name: bgp_peeraddress - name: bgp_peerpass - name: bgp_peeras value: "65000" - name: bgp_peers value: 10.69.20.2:65000::false,10.69.20.3:65000::false - name: bgp_routerinterface value: eth0 - name: vip_address image: ghcr.io/kube-vip/kube-vip:v0.3.7 imagePullPolicy: Always name: kube-vip resources: {} securityContext: capabilities: add: - NET_ADMIN - NET_RAW - SYS_TIME hostNetwork: true serviceAccountName: kube-vip updateStrategy: {} status: currentNumberScheduled: 0 desiredNumberScheduled: 0 numberMisscheduled: 0 numberReady: 0 -
Manually add the following to the manifest file as shown in the example above
- name: bgp_routerinterface value: eth0 -
Deploy the Hello EKS Anywhere test application.
kubectl apply -f https://anywhere.eks.amazonaws.com/manifests/hello-eks-a.yaml -
Expose the hello-eks-a service
kubectl expose deployment hello-eks-a --port=80 --type=LoadBalancer --name=hello-eks-a-lb -
Describe the service to get the IP. The external IP will be the one in CIDR range specified in step 4
EXTERNAL_IP=$(kubectl get svc hello-eks-a-lb -o jsonpath='{.spec.externalIP}') -
Ensure the load balancer is working by curl’ing the IP you got in step 8
curl ${EXTERNAL_IP}
You should see something like this in the output
   ⬡⬢⬡⬢⬡⬢⬡⬢⬡⬢⬡⬢⬡⬢⬡⬢⬡⬢⬡⬢⬡⬢⬡⬢⬡⬢⬡⬢⬡⬢⬡⬢⬡⬢⬡⬢⬡⬢⬡⬢⬡⬢⬡⬢⬡⬢⬡⬢⬡⬢⬡⬢⬡⬢⬡⬢

   Thank you for using

   ███████╗██╗  ██╗███████╗
   ██╔════╝██║ ██╔╝██╔════╝
   █████╗  █████╔╝ ███████╗
   ██╔══╝  ██╔═██╗ ╚════██║
   ███████╗██║  ██╗███████║
   ╚══════╝╚═╝  ╚═╝╚══════╝

    █████╗ ███╗   ██╗██╗   ██╗██╗    ██╗██╗  ██╗███████╗██████╗ ███████╗
   ██╔══██╗████╗  ██║╚██╗ ██╔╝██║    ██║██║  ██║██╔════╝██╔══██╗██╔════╝
   ███████║██╔██╗ ██║ ╚████╔╝ ██║ █╗ ██║███████║█████╗  ██████╔╝█████╗
   ██╔══██║██║╚██╗██║  ╚██╔╝  ██║███╗██║██╔══██║██╔══╝  ██╔══██╗██╔══╝
   ██║  ██║██║ ╚████║   ██║   ╚███╔███╔╝██║  ██║███████╗██║  ██║███████╗
   ╚═╝  ╚═╝╚═╝  ╚═══╝   ╚═╝    ╚══╝╚══╝ ╚═╝  ╚═╝╚══════╝╚═╝  ╚═╝╚══════╝

   You have successfully deployed the hello-eks-a pod hello-eks-a-c5b9bc9d8-fx2fr

   For more information check out
   https://anywhere.eks.amazonaws.com

   ⬡⬢⬡⬢⬡⬢⬡⬢⬡⬢⬡⬢⬡⬢⬡⬢⬡⬢⬡⬢⬡⬢⬡⬢⬡⬢⬡⬢⬡⬢⬡⬢⬡⬢⬡⬢⬡⬢⬡⬢⬡⬢⬡⬢⬡⬢⬡⬢⬡⬢⬡⬢⬡⬢⬡⬢
BGP Configuration on Network Switch Side
BGP configuration will vary depending upon network vendor equipment and local network environment. Listed below are the basic conceptual configuration steps for BGP operation. Included with each step is a sample configuration from a Cisco Switch (Cisco Nexus 9000) running in NX-OS mode. You will need to find similar steps in your network vendor equipment’s manual for BGP configuration on your specific switch.
-
Configure BGP local AS, router ID, and timers
router bgp 65000 router-id 10.69.5.1 timers bgp 15 45 log-neighbor-changes -
Configure BGP neighbors
BGP neighbors can be configured individually or as a subnet
a. Individual BGP neighbors
Determine the IP addresses of each of the EKS-A nodes via VMWare console or DHCP server allocation.
In the example below, node IP addresses are 10.69.20.165, 10.69.20.167, and 10.69.20.170.
Note that remote-as is the AS used as the bgp_as value in the generated example manifest above.neighbor 10.69.20.165 remote-as 65200 address-family ipv4 unicast soft-reconfiguration inbound always neighbor 10.69.20.167 remote-as 65200 address-family ipv4 unicast soft-reconfiguration inbound always neighbor 10.69.20.170 remote-as 65200 address-family ipv4 unicast soft-reconfiguration inbound alwaysb. Subnet-based BGP neighbors
Determine the subnet address and netmask of the EKS-A nodes. In this example the EKS-A nodes are on 10.69.20.0/24 subnet. Note that remote-as is the AS used as the bgp_as value in the generated example manifest above.
neighbor 10.69.20.0/24 remote-as 65200 address-family ipv4 unicast soft-reconfiguration inbound always -
Verify bgp neighbors are established with each node
switch% show ip bgp summary information for VRF default, address family IPv4 Unicast BGP router identifier 10.69.5.1, local AS number 65000 BGP table version is 181, IPv4 Unicast config peers 7, capable peers 7 32 network entries and 63 paths using 11528 bytes of memory BGP attribute entries [16/2752], BGP AS path entries [6/48] BGP community entries [0/0], BGP clusterlist entries [0/0] 3 received paths for inbound soft reconfiguration 3 identical, 0 modified, 0 filtered received paths using 0 bytes Neighbor V AS MsgRcvd MsgSent TblVer InQ OutQ Up/Down State/PfxRcd 10.69.20.165 4 65200 34283 34276 181 0 0 5d20h 1 10.69.20.167 4 65200 34543 34531 181 0 0 5d20h 1 10.69.20.170 4 65200 34542 34530 181 0 0 5d20h 1 -
Verify routes learned from EKS-A cluster match the external IP address assigned by kube-vip LoadBalancer configuration
In the example below, 10.35.10.13 is the external kube-vip LoadBalancer IP
switch% show ip bgp neighbors 10.69.20.165 received-routes

Peer 10.69.20.165 routes for address family IPv4 Unicast:
BGP table version is 181, Local Router ID is 10.69.5.1
Status: s-suppressed, x-deleted, S-stale, d-dampened, h-history, *-valid, >-best
Path type: i-internal, e-external, c-confed, l-local, a-aggregate, r-redist, I-injected
Origin codes: i - IGP, e - EGP, ? - incomplete, | - multipath, & - backup, 2 - best2

   Network            Next Hop            Metric     LocPrf     Weight Path
*>e10.35.10.13/32     10.69.20.165                                   0 65200 i
1.2.2 - Alternative: MetalLB Service-type Load Balancer
The purpose of this document is to walk you through getting set up with MetalLB Kubernetes Load Balancer for your cluster. This is suggested as an alternative if your networking requirements do not allow you to use Kube-Vip .
MetalLB is a native Kubernetes load balancing solution for bare-metal Kubernetes clusters. Detailed information about MetalLB can be found here .
Prerequisites
You will need Helm installed on your system as this is the easiest way to deploy MetalLB. Helm can be installed from here . MetalLB installation is described here
Steps
-
Enable strict ARP as it’s required for MetalLB
kubectl get configmap kube-proxy -n kube-system -o yaml | \ sed -e "s/strictARP: false/strictARP: true/" | \ kubectl apply -f - -n kube-system -
Pull helm repo for metalLB
helm repo add metallb https://metallb.github.io/metallb -
Create an override file to specify LB IP range
LB-IP-RANGE can be a CIDR block like 198.18.210.0/24 or range like 198.18.210.0-198.18.210.10
cat << 'EOF' >> values.yaml configInline: address-pools: - name: default protocol: layer2 addresses: - <LB-IP-range> EOF -
Install metalLB on your cluster
helm install metallb metallb/metallb -f values.yaml -
Deploy the Hello EKS Anywhere test application.
kubectl apply -f https://anywhere.eks.amazonaws.com/manifests/hello-eks-a.yaml -
Expose the hello-eks-a deployment
kubectl expose deployment hello-eks-a --port=80 --type=LoadBalancer --name=hello-eks-a-lb -
Get the load balancer external IP
EXTERNAL_IP=$(kubectl get svc hello-eks-a-lb -o jsonpath='{.spec.externalIP}') -
Hit the external ip
curl ${EXTERNAL_IP}
1.3 - Add an ingress controller
A production-quality Kubernetes cluster requires planning and preparation for various networking features.
The purpose of this document is to walk you through getting set up with a recommended Kubernetes Ingress Controller for EKS Anywhere. Ingress Controller is essential in order to have routing rules that decide how external users access services running in a Kubernetes cluster. It enables efficient distribution of incoming network traffic among multiple backend services.
Current Recommendation: Emissary-ingress
We currently recommend using Emissary-ingress Kubernetes Ingress Controller by Ambassador. Emissary-ingress allows you to route and secure traffic to your cluster with an Open Source Kubernetes-native API Gateway. Detailed information about Emissary-ingress can be found here .
Setting up Emissary-ingress for Ingress Controller
-
Deploy the Hello EKS Anywhere test application.
kubectl apply -f "https://anywhere.eks.amazonaws.com/manifests/hello-eks-a.yaml" -
Set up kube-vip service type: Load Balancer in your cluster by following the instructions here . Alternatively, you can set up MetalLB Load Balancer by following the instructions here
-
Install Ambassador CRDs and ClusterRoles and RoleBindings
kubectl apply -f "https://www.getambassador.io/yaml/ambassador/ambassador-crds.yaml" kubectl apply -f "https://www.getambassador.io/yaml/ambassador/ambassador-rbac.yaml" -
Create Ambassador Service with Type LoadBalancer.
kubectl apply -f - <<EOF --- apiVersion: v1 kind: Service metadata: name: ambassador spec: type: LoadBalancer externalTrafficPolicy: Local ports: - port: 80 targetPort: 8080 selector: service: ambassador EOF -
Create a Mapping on your cluster. This Mapping tells Emissary-ingress to route all traffic inbound to the /backend/ path to the quote Service.
kubectl apply -f - <<EOF --- apiVersion: getambassador.io/v2 kind: Mapping metadata: name: hello-backend spec: prefix: /backend/ service: hello-eks-a EOF -
Store the Emissary-ingress load balancer IP address to a local environment variable. You will use this variable to test accessing your service.
export EMISSARY_LB_ENDPOINT=$(kubectl get svc ambassador -o "go-template={{range .status.loadBalancer.ingress}}{{or .ip .hostname}}{{end}}") -
Test the configuration by accessing the service through the Emissary-ingress load balancer.
curl -Lk http://$EMISSARY_LB_ENDPOINT/backend/NOTE: URL base path will need to match what is specified in the prefix exactly, including the trailing ‘/’
You should see something like this in the output
⬡⬢⬡⬢⬡⬢⬡⬢⬡⬢⬡⬢⬡⬢⬡⬢⬡⬢⬡⬢⬡⬢⬡⬢⬡⬢⬡⬢⬡⬢⬡⬢⬡⬢⬡⬢⬡⬢⬡⬢⬡⬢⬡⬢⬡⬢⬡⬢⬡⬢⬡⬢⬡⬢⬡⬢⬡⬢⬡⬢⬡⬢⬡⬢⬡⬢⬡⬢

Thank you for using

███████╗██╗  ██╗███████╗
██╔════╝██║ ██╔╝██╔════╝
█████╗  █████╔╝ ███████╗
██╔══╝  ██╔═██╗ ╚════██║
███████╗██║  ██╗███████║
╚══════╝╚═╝  ╚═╝╚══════╝

 █████╗ ███╗   ██╗██╗   ██╗██╗    ██╗██╗  ██╗███████╗██████╗ ███████╗
██╔══██╗████╗  ██║╚██╗ ██╔╝██║    ██║██║  ██║██╔════╝██╔══██╗██╔════╝
███████║██╔██╗ ██║ ╚████╔╝ ██║ █╗ ██║███████║█████╗  ██████╔╝█████╗
██╔══██║██║╚██╗██║  ╚██╔╝  ██║███╗██║██╔══██║██╔══╝  ██╔══██╗██╔══╝
██║  ██║██║ ╚████║   ██║   ╚███╔███╔╝██║  ██║███████╗██║  ██║███████╗
╚═╝  ╚═╝╚═╝  ╚═══╝   ╚═╝    ╚══╝╚══╝ ╚═╝  ╚═╝╚══════╝╚═╝  ╚═╝╚══════╝

You have successfully deployed the hello-eks-a pod hello-eks-a-c5b9bc9d8-fx2fr

For more information check out
https://anywhere.eks.amazonaws.com

⬡⬢⬡⬢⬡⬢⬡⬢⬡⬢⬡⬢⬡⬢⬡⬢⬡⬢⬡⬢⬡⬢⬡⬢⬡⬢⬡⬢⬡⬢⬡⬢⬡⬢⬡⬢⬡⬢⬡⬢⬡⬢⬡⬢⬡⬢⬡⬢⬡⬢⬡⬢⬡⬢⬡⬢⬡⬢⬡⬢⬡⬢⬡⬢⬡⬢⬡⬢
1.4 - Secure connectivity with CNI and Network Policy
EKS Anywhere uses Cilium for pod networking and security.
Cilium is installed by default as a Kubernetes CNI plugin and so is already running in your EKS Anywhere cluster.
This section provides information about:
-
Understanding Cilium components and requirements
-
Validating your Cilium networking setup.
-
Using Cilium to securing workload connectivity using Kubernetes Network Policy.
Cilium Components
The primary Cilium Agent runs as a DaemonSet on each Kubernetes node. Each cluster also includes a Cilium Operator Deployment to handle certain cluster-wide operations. For EKS Anywhere, Cilium is configured to use the Kubernetes API server as the identity store, so no etcd cluster connectivity is required.
In a properly working environment, each Kubernetes node should have a Cilium Agent pod (cilium-WXYZ) in “Running” and ready (1/1) state.
By default there will be two
Cilium Operator pods (cilium-operator-123456-WXYZ) in “Running” and ready (1/1) state on different Kubernetes nodes for high-availability.
Run the following command to ensure all cilium related pods are in a healthy state.
kubectl get pods -n kube-system | grep cilium
Example output for this command in a 3 node environment is:
kube-system   cilium-fsjmd                                1/1     Running           0          4m
kube-system   cilium-nqpkv                                1/1     Running           0          4m
kube-system   cilium-operator-58ff67b8cd-jd7rf            1/1     Running           0          4m
kube-system   cilium-operator-58ff67b8cd-kn6ss            1/1     Running           0          4m
kube-system   cilium-zz4mt                                1/1     Running           0          4m
Network Connectivity Requirements
To provide pod connectivity within an on-premises environment, the Cilium agent implements an overlay network using the GENEVE tunneling protocol. As a result, UDP port 6081 connectivity MUST be allowed by any firewall running between Kubernetes nodes running the Cilium agent.
Allowing ICMP Ping (type = 8, code = 0) as well as TCP port 4240 is also recommended in order for Cilium Agents to validate node-to-node connectivity as part of internal status reporting.
Validating Connectivity
Cilium includes a connectivity check YAML that can be deployed into a test namespace in order to validate proper installation and connectivity within a Kubernetes cluster. If the connectivity check passes, all pods created by the YAML manifest will reach “Running” and ready (1/1) state. We recommend running this test only once you have multiple worker nodes in your environment to ensure you are validating cross-node connectivity.
It is important that this test is run in a dedicated namespace, with no existing network policy. For example:
kubectl create ns cilium-test
kubectl apply -n cilium-test -f https://docs.isovalent.com/v1.10/public/connectivity-check-eksa.yaml
Once all pods have started, simply checking the status of pods in this namespace will indicate whether the tests have passed:
kubectl get pods -n cilium-test
Successful test output will show all pods in a “Running” and ready (1/1) state:
NAME                                                     READY   STATUS    RESTARTS   AGE
echo-a-d576c5f8b-zlfsk                                   1/1     Running   0          59s
echo-b-787dc99778-sxlcc                                  1/1     Running   0          59s
echo-b-host-675cd8cfff-qvvv8                             1/1     Running   0          59s
host-to-b-multi-node-clusterip-6fd884bcf7-pvj5d          1/1     Running   0          58s
host-to-b-multi-node-headless-79f7df47b9-8mzbp           1/1     Running   0          58s
pod-to-a-57695cc7ff-6tqpv                                1/1     Running   0          59s
pod-to-a-allowed-cnp-7b6d5ff99f-4rhrs                    1/1     Running   0          59s
pod-to-a-denied-cnp-6887b57579-zbs2t                     1/1     Running   0          59s
pod-to-b-intra-node-hostport-7d656d7bb9-6zjrl            1/1     Running   0          57s
pod-to-b-intra-node-nodeport-569d7c647-76gn5             1/1     Running   0          58s
pod-to-b-multi-node-clusterip-fdf45bbbc-8l4zz            1/1     Running   0          59s
pod-to-b-multi-node-headless-64b6cbdd49-9hcqg            1/1     Running   0          59s
pod-to-b-multi-node-hostport-57fc8854f5-9d8m8            1/1     Running   0          58s
pod-to-b-multi-node-nodeport-54446bdbb9-5xhfd            1/1     Running   0          58s
pod-to-external-1111-56548587dc-rmj9f                    1/1     Running   0          59s
pod-to-external-fqdn-allow-google-cnp-5ff4986c89-z4h9j   1/1     Running   0          59s
Afterward, simply delete the namespace to clean-up the connectivity test:
kubectl delete ns cilium-test
Kubernetes Network Policy
By default, all Kubernetes workloads within a cluster can talk to any other workloads in the cluster, as well as any workloads outside the cluster. To enable a stronger security posture, Cilium implements the Kubernetes Network Policy specification to provide identity-aware firewalling / segmentation of Kubernetes workloads.
Network policies are defined as Kubernetes YAML specifications that are applied to a particular namespaces to describe that connections should be allowed to or from a given set of pods. These network policies are “identity-aware” in that they describe workloads within the cluster using Kubernetes metadata like namespace and labels, rather than by IP Address.
Basic network policies are validated as part of the above Cilium connectivity check test.
For next steps on leveraging Network Policy, we encourage you to explore:
-
A hands-on Network Policy Intro Tutorial .
-
The visual Network Policy Editor .
-
The #networkpolicy channel on Cilium Slack .
-
Other resources on networkpolicy.io .
Additional Cilium Features
Many advanced features of Cilium are not yet enabled as part of EKS Anywhere, including: Hubble observability, DNS-aware and HTTP-Aware Network Policy, Multi-cluster Routing, Transparent Encryption, and Advanced Load-balancing.
Please contact the EKS Anywhere team if you are interested in leveraging these advanced features along with EKS Anywhere.
2 - Cluster management
2.1 - Cluster management overview
The content in this page will describe the tools and interfaces available to an administrator after an EKS Anywhere cluster is up and running. It will also describe which administrative actions done:
- Directly in Kubernetes itself (such as adding nodes with
kubectl) - Through the EKS Anywhere API (such as deleting a cluster with
eksctl). - Through tools which interface with the Kubernetes API (such as managing a cluster with
terraform)
Note that direct changes to OVAs before nodes are deployed is not yet supported. However, we are working on a solution for that issue.
2.2 - Etcd Backup and Restore
This page contains steps for backing up a cluster by taking an etcd snapshot, and restoring the cluster from a snapshot. These steps are for an EKS Anywhere cluster provisioned using the external etcd topology (selected by default) and Ubuntu OVAs.
Use case
EKS-Anywhere clusters use etcd as the backing store. Taking a snapshot of etcd backs up the entire cluster data. This can later be used to restore a cluster back to an earlier state if required. Etcd backups can be taken prior to cluster upgrade, so if the upgrade doesn’t go as planned you can restore from the backup.
Backup
Etcd offers a built-in snapshot mechanism. You can take a snapshot using the etcdctl snapshot save command by following the steps given below.
- Login to any one of the etcd VMs
ssh -i $PRIV_KEY ec2-user@$ETCD_VM_IP
- Run the etcdctl command to take a snapshot with the following steps
sudo su
source /etc/etcd/etcdctl.env
etcdctl snapshot save snapshot.db
chown ec2-user snapshot.db
- Exit the VM. Copy the snapshot from the VM to your local/admin setup where you can save snapshots in a secure place. Before running scp, make sure you don’t already have a snapshot file saved by the same name locally.
scp -i $PRIV_KEY ec2-user@$ETCD_VM_IP:/home/ec2-user/snapshot.db .
NOTE: This snapshot file contains all information stored in the cluster, so make sure you save it securely (encrypt it).
Restore
Restoring etcd is a 2-part process. The first part is restoring etcd using the snapshot, creating a new data-dir for etcd. The second part is replacing the current etcd data-dir with the one generated after restore. During etcd data-dir replacement, we cannot have any kube-apiserver instances running in the cluster. So we will first stop all instances of kube-apiserver and other controlplane components using the following steps for every controlplane VM:
Pausing Etcdadm controller reconcile
During restore, it is required to pause the Etcdadm controller reconcile for the target cluster (whether it is management or workload cluster). To do that, you need to add a cluster.x-k8s.io/paused annotation to the target cluster’s etcdadmclusters resource. For example,
kubectl annotate etcdadmclusters workload-cluster-1-etcd cluster.x-k8s.io/paused=true -n eksa-system --kubeconfig mgmt-cluster.kubeconfig
Stopping the controlplane components
- Login to a controlplane VM
ssh -i $PRIV_KEY ec2-user@$CONTROLPLANE_VM_IP
- Stop controlplane components by moving the static pod manifests under a temp directory:
sudo su
mkdir temp-manifests
mv /etc/kubernetes/manifests/*.yaml temp-manifests
- Repeat these steps for all other controlplane VMs
After this you can restore etcd from a saved snapshot using the etcdctl snapshot save command following the steps given below.
Restoring from the snapshot
- The snapshot file should be made available in every etcd VM of the cluster. You can copy it to each etcd VM using this command:
scp -i $PRIV_KEY snapshot.db ec2-user@$ETCD_VM_IP:/home/ec2-user
- To run the etcdctl snapshot restore command, you need to provide the following configuration parameters:
- name: This is the name of the etcd member. The value of this parameter should match the value used while starting the member. This can be obtained by running:
export ETCD_NAME=$(cat /etc/etcd/etcd.env | grep ETCD_NAME | awk -F'=' '{print $2}')
- initial-advertise-peer-urls: This is the advertise peer URL with which this etcd member was configured. It should be the exact value with which this etcd member was started. This can be obtained by running:
export ETCD_INITIAL_ADVERTISE_PEER_URLS=$(cat /etc/etcd/etcd.env | grep ETCD_INITIAL_ADVERTISE_PEER_URLS | awk -F'=' '{print $2}')
- initial-cluster: This should be a comma-separated mapping of etcd member name and its peer URL. For this, get the
ETCD_NAMEandETCD_INITIAL_ADVERTISE_PEER_URLSvalues for each member and join them. And then use this exact value for all etcd VMs. For example, for a 3 member etcd cluster this is what the value would look like (The command below cannot be run directly without substituting the required variables and is meant to be an example)
export ETCD_INITIAL_CLUSTER=${ETCD_NAME_1}=${ETCD_INITIAL_ADVERTISE_PEER_URLS_1},${ETCD_NAME_2}=${ETCD_INITIAL_ADVERTISE_PEER_URLS_2},${ETCD_NAME_3}=${ETCD_INITIAL_ADVERTISE_PEER_URLS_3}
- initial-cluster-token: Set this to a unique value and use the same value for all etcd members of the cluster. It can be any value such as
etcd-cluster-1as long as it hasn’t been used before.
- Gather the required env vars for the restore command
cat <<EOF >> restore.env
export ETCD_NAME=$(cat /etc/etcd/etcd.env | grep ETCD_NAME | awk -F'=' '{print $2}')
export ETCD_INITIAL_ADVERTISE_PEER_URLS=$(cat /etc/etcd/etcd.env | grep ETCD_INITIAL_ADVERTISE_PEER_URLS | awk -F'=' '{print $2}')
EOF

cat /etc/etcd/etcdctl.env >> restore.env
- Make sure you form the correct
ETCD_INITIAL_CLUSTERvalue using all etcd members, and set it as an env var in the restore.env file created in the above step. - Once you have obtained all the right values, run the following commands to restore etcd replacing the required values:
sudo su
source restore.env
etcdctl snapshot restore snapshot.db --name=${ETCD_NAME} --initial-cluster=${ETCD_INITIAL_CLUSTER} --initial-cluster-token=etcd-cluster-1 --initial-advertise-peer-urls=${ETCD_INITIAL_ADVERTISE_PEER_URLS}
- This is going to create a new data-dir for the restored contents under a new directory
{ETCD_NAME}.etcd. To start using this, restart etcd with the new data-dir with the following steps:
systemctl stop etcd.service
mv /var/lib/etcd/member /var/lib/etcd/member.bak
mv ${ETCD_NAME}.etcd/member /var/lib/etcd/
- Perform this directory swap on all etcd VMs, and then start etcd again on those VMs
systemctl start etcd.service
NOTE: Until the etcd process is started on all VMs, it might appear stuck on the VMs where it was started first, but this should be temporary.
Starting the controlplane components
- Login to a controlplane VM
ssh -i $PRIV_KEY ec2-user@$CONTROLPLANE_VM_IP
- Start the controlplane components by moving back the static pod manifests from under the temp directory to the /etc/kubernetes/manifests directory:
mv temp-manifests/*.yaml /etc/kubernetes/manifests
- Repeat these steps for all other controlplane VMs
- It may take a few minutes for the kube-apiserver and the other components to get restarted. After this you should be able to access all objects present in the cluster at the time the backup was taken.
Resuming Etcdadm controller reconcile
Resume Etcdadm controller reconcile for the target cluster by removing the cluster.x-k8s.io/paused annotation in the target cluster’s etcdadmclusters resource. For example,
kubectl annotate etcdadmclusters workload-cluster-1-etcd cluster.x-k8s.io/paused- -n eksa-system
2.3 - Verify cluster
To verify that a cluster control plane is up and running, use the kubectl command to show that the control plane pods are all running.
kubectl get po -A -l control-plane=controller-manager
NAMESPACE                           NAME                                                             READY   STATUS    RESTARTS   AGE
capi-kubeadm-bootstrap-system       capi-kubeadm-bootstrap-controller-manager-57b99f579f-sd85g       2/2     Running   0          47m
capi-kubeadm-control-plane-system   capi-kubeadm-control-plane-controller-manager-79cdf98fb8-ll498   2/2     Running   0          47m
capi-system                         capi-controller-manager-59f4547955-2ks8t                         2/2     Running   0          47m
capi-webhook-system                 capi-controller-manager-bb4dc9878-2j8mg                          2/2     Running   0          47m
capi-webhook-system                 capi-kubeadm-bootstrap-controller-manager-6b4cb6f656-qfppd       2/2     Running   0          47m
capi-webhook-system                 capi-kubeadm-control-plane-controller-manager-bf7878ffc-rgsm8    2/2     Running   0          47m
capi-webhook-system                 capv-controller-manager-5668dbcd5-v5szb                          2/2     Running   0          47m
capv-system                         capv-controller-manager-584886b7bd-f66hs                         2/2     Running   0          47m
You may also check the status of the cluster control plane resource directly. This can be especially useful to verify clusters with multiple control plane nodes after an upgrade.
kubectl get kubeadmcontrolplanes.controlplane.cluster.x-k8s.io
NAME                       INITIALIZED   API SERVER AVAILABLE   VERSION              REPLICAS   READY   UPDATED   UNAVAILABLE
supportbundletestcluster   true          true                   v1.20.7-eks-1-20-6   1          1       1
To verify that the expected number of cluster worker nodes are up and running, use the kubectl command to show that nodes are Ready.
This will confirm that the expected number of worker nodes are present.
Worker nodes are named using the cluster name followed by the worker node group name (example: my-cluster-md-0)
kubectl get nodes
NAME                                           STATUS   ROLES                  AGE    VERSION
supportbundletestcluster-md-0-55bb5ccd-mrcf9   Ready    <none>                 4m   v1.20.7-eks-1-20-6
supportbundletestcluster-md-0-55bb5ccd-zrh97   Ready    <none>                 4m   v1.20.7-eks-1-20-6
supportbundletestcluster-mdrwf                 Ready    control-plane,master   5m   v1.20.7-eks-1-20-6
To test a workload in your cluster you can try deploying the hello-eks-anywhere .
2.4 - Add cluster integrations
EKS Anywhere offers AWS support for certain third-party vendor components, namely Ubuntu TLS, Cilium, and Flux. It also provides flexibility for you to integrate with your choice of tools in other areas. Below is a list of example third-party tools your consideration.
For a full list of partner integration options, please visit Amazon EKS Anywhere Partner page .
Note
The solutions listed on this page have not been tested by AWS and are not covered by the EKS Anywhere Support Subscription.| Feature | Example third-party tools |
|---|---|
| Ingress controller | Gloo Edge , Emissary-ingress (previously Ambassador) |
| Service type load balancer | KubeVip or MetalLB |
| Local container repository | Harbor |
| Monitoring | Prometheus , Grafana , Datadog , or NewRelic |
| Logging | Splunk or Fluentbit |
| Secret management | Hashi Vault |
| Policy agent | Open Policy Agent |
| Service mesh | Istio , Gloo Mesh , or Linkerd |
| Cost management | KubeCost |
| Etcd backup and restore | Velero |
| Storage | Default storage class, any compatible CSI |
2.5 - Connect cluster to console
The AWS EKS Connector lets you connect your EKS Anywhere cluster to the AWS EKS console, where you can see your the EKS Anywhere cluster, its configuration, workloads, and their status. EKS Connector is a software agent that can be deployed on your EKS Anywhere cluster, enabling the cluster to register with the EKS console.
Visit AWS EKS Connector for details.
2.6 - License cluster
If you are are licensing an existing cluster, apply the following secret to your cluster (replacing my-license-here with your license):
kubectl apply -f - <<EOF
apiVersion: v1
kind: Secret
metadata:
  name: eksa-license
  namespace: eksa-system
stringData:
  license: "my-license-here"
type: Opaque
EOF
2.7 - Scale cluster
When you are scaling your EKS Anywhere cluster, consider the number of nodes you need for your control plane and for your data plane. Each plane can be scaled horizontally (add more nodes) or vertically (provide nodes with more resources). In each case you can scale the cluster manually, semi-automatically, or automatically.
See the Kubernetes Components documentation to learn the differences between the control plane and the data plane (worker nodes).
Manual cluster scaling
Horizontally scaling the cluster is done by increasing the number for the control plane or worker node groups under the Cluster specification.
NOTE: If etcd is running on your control plane (the default configuration) you should scale your control plane in odd numbers (3, 5, 7…).
apiVersion: anywhere.eks.amazonaws.com/v1
kind: Cluster
metadata:
  name: test-cluster
spec:
  controlPlaneConfiguration:
    count: 1     # increase this number to horizontally scale your control plane
...
  workerNodeGroupsConfiguration:
  - count: 1     # increase this number to horizontally scale your data plane
Vertically scaling your cluster is done by updating the machine config spec for your infrastructure provider. For a vSphere cluster an example is
NOTE: Not all providers can be vertically scaled (e.g. bare metal)
apiVersion: anywhere.eks.amazonaws.com/v1
kind: VSphereMachineConfig
metadata:
  name: test-machine
  namespace: default
spec:
  diskGiB: 25       # increase this number to make the VM disk larger
  numCPUs: 2        # increase this number to add vCPUs to your VM
  memoryMiB: 8192   # increase this number to add memory to your VM
Once you have made configuration updates you can apply the changes to your cluster. If you are adding or removing a node, only the terminated nodes will be affected. If you are vertically scaling your nodes, then all nodes will be replaced one at a time.
eksctl anywhere upgrade cluster -f cluster.yaml
Semi-automatic scaling
Scaling your cluster in a semi-automatic way still requires changing your cluster manifest configuration. In a semi-automatic mode you change your cluster spec and then have automation make the cluster changes.
You can do this by storing your cluster config manifest in git and then having a CI/CD system deploy your changes. Or you can use a GitOps controller to apply the changes. To read more about making changes with the integrated Flux GitOps controller you can read how to Manage a cluster with GitOps .
Automatic scaling
Automatic cluster scaling is designed for worker nodes and it is not advised to automatically scale your control plane. Typically, autoscaling is done with a controller such as the Kubernetes Cluster Autoscaler . This has some concerns in an on-prem environment.
Automatic scaling does not work with some providers such as Docker or bare metal. An EKS Anywhere cluster currently is not intended to be used with the Kubernetes Cluster Autoscaler so that it does not interfere with built in controllers or cause unexpected machine thrashing.
In future versions of EKS Anywhere we will be adding support for automatic autoscaling for specific providers.
2.8 - Upgrade cluster
EKS Anywhere provides the command upgrade, which allows you to upgrade various aspects of your EKS Anywhere cluster.
When you run eksctl anywhere upgrade cluster -f ./cluster.yaml, EKS Anywhere runs a set of preflight checks to ensure your cluster is ready to be upgraded.
EKS Anywhere then performs the upgrade, modifying your cluster to match the updated specification.
The upgrade command also upgrades core components of EKS Anywhere and lets the user enjoy the latest features, bug fixes and security patches.
Minor Version Upgrades
Kubernetes has minor releases three times per year and EKS Distro follows a similar cadence. EKS Anywhere will add support for new EKS Distro releases as they are released, and you are advised to upgrade your cluster when possible.
Cluster upgrades are not handled automatically and require administrator action to modify the cluster specification and perform an upgrade. You are advised to upgrade your clusters in development environments first and verify your workloads and controllers are compatible with the new version.
Cluster upgrades are performed in place using a rolling process (similar to Kubernetes Deployments).
Upgrades can only happen one minor version at a time (e.g. 1.20 -> 1.21).
Control plane components will be upgraded before worker nodes.
A new VM is created with the new version and then an old VM is removed. This happens one at a time until all the control plane components have been upgraded.
Core component upgrades
EKS Anywhere upgrade also supports upgrading the following core components:
- Core CAPI
- CAPI providers
- Cilium CNI plugin
- Cert-manager
- Etcdadm CAPI provider
- EKS Anywhere controllers and CRDs
- GitOps controllers (Flux) - this is an optional component, will be upgraded only if specified
The latest versions of these core EKS Anywhere components are embedded into a bundles manifest that the CLI uses to fetch the latest versions and image builds needed for each component upgrade. The command detects both component version changes and new builds of the same versioned component. If there is a new Kubernetes version that is going to get rolled out, the core components get upgraded before the Kubernetes version. Irrespective of a Kubernetes version change, the upgrade command will always upgrade the internal EKS Anywhere components mentioned above to their latest available versions. All upgrade changes are backwards compatible.
Check upgrade components
Before you perform an upgrade, check the current and new versions of components that are ready to upgrade by typing:
Management Cluster
eksctl anywhere upgrade plan cluster -f mgmt-cluster.yaml
Workload Cluster
eksctl anywhere upgrade plan cluster -f workload-cluster.yaml --kubeconfig mgmt/mgmt-eks-a-cluster.kubeconfig
The output should appear similar to the following:
Worker node group name not specified. Defaulting name to md-0.
Warning: The recommended number of control plane nodes is 3 or 5
Worker node group name not specified. Defaulting name to md-0.
Checking new release availability...
NAME                     CURRENT VERSION                 NEXT VERSION
EKS-A                    v0.0.0-dev+build.1000+9886ba8   v0.0.0-dev+build.1105+46598cb
cluster-api              v1.0.2+e8c48f5                  v1.0.2+1274316
kubeadm                  v1.0.2+92c6d7e                  v1.0.2+aa1a03a
vsphere                  v1.0.1+efb002c                  v1.0.1+ef26ac1
kubadm                   v1.0.2+f002eae                  v1.0.2+f443dcf
etcdadm-bootstrap        v1.0.2-rc3+54dcc82              v1.0.0-rc3+df07114
etcdadm-controller       v1.0.2-rc3+a817792              v1.0.0-rc3+a310516
To the format output in json, add -o json to the end of the command line.
Performing a cluster upgrade
To perform a cluster upgrade you can modify your cluster specification kubernetesVersion field to the desired version.
As an example, to upgrade a cluster with version 1.20 to 1.21 you would change your spec
apiVersion: anywhere.eks.amazonaws.com/v1alpha1
kind: Cluster
metadata:
  name: dev
spec:
  controlPlaneConfiguration:
    count: 1
    endpoint:
      host: "198.18.99.49"
    machineGroupRef:
      kind: VSphereMachineConfig
      name: dev
      ...
  kubernetesVersion: "1.21"
      ...
NOTE: If you have a custom machine image for your nodes you may also need to update your
vsphereMachineConfigwith a newtemplate.
and then you will run the command
Management Cluster
eksctl anywhere upgrade cluster -f mgmt-cluster.yaml
Workload Cluster
eksctl anywhere upgrade cluster -f workload-cluster.yaml --kubeconfig mgmt/mgmt-eks-a-cluster.kubeconfig
This will upgrade the cluster specification (if specified), upgrade the core components to the latest available versions and apply the changes using the provisioner controllers.
Example output:
✅ control plane ready
✅ worker nodes ready
✅ nodes ready
✅ cluster CRDs ready
✅ cluster object present on workload cluster
✅ upgrade cluster kubernetes version increment
✅ validate immutable fields
🎉 all cluster upgrade preflight validations passed
Performing provider setup and validations
Pausing EKS-A cluster controller reconcile
Pausing Flux kustomization
GitOps field not specified, pause flux kustomization skipped
Creating bootstrap cluster
Installing cluster-api providers on bootstrap cluster
Moving cluster management from workload to bootstrap cluster
Upgrading workload cluster
Moving cluster management from bootstrap to workload cluster
Applying new EKS-A cluster resource; resuming reconcile
Resuming EKS-A controller reconciliation
Updating Git Repo with new EKS-A cluster spec
GitOps field not specified, update git repo skipped
Forcing reconcile Git repo with latest commit
GitOps not configured, force reconcile flux git repo skipped
Resuming Flux kustomization
GitOps field not specified, resume flux kustomization skipped
Upgradeable Cluster Attributes
EKS Anywhere upgrade supports upgrading more than just the kubernetesVersion,
allowing you to upgrade a number of fields simultaneously with the same procedure.
Upgradeable Attributes
Cluster:
kubernetesVersioncontrolPlaneConfig.countcontrolPlaneConfigurations.machineGroupRef.nameworkerNodeGroupConfigurations.countworkerNodeGroupConfigurations.machineGroupRef.nameetcdConfiguration.externalConfiguration.machineGroupRef.nameidentityProviderRefs(Only forkind:OIDCConfig,kind:AWSIamConfigis immutable)
VSphereMachineConfig:
datastorediskGiBfoldermemoryMiBnumCPUsresourcePooltemplateusers
OIDCConfig:
clientIDgroupsClaimgroupsPrefixissuerUrlrequiredClaims.claimrequiredClaims.valueusernameClaimusernamePrefix
EKS Anywhere upgrade also supports adding more worker node groups post-creation.
To add more worker node groups, modify your cluster config file to define the additional group(s).
Example:
apiVersion: anywhere.eks.amazonaws.com/v1alpha1
kind: Cluster
metadata:
  name: dev
spec:
  controlPlaneConfiguration:
     ...
  workerNodeGroupConfigurations:
  - count: 2
    machineGroupRef:
      kind: VSphereMachineConfig
      name: my-cluster-machines
    name: md-0
  - count: 2
    machineGroupRef:
      kind: VSphereMachineConfig
      name: my-cluster-machines
    name: md-1
      ...
Worker node groups can use the same machineGroupRef as previous groups, or you can define a new machine configuration for your new group.
Troubleshooting
Attempting to upgrade a cluster with more than 1 minor release will result in receiving the following error.
✅ validate immutable fields
❌ validation failed    {"validation": "Upgrade preflight validations", "error": "validation failed with 1 errors: WARNING: version difference between upgrade version (1.21) and server version (1.19) do not meet the supported version increment of +1", "remediation": ""}
Error: failed to upgrade cluster: validations failed
For more errors you can see the troubleshooting section .
2.9 - Authenticate cluster with AWS IAM Authenticator
AWS IAM Authenticator Support (optional)
EKS Anywhere supports configuring AWS IAM Authenticator as an authentication provider for clusters.
When you create a cluster with IAM Authenticator enabled, EKS Anywhere
- Installs
aws-iam-authenticatorserver as a DaemonSet on the workload cluster. - Configures the Kubernetes API Server to communicate with iam authenticator using a token authentication webhook .
- Creates the necessary ConfigMaps based on user options.
Note
Enabling IAM Authenticator needs to be done during cluster creation.Create IAM Authenticator enabled cluster
Generate your cluster configuration and add the necessary IAM Authenticator configuration. For a full spec reference check AWSIamConfig .
Create an EKS Anywhere cluster as follows:
CLUSTER_NAME=my-cluster-name
eksctl anywhere create cluster -f ${CLUSTER_NAME}.yaml
Example AWSIamConfig configuration
This example uses a region in the default aws partition and EKSConfigMap as backendMode. Also, the IAM ARNs are mapped to the kubernetes system:masters group.
apiVersion: anywhere.eks.amazonaws.com/v1alpha1
kind: Cluster
metadata:
   name: my-cluster-name
spec:
   ...
   # IAM Authenticator
   identityProviderRefs:
      - kind: AWSIamConfig
        name: aws-iam-auth-config
---
apiVersion: anywhere.eks.amazonaws.com/v1alpha1
kind: AWSIamConfig
metadata:
   name: aws-iam-auth-config
spec:
    awsRegion: us-west-1
    backendMode:
        - EKSConfigMap
    mapRoles:
        - roleARN: arn:aws:iam::XXXXXXXXXXXX:role/myRole
          username: myKubernetesUsername
          groups:
          - system:masters
    mapUsers:
        - userARN: arn:aws:iam::XXXXXXXXXXXX:user/myUser
          username: myKubernetesUsername
          groups:
          - system:masters
    partition: aws
Note
When using backend modeCRD, the mapRoles and mapUsers are not required. For more details on configuring CRD mode, refer to CRD
Authenticating with IAM Authenticator
After your cluster is created you may now use the mapped IAM ARNs to authenticate to the cluster.
EKS Anywhere generates a KUBECONFIG file in your local directory that uses aws-iam-authenticator client to authenticate with the cluster. The file can be found at
${PWD}/${CLUSTER_NAME}/${CLUSTER_NAME}-aws.kubeconfig
Steps
-
Ensure the IAM role/user ARN mapped in the cluster is configured on the local machine from which you are trying to access the cluster.
-
Install the
aws-iam-authenticator clientbinary on the local machine.- We recommend installing the binary referenced in the latest
release manifestof the kubernetes version used when creating the cluster. - The below commands can be used to fetch the installation uri for clusters created with
1.21kubernetes version and OSlinux.
CLUSTER_NAME=my-cluster-name KUBERNETES_VERSION=1.21 export KUBECONFIG=${PWD}/${CLUSTER_NAME}/${CLUSTER_NAME}-eks-a-cluster.kubeconfig EKS_D_MANIFEST_URL=$(kubectl get bundles $CLUSTER_NAME -o jsonpath="{.spec.versionsBundles[?(@.kubeVersion==\"$KUBERNETES_VERSION\")].eksD.manifestUrl}") OS=linux curl -fsSL $EKS_D_MANIFEST_URL | yq e '.status.components[] | select(.name=="aws-iam-authenticator") | .assets[] | select(.os == '"\"$OS\""' and .type == "Archive") | .archive.uri' - - We recommend installing the binary referenced in the latest
-
Export the generated IAM Authenticator based
KUBECONFIGfile.export KUBECONFIG=${PWD}/${CLUSTER_NAME}/${CLUSTER_NAME}-aws.kubeconfig -
Run
kubectlcommands to check cluster access. Example,kubectl get pods -A
Modify IAM Authenticator mappings
EKS Anywhere supports modifying IAM ARNs that are mapped on the cluster. The mappings can be modified by either running the upgrade cluster command or using GitOps.
upgrade command
The mapRoles and mapUsers lists in AWSIamConfig can be modified when running the upgrade cluster command from EKS Anywhere.
As an example, let’s add another IAM user to the above example configuration.
apiVersion: anywhere.eks.amazonaws.com/v1alpha1
kind: AWSIamConfig
metadata:
   name: aws-iam-auth-config
spec:
    ...
    mapUsers:
        - userARN: arn:aws:iam::XXXXXXXXXXXX:user/myUser
          username: myKubernetesUsername
          groups:
          - system:masters
        - userARN: arn:aws:iam::XXXXXXXXXXXX:user/anotherUser
          username: anotherKubernetesUsername
    partition: aws
and then run the upgrade command
CLUSTER_NAME=my-cluster-name
eksctl anywhere upgrade cluster -f ${CLUSTER_NAME}.yaml
EKS Anywhere now updates the role mappings for IAM authenticator in the cluster and a new user gains access to the cluster.
GitOps
If the cluster created has GitOps configured, then the mapRoles and mapUsers list in AWSIamConfig can be modified by the GitOps controller. For GitOps configuration details refer to Manage Cluster with GitOps
.
- Clone your git repo and modify the cluster specification.
The default path for the cluster file is:
clusters/$CLUSTER_NAME/eksa-system/eksa-cluster.yaml - Modify the
AWSIamConfigobject and add to themapRolesandmapUsersobject lists. - Commit the file to your git repository
git add eksa-cluster.yaml
git commit -m 'Adding IAM Authenticator access ARNs'
git push origin main
EKS Anywhere GitOps Controller now updates the role mappings for IAM authenticator in the cluster and users gains access to the cluster.
2.10 - Manage cluster with GitOps
GitOps Support (optional)
EKS Anywhere supports a GitOps workflow for the management of your cluster.
When you create a cluster with GitOps enabled, EKS Anywhere will automatically commit your cluster configuration to the provided GitHub repository and install a GitOps toolkit on your cluster which watches that committed configuration file. You can then manage the scale of the cluster by making changes to the version controlled cluster configuration file and committing the changes. Once a change has been detected by the GitOps controller running in your cluster, the scale of the cluster will be adjusted to match the committed configuration file.
If you’d like to learn more about GitOps, and the associated best practices, check out this introduction from Weaveworks .
NOTE: Installing a GitOps controller needs to be done during cluster creation. In the event that GitOps installation fails, EKS Anywhere cluster creation will continue.
Supported Cluster Properties
Currently, you can manage a subset of cluster properties with GitOps:
Management Cluster
Cluster:
workerNodeGroupConfigurations.countworkerNodeGroupConfigurations.machineGroupRef.name
WorkerNodes VSphereMachineConfig:
datastorediskGiBfoldermemoryMiBnumCPUsresourcePooltemplateusers
Workload Cluster
Cluster:
kubernetesVersioncontrolPlaneConfiguration.countcontrolPlaneConfiguration.machineGroupRef.nameworkerNodeGroupConfigurations.countworkerNodeGroupConfigurations.machineGroupRef.nameidentityProviderRefs(Only forkind:OIDCConfig,kind:AWSIamConfigis immutable)
ControlPlane / Etcd / WorkerNodes VSphereMachineConfig:
datastorediskGiBfoldermemoryMiBnumCPUsresourcePooltemplateusers
OIDCConfig:
clientIDgroupsClaimgroupsPrefixissuerUrlrequiredClaims.claimrequiredClaims.valueusernameClaimusernamePrefix
Any other changes to the cluster configuration in the git repository will be ignored. If an immutable field has been changed in a Git repository, there are two ways to find the error message:
- If a notification webhook is set up, check the error message in notification channel.
- Check the Flux Kustomization Controller log:
kubectl logs -f -n flux-system kustomize-controller-******for error message containing text similar toInvalid value: 1: field is immutable
Getting Started with EKS Anywhere GitOps with Github
In order to use GitOps to manage cluster scaling, you need a couple of things:
- A GitHub account
- A cluster configuration file with a
GitOpsConfig, referenced with agitOpsRefin your Cluster spec - A Personal Access Token (PAT) for the GitHub account , with permissions to create, clone, and push to a repo
Create a GitHub Personal Access Token
Create a Personal Access Token (PAT)
to access your provided GitHub repository.
It must be scoped for all repo permissions.
NOTE: GitOps configuration only works with hosted github.com and will not work on a self-hosted GitHub Enterprise instances.
This PAT should have at least the following permissions:
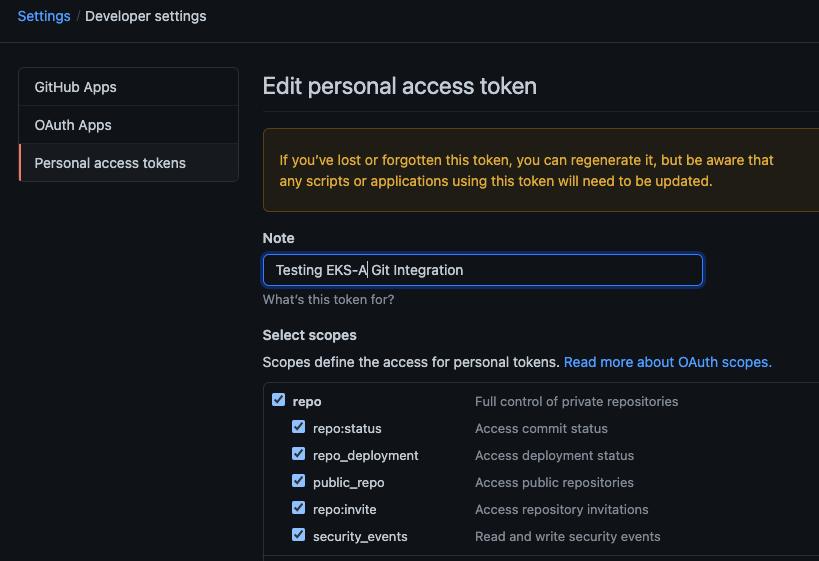
NOTE: The PAT must belong to the
ownerof therepositoryor, if using an organization as theowner, the creator of thePATmust have repo permission in that organization.
You need to set your PAT as the environment variable $EKSA_GITHUB_TOKEN to use it during cluster creation:
export EKSA_GITHUB_TOKEN=ghp_MyValidPersonalAccessTokenWithRepoPermissions
Create GitOps configuration repo
If you have an existing repo you can set that as your repository name in the configuration.
If you specify a repo in your FluxConfig which does not exist EKS Anywhere will create it for you.
If you would like to create a new repo you can click here
to create a new repo.
If your repository contains multiple cluster specification files, store them in sub-folders and specify the configuration path in your cluster specification.
In order to accommodate the management cluster feature, the CLI will now structure the repo directory following a new convention:
clusters
└── management-cluster
    ├── flux-system
    │   └── ...
    ├── management-cluster
    │   └── eksa-system
    │       └── eksa-cluster.yaml
    ├── workload-cluster-1
    │   └── eksa-system
    │       └── eksa-cluster.yaml
    └── workload-cluster-2
        └── eksa-system
            └── eksa-cluster.yaml
By default, Flux kustomization reconciles at the management cluster’s root level (./clusters/management-cluster), so both the management cluster and all the workload clusters it manages are synced.
Example GitOps cluster configuration for Github
apiVersion: anywhere.eks.amazonaws.com/v1alpha1
kind: Cluster
metadata:
  name: mynewgitopscluster
spec:
... # collapsed cluster spec fields
# Below added for gitops support
  gitOpsRef:
    kind: FluxConfig
    name: my-cluster-name
---
apiVersion: anywhere.eks.amazonaws.com/v1alpha1
kind: FluxConfig
metadata:
  name: my-cluster-name
spec:
    github:
      personal: true
      repository: mygithubrepository
      owner: mygithubusername
Create a GitOps enabled cluster
Generate your cluster configuration and add the GitOps configuration. For a full spec reference see the Cluster Spec reference .
NOTE: After your cluster has been created the cluster configuration will automatically be committed to your git repo.
-
Create an EKS Anywhere cluster with GitOps enabled.
CLUSTER_NAME=gitops
eksctl anywhere create cluster -f ${CLUSTER_NAME}.yaml
Test GitOps controller
After your cluster has been created, you can test the GitOps controller by modifying the cluster specification.
-
Clone your git repo and modify the cluster specification. The default path for the cluster file is:
clusters/$CLUSTER_NAME/eksa-system/eksa-cluster.yaml -
Modify the
workerNodeGroupsConfigurations[0].countfield with your desired changes. -
Commit the file to your git repository
git add eksa-cluster.yaml git commit -m 'Scaling nodes for test' git push origin main -
The flux controller will automatically make the required changes.
If you updated your node count, you can use this command to see the current node state.
kubectl get nodes
Getting Started with EKS Anywhere GitOps with any Git source
You can configure EKS Anywhere to use a generic git repository as the source of truth for GitOps by providing a FluxConfig with a git configuration.
EKS Anywhere requires a valid SSH Known Hosts file and SSH Private key in order to connect to your repository and bootstrap Flux.
Create a Git repository for use by EKS Anywhere and Flux
When using the git provider, EKS Anywhere requires that the configuration repository be pre-initialized.
You may re-use an existing repo or use the same repo for multiple management clusters.
Create the repository through your git provider and initialize it with a README.md documenting the purpose of the repository.
Create a Private Key for use by EKS Anywhere and Flux
EKS Anywhere requires a private key to authenticate to your git repository, push the cluster configuration, and configure Flux for ongoing management and monitoring of that configuration. The private key should have permissions to read and write from the repository in question.
It is recommended that you create a new private key for use exclusively by EKS Anywhere.
You can use ssh-keygen to generate a new key.
ssh-keygen -t ecdsa -C "my_email@example.com"
Please consult the documentation for your git provider to determine how to add your corresponding public key; for example, if using Github enterprise, you can find the documentation for adding a public key to your github account here .
Add your private key to your SSH agent on your management machine
When using a generic git provider, EKS Anywhere requires that your management machine has a running SSH agent and the private key be added to that SSH agent.
You can start an SSH agent and add your private key by executing the following in your current session:
eval "$(ssh-agent -s)" && ssh-add $EKSA_GIT_PRIVATE_KEY
Create an SSH Known Hosts file for use by EKS Anywhere and Flux
EKS Anywhere needs an SSH known hosts file to verify the identity of the remote git host.
A path to a valid known hosts file must be provided to the EKS Anywhere command line via the environment variable EKSA_GIT_KNOWN_HOSTS.
For example, if you have a known hosts file at /home/myUser/.ssh/known_hosts that you want EKS Anywhere to use, set the environment variable EKSA_GIT_KNOWN_HOSTS to the path to that file, /home/myUser/.ssh/known_hosts.
export EKSA_GIT_KNOWN_HOSTS=/home/myUser/.ssh/known_hosts
While you can use your pre-existing SSH known hosts file, it is recommended that you generate a new known hosts file for use by EKS Anywhere that contains only the known-hosts entries required for your git host and key type.
For example, if you wanted to generate a known hosts file for a git server located at example.com with key type ecdsa, you can use the OpenSSH utility ssh-keyscan:
ssh-keyscan -t ecdsa example.com >> my_eksa_known_hosts
This will generate a known hosts file which contains only the entry necessary to verify the identity of example.com when using an ecdsa based private key file.
Example FluxConfig cluster configuration for a generic git provider
For a full spec reference see the Cluster Spec reference .
apiVersion: anywhere.eks.amazonaws.com/v1alpha1
kind: Cluster
metadata:
  name: mynewgitopscluster
spec:
... # collapsed cluster spec fields
# Below added for gitops support
  gitOpsRef:
    kind: FluxConfig
    name: my-cluster-name
---
apiVersion: anywhere.eks.amazonaws.com/v1alpha1
kind: FluxConfig
metadata:
  name: my-cluster-name
spec:
    git:
      repositoryUrl: ssh://git@provider.com/myAccount/myClusterGitopsRepo.git
      sshKeyAlgorithm: ecdsa
2.11 - Manage cluster with Terraform
Using Terraform to manage an EKS Anywhere Cluster (Optional)
This guide explains how you can use Terraform to manage and modify an EKS Anywhere cluster. The guide is meant for illustrative purposes and is not a definitive approach to building production systems with Terraform and EKS Anywhere.
At its heart, EKS Anywhere is a set of Kubernetes CRDs, which define an EKS Anywhere cluster,
and a controller, which moves the cluster state to match these definitions.
These CRDs, and the EKS-A controller, live on the management cluster or
on a self-managed cluster.
We can manage a subset of the fields in the EKS Anywhere CRDs with any tool that can interact with the Kubernetes API, like kubectl or, in this case, the Terraform Kubernetes provider.
In this guide, we’ll show you how to import your EKS Anywhere cluster into Terraform state and how to scale your EKS Anywhere worker nodes using the Terraform Kubernetes provider.
Prerequisites
-
An existing EKS Anywhere cluster
-
the latest version of Terraform
-
the latest version of tfk8s , a tool for converting Kubernetes manifest files to Terraform HCL
Guide
- Create an EKS-A management cluster, or a self-managed stand-alone cluster.
- if you already have an existing EKS-A cluster, skip this step.
- if you don’t already have an existing EKS-A cluster, follow the official instructions to create one
-
Set up the Terraform Kubernetes provider Make sure your KUBECONFIG environment variable is set
export KUBECONFIG=/path/to/my/kubeconfig.kubeconfigSet an environment variable with your cluster name:
export MY_EKSA_CLUSTER="myClusterName"cat << EOF > ./provider.tf provider "kubernetes" { config_path = "${KUBECONFIG}" } EOF -
Get
tfk8sand use it to convert your EKS Anywhere cluster Kubernetes manifest into Terraform HCL:- Install tfk8s
- Convert the manifest into Terraform HCL:
kubectl get cluster ${MY_EKSA_CLUSTER} -o yaml | tfk8s --strip -o ${MY_EKSA_CLUSTER}.tf -
Configure the Terraform cluster resource definition generated in step 2
- Set
metadata.generationas a computed field . Add the following to your cluster resource configuration
computed_fields = ["metadata.generated"]- Configure the field manager to force reconcile managed resources . Add the following configuration block to your cluster resource:
field_manager { force_conflicts = true }- Add the
namespacedefaultto themetadataof the cluster - Remove the
generationfield from themetadataof the cluster - Your Terraform cluster resource should look similar to this:
computed_fields = ["metadata.generated"] field_manager { force_conflicts = true } manifest = { "apiVersion" = "anywhere.eks.amazonaws.com/v1alpha1" "kind" = "Cluster" "metadata" = { "name" = "MyClusterName" "namespace" = "default" } - Set
-
Import your EKS Anywhere cluster into terraform state:
terraform init
terraform import kubernetes_manifest.cluster_${MY_EKSA_CLUSTER} "apiVersion=anywhere.eks.amazonaws.com/v1alpha1,kind=Cluster,namespace=default,name=${MY_EKSA_CLUSTER}"
After you
importyour cluster, you will need to runterraform applyone time to ensure that themanifestfield of your cluster resource is in-sync. This will not change the state of your cluster, but is a required step after the initial import. Themanifestfield stores the contents of the associated kubernetes manifest, while theobjectfield stores the actual state of the resource. -
Modify Your Cluster using Terraform
- Modify the
countvalue of one of yourworkerNodeGroupConfigurations, or another mutable field, in the configuration stored in${MY_EKSA_CLUSTER}.tffile. - Check the expected diff between your cluster state and the modified local state via
terraform plan
You should see in the output that the worker node group configuration count field (or whichever field you chose to modify) will be modified by Terraform.
- Modify the
-
Now, actually change your cluster to match the local configuration:
terraform apply -
Observe the change to your cluster. For example:
kubectl get nodes
Appendix
Terraform K8s Provider https://registry.terraform.io/providers/hashicorp/kubernetes/latest/docs
2.12 - Delete cluster
Deleting a workload cluster
Follow these steps to delete your EKS Anywhere cluster that is managed by a separate management cluster.
To delete a workload cluster, you will need:
- name of your workload cluster
- kubeconfig of your workload cluster
- kubeconfig of your management cluster
Run the following commands to delete the cluster:
-
Set up
CLUSTER_NAMEandKUBECONFIGenvironment variables:export CLUSTER_NAME=eksa-w01-cluster export KUBECONFIG=${CLUSTER_NAME}/${CLUSTER_NAME}-eks-a-cluster.kubeconfig export MANAGEMENT_KUBECONFIG=<path-to-management-cluster-kubeconfig> -
Run the delete command:
-
If you are running the delete command from the directory which has the cluster folder with
${CLUSTER_NAME}/${CLUSTER_NAME}-eks-a-cluster.yaml:eksctl anywhere delete cluster ${CLUSTER_NAME} --kubeconfig ${MANAGEMENT_KUBECONFIG}
Deleting a management cluster
Follow these steps to delete your management cluster.
To delete a cluster you will need:
- cluster name or cluster configuration
- kubeconfig of your cluster
Run the following commands to delete the cluster:
-
Set up
CLUSTER_NAMEandKUBECONFIGenvironment variables:export CLUSTER_NAME=mgmt export KUBECONFIG=${CLUSTER_NAME}/${CLUSTER_NAME}-eks-a-cluster.kubeconfig -
Run the delete command:
-
If you are running the delete command from the directory which has the cluster folder with
${CLUSTER_NAME}/${CLUSTER_NAME}-eks-a-cluster.yaml:eksctl anywhere delete cluster ${CLUSTER_NAME} -
Otherwise, use this command to manually specify the clusterconfig file path:
export CONFIG_FILE=<path-to-config-file>
eksctl anywhere delete cluster -f ${CONFIG_FILE}
Example output:
Performing provider setup and validations
Creating management cluster
Installing cluster-api providers on management cluster
Moving cluster management from workload cluster
Deleting workload cluster
Clean up Git Repo
GitOps field not specified, clean up git repo skipped
🎉 Cluster deleted!
This will delete all of the VMs that were created in your provider. If your workloads created external resources such as external DNS entries or load balancer endpoints you may need to delete those resources manually.
3 - Cluster troubleshooting
3.1 - Troubleshooting
This guide covers some generic troubleshooting techniques and then cover more detailed examples. You may want to search this document for a fragment of the error you are seeing.
Increase eksctl anywhere output
If you’re having trouble running eksctl anywhere you may get more verbose output with the -v 6 option. The highest level of verbosity is -v 9 and the default level of logging is level equivalent to -v 0.
Cannot run docker commands
The EKS Anywhere binary requires access to run docker commands without using sudo.
If you’re using a Linux distribution you will need to be using Docker 20.x.x add your user needs to be part of the docker group.
To add your user to the docker group you can use.
sudo usermod -a -G docker $USER
Now you need to log out and back in to get the new group permissions.
Minimum requirements for docker version have not been met
Error: failed to validate docker: minimum requirements for docker version have not been met. Install Docker version 20.x.x or above
Ensure you are running Docker 20.x.x for example:
% docker --version
Docker version 20.10.6, build 370c289
Minimum requirements for docker version have not been met on Mac OS
Error: EKS Anywhere does not support Docker desktop versions between 4.3.0 and 4.4.1 on macOS
Error: EKS Anywhere requires Docker desktop to be configured to use CGroups v1. Please set `deprecatedCgroupv1:true` in your `~/Library/Group\\ Containers/group.com.docker/settings.json` file
Ensure you are running Docker Desktop 4.4.2 or newer and have set "deprecatedCgroupv1": true in your settings.json file
% defaults read /Applications/Docker.app/Contents/Info.plist CFBundleShortVersionString
4.42
% docker info --format '{{json .CgroupVersion}}'
"1"
ECR access denied
Error: failed to create cluster: unable to initialize executables: failed to setup eks-a dependencies: Error response from daemon: pull access denied for public.ecr.aws/***/cli-tools, repository does not exist or may require 'docker login': denied: Your authorization token has expired. Reauthenticate and try again.
All images needed for EKS Anywhere are public and do not need authentication. Old cached credentials could trigger this error. Remove cached credentials by running:
docker logout public.ecr.aws
EKSA_VSPHERE_USERNAME is not set or is empty
❌ Validation failed {"validation": "vsphere Provider setup is valid", "error": "failed setup and validations: EKSA_VSPHERE_USERNAME is not set or is empty", "remediation": ""}
Two environment variables need to be set and exported in your environment to create clusters successfully. Be sure to use single quotes around your user name and password to avoid shell manipulation of these values.
export EKSA_VSPHERE_USERNAME='<vSphere-username>'
export EKSA_VSPHERE_PASSWORD='<vSphere-password>'
vSphere authentication failed
❌ Validation failed	{"validation": "vsphere Provider setup is valid", "error": "error validating vCenter setup: vSphere authentication failed: govc: ServerFaultCode: Cannot complete login due to an incorrect user name or password.\n", "remediation": ""}
Error: failed to create cluster: validations failed
Two environment variables need to be set and exported in your environment to create clusters successfully. Be sure to use single quotes around your user name and password to avoid shell manipulation of these values.
export EKSA_VSPHERE_USERNAME='<vSphere-username>'
export EKSA_VSPHERE_PASSWORD='<vSphere-password>'
error unmarshaling JSON: while decoding JSON: json: unknown field “spec”
Error: loading config file "cluster.yaml": error unmarshaling JSON: while decoding JSON: json: unknown field "spec"
Use eksctl anywhere create cluster -f cluster.yaml instead of eksctl create cluster -f cluster.yaml to create an EKS Anywhere cluster.
Error: old cluster config file exists under my-cluster, please use a different clusterName to proceed
Error: old cluster config file exists under my-cluster, please use a different clusterName to proceed
The my-cluster directory already exists in the current directory.
Either use a different cluster name or move the directory.
failed to create cluster: node(s) already exist for a cluster with the name
Performing provider setup and validations
Creating new bootstrap cluster
Error create bootstrapcluster	{"error": "error creating bootstrap cluster: error executing create cluster: ERROR: failed to create cluster: node(s) already exist for a cluster with the name \"cluster-name\"\n, try rerunning with --force-cleanup to force delete previously created bootstrap cluster"}
Failed to create cluster	{"error": "error creating bootstrap cluster: error executing create cluster: ERROR: failed to create cluster: node(s) already exist for a cluster with the name \"cluster-name\"\n, try rerunning with --force-cleanup to force delete previously created bootstrap cluster"}ry rerunning with --force-cleanup to force delete previously created bootstrap cluster"}
A bootstrap cluster already exists with the same name. If you are sure the cluster is not being used, you may use the --force-cleanup option to eksctl anywhere to delete the cluster or you may delete the cluster with kind delete cluster --name <cluster-name>. If you do not have kind installed, you may use docker stop to stop the docker container running the KinD cluster.
Bootstrap cluster fails to come up
If your bootstrap cluster has problems you may get detailed logs by looking at the files created under the ${CLUSTER_NAME}/logs folder. The capv-controller-manager log file will surface issues with vsphere specific configuration while the capi-controller-manager log file might surface other generic issues with the cluster configuration passed in.
You may also access the logs from your bootstrap cluster directly as below:
export KUBECONFIG=${PWD}/${CLUSTER_NAME}/generated/${CLUSTER_NAME}.kind.kubeconfig
kubectl logs -f -n capv-system -l control-plane="controller-manager" -c manager
It also might be useful to start a shell session on the docker container running the bootstrap cluster by running docker ps and then docker exec -it <container-id> bash the kind container.
Memory or disk resource problem
There are various disk and memory issues that can cause problems. Make sure docker is configured with enough memory. Make sure the system wide Docker memory configuration provides enough RAM for the bootstrap cluster.
Make sure you do not have unneeded KinD clusters running kind get clusters.
You may want to delete unneeded clusters with kind delete cluster --name <cluster-name>.
If you do not have kind installed, you may install it from https://kind.sigs.k8s.io/
or use docker ps to see the KinD clusters and docker stop to stop the cluster.
Make sure you do not have any unneeded Docker containers running with docker ps.
Terminate any unneeded Docker containers.
Make sure Docker isn’t out of disk resources.
If you don’t have any other docker containers running you may want to run docker system prune to clean up disk space.
You may want to restart Docker.
To restart Docker on Ubuntu sudo systemctl restart docker.
Issues detected with selected template
Issues detected with selected template. Details: - -1:-1:VALUE_ILLEGAL: No supported hardware versions among [vmx-15]; supported: [vmx-04, vmx-07, vmx-08, vmx-09, vmx-10, vmx-11, vmx-12, vmx-13].
Our upstream dependency on CAPV makes it a requirement that you use vSphere 6.7 update 3 or newer. Make sure your ESXi hosts are also up to date.
Waiting for cert-manager to be available… Error: timed out waiting for the condition
Failed to create cluster {"error": "error initializing capi resources in cluster: error executing init: Fetching providers\nInstalling cert-manager Version=\"v1.1.0\"\nWaiting for cert-manager to be available...\nError: timed out waiting for the condition\n"}
This is likely a Memory or disk resource problem . You can also try using techniques from Generic cluster unavailable .
Timed out waiting for the condition on deployments/capv-controller-manager
Failed to create cluster {"error": "error initializing capi in bootstrap cluster: error waiting for capv-controller-manager in namespace capv-system: error executing wait: error: timed out waiting for the condition on deployments/capv-controller-manager\n"}
Debug this problem using techniques from Generic cluster unavailable .
Timed out waiting for the condition on clusters/
Failed to create cluster {"error": "error waiting for workload cluster control plane to be ready: error executing wait: error: timed out waiting for the condition on clusters/test-cluster\n"}
This can be an issue with the number of control plane and worker node replicas defined in your cluster yaml file. Try to start off with a smaller number (3 or 5 is recommended for control plane) in order to bring up the cluster.
This error can also occur because your vCenter server is using self-signed certificates and you have insecure set to true in the generated cluster yaml.
To check if this is the case, run the commands below:
export KUBECONFIG=${PWD}/${CLUSTER_NAME}/generated/${CLUSTER_NAME}.kind.kubeconfig
kubectl get machines
If all the machines are in Provisioning phase, this is most likely the issue.
To resolve the issue, set insecure to false and thumbprint to the TLS thumbprint of your vCenter server in the cluster yaml and try again.
"msg"="discovered IP address"
The aforementioned log message can also appear with an address value of the control plane in either of the ${CLUSTER_NAME}/logs/capv-controller-manager.log file or the capv-controller-manager pod log which can be extracted with the following command,
export KUBECONFIG=${PWD}/${CLUSTER_NAME}/generated/${CLUSTER_NAME}.kind.kubeconfig
kubectl logs -f -n capv-system -l control-plane="controller-manager" -c manager
Make sure you are choosing an ip in your network range that does not conflict with other VMs. https://anywhere.eks.amazonaws.com/docs/reference/clusterspec/vsphere/#controlplaneconfigurationendpointhost-required
The connection to the server localhost:8080 was refused
Performing provider setup and validations
Creating new bootstrap cluster
Installing cluster-api providers on bootstrap cluster
Error initializing capi in bootstrap cluster	{"error": "error waiting for capi-kubeadm-control-plane-controller-manager in namespace capi-kubeadm-control-plane-system: error executing wait: The connection to the server localhost:8080 was refused - did you specify the right host or port?\n"}
Failed to create cluster	{"error": "error waiting for capi-kubeadm-control-plane-controller-manager in namespace capi-kubeadm-control-plane-system: error executing wait: The connection to the server localhost:8080 was refused - did you specify the right host or port?\n"}
This is likely a Memory or disk resource problem .
Generic cluster unavailable
Troubleshoot more by inspecting bootstrap cluster or workload cluster (depending on the stage of failure) using kubectl commands.
kubectl get pods -A --kubeconfig=<kubeconfig>
kubectl get nodes -A --kubeconfig=<kubeconfig>
kubectl get logs <podname> -n <namespace> --kubeconfig=<kubeconfig>
....
Capv troubleshooting guide: https://github.com/kubernetes-sigs/cluster-api-provider-vsphere/blob/master/docs/troubleshooting.md#debugging-issues
Workload VM is created on vSphere but can not power on
A similar issue is the VM does power on but does not show any logs on the console and does not have any IPs assigned.
This issue can occur if the resourcePool that the VM uses does not have enough CPU or memory resources to run a VM.
To resolve this issue, increase the CPU and/or memory reservations or limits for the resourcePool.
Workload VMs start but Kubernetes not working properly
If the workload VMs start, but Kubernetes does not start or is not working properly, you may want to log onto the VMs and check the logs there.
If Kubernetes is at least partially working, you may use kubectl to get the IPs of the nodes:
kubectl get nodes -o=custom-columns="NAME:.metadata.name,IP:.status.addresses[2].address"
If Kubernetes is not working at all, you can get the IPs of the VMs from vCenter or using govc.
When you get the external IP you can ssh into the nodes using the private ssh key associated with the public ssh key you provided in your cluster configuration:
ssh -i <ssh-private-key> <ssh-username>@<external-IP>
create command stuck on Creating new workload cluster
There can we a few reasons if the create command is stuck on Creating new workload cluster for over 30 min.
First, check the vSphere UI to see if any workload VM are created.
If any VMs are created, check to see if they have any IPv4 IPs assigned to them.
If there are no IPv4 IPs assigned to them, this is most likely because you don’t have a DHCP server configured for the network configured in the cluster config yaml.
Ensure that you have DHCP running and run the create command again.
If there are any IPv4 IPs assigned, check if one of the VMs have the controlPlane IP specified in Cluster.spec.controlPlaneConfiguration.endpoint.host in the clusterconfig yaml.
If this IP is not present on any control plane VM, make sure the network has access to the following endpoints:
- public.ecr.aws
- anywhere-assets.eks.amazonaws.com (to download the EKS Anywhere binaries, manifests and OVAs)
- distro.eks.amazonaws.com (to download EKS Distro binaries and manifests)
- d2glxqk2uabbnd.cloudfront.net (for EKS Anywhere and EKS Distro ECR container images)
- api.github.com (only if GitOps is enabled)
If the IPv4 IPs are assigned to the VM and you have the workload kubeconfig under <cluster-name>/<cluster-name>-eks-a-cluster.kubeconfig, you can use it to check vsphere-cloud-controller-manager logs.
kubectl logs -n kube-system vsphere-cloud-controller-manager-<xxxxx> --kubeconfig <cluster-name>/<cluster-name>-eks-a-cluster.kubeconfig
If you see this message in the logs, it means your cluster nodes do not have access to vSphere, which is required for cluster to get to a ready state.
Failed to connect to <vSphere-FQDN>: connection refused
In this case, you need to enable inbound traffic from your cluster nodes on your vCenter’s management network.
If VMs are created, but they do not get a network connection and DHCP is not configured for your vSphere deployment, you may need to create your own DHCP server
.
If no VMs are created, check the capi-controller-manager, capv-controller-manager and capi-kubeadm-control-plane-controller-manager logs using the commands mentioned in Generic cluster unavailable
section.
Cluster Deletion Fails
If cluster deletion fails, you may need to manually delete the VMs associated with the cluster.
The VMs should be named with the cluster name.
You can power off and delete from disk using the vCenter web user interface.
You may also use govc:
govc find -type VirtualMachine --name '<cluster-name>*'
This will give you a list of virtual machines that should be associated with your cluster. For each of the VMs you want to delete run:
VM_NAME=vm-to-destroy
govc vm.power -off -force $VM_NAME
govc object.destroy $VM_NAME
Troubleshooting GitOps integration
Cluster creation failure leaves outdated cluster configuration in GitHub.com repository
Failed cluster creation can sometimes leave behind cluster configuration files committed to your GitHub.com repository.
Make sure to delete these configuration files before you re-try eksctl anywhere create cluster.
If these configuration files are not deleted, GitOps installation will fail but cluster creation will continue.
They’ll generally be located under the directory
clusters/$CLUSTER_NAME if you used the default path in your flux gitops config.
Delete the entire directory named $CLUSTER_NAME.
Cluster creation failure leaves empty GitHub.com repository
Failed cluster creation can sometimes leave behind a completely empty GitHub.com repository. This can cause the GitOps installation to fail if you re-try the creation of a cluster which uses this repository. If cluster creation failure leaves behind an empty github repository, please manually delete the created GitHub.com repository before attempting cluster creation again.
Changes not syncing to cluster
Please remember that the only fields currently supported for GitOps are:
Cluster
Cluster.workerNodeGroupConfigurations.countCluster.workerNodeGroupConfigurations.machineGroupRef.name
Worker Nodes
VsphereMachineConfig.diskGiBVsphereMachineConfig.numCPUsVsphereMachineConfig.memoryMiBVsphereMachineConfig.templateVsphereMachineConfig.datastoreVsphereMachineConfig.folderVsphereMachineConfig.resourcePool
If you’ve changed these fields and they’re not syncing to the cluster as you’d expect,
check out the logs of the pod in the source-controller deployment in the flux-system namespaces.
If flux is having a problem connecting to your GitHub repository the problem will be logged here.
$ kubectl get pods -n flux-system
NAME                                       READY   STATUS    RESTARTS   AGE
helm-controller-7d644b8547-k8wfs           1/1     Running   0          4h15m
kustomize-controller-7cf5875f54-hs2bt      1/1     Running   0          4h15m
notification-controller-776f7d68f4-v22kp   1/1     Running   0          4h15m
source-controller-7c4555748d-7c7zb         1/1     Running   0          4h15m
$ kubectl logs source-controller-7c4555748d-7c7zb -n flux-system
A well behaved flux pod will simply log the ongoing reconciliation process, like so:
{"level":"info","ts":"2021-07-01T19:58:51.076Z","logger":"controller.gitrepository","msg":"Reconciliation finished in 902.725344ms, next run in 1m0s","reconciler group":"source.toolkit.fluxcd.io","reconciler kind":"GitRepository","name":"flux-system","namespace":"flux-system"}
{"level":"info","ts":"2021-07-01T19:59:52.012Z","logger":"controller.gitrepository","msg":"Reconciliation finished in 935.016754ms, next run in 1m0s","reconciler group":"source.toolkit.fluxcd.io","reconciler kind":"GitRepository","name":"flux-system","namespace":"flux-system"}
{"level":"info","ts":"2021-07-01T20:00:52.982Z","logger":"controller.gitrepository","msg":"Reconciliation finished in 970.03174ms, next run in 1m0s","reconciler group":"source.toolkit.fluxcd.io","reconciler kind":"GitRepository","name":"flux-system","namespace":"flux-system"}
If there are issues connecting to GitHub, you’ll instead see exceptions in the source-controller log stream.
For example, if the deploy key used by flux has been deleted, you’d see something like this:
{"level":"error","ts":"2021-07-01T20:04:56.335Z","logger":"controller.gitrepository","msg":"Reconciler error","reconciler group":"source.toolkit.fluxcd.io","reconciler kind":"GitRepository","name":"flux-system","namespace":"flux-system","error":"unable to clone 'ssh://git@github.com/youruser/gitops-vsphere-test', error: ssh: handshake failed: ssh: unable to authenticate, attempted methods [none publickey], no supported methods remain"}
Other ways to troubleshoot GitOps integration
If you’re still having problems after deleting any empty EKS Anywhere created GitHub repositories and looking at the source-controller logs.
You can look for additional issues by checking out the deployments in the flux-system and eksa-system namespaces and ensure they’re running and their log streams are free from exceptions.
$ kubectl get deployments -n flux-system
NAME                      READY   UP-TO-DATE   AVAILABLE   AGE
helm-controller           1/1     1            1           4h13m
kustomize-controller      1/1     1            1           4h13m
notification-controller   1/1     1            1           4h13m
source-controller         1/1     1            1           4h13m
$ kubectl get deployments -n eksa-system
NAME                      READY   UP-TO-DATE   AVAILABLE   AGE
eksa-controller-manager   1/1     1            1           4h13m
3.2 - Generating a Support Bundle
This guide covers the use of the EKS Anywhere Support Bundle for troubleshooting and support. This allows you to gather cluster information, save it to your administrative machine, and perform analysis of the results.
EKS Anywhere leverages troubleshoot.sh to collect and analyze kubernetes cluster logs, cluster resource information, and other relevant debugging information.
EKS Anywhere has two Support Bundle commands:
eksctl anywhere generate support-bundle will execute a support bundle on your cluster,
collecting relevant information, archiving it locally, and performing analysis of the results.
eksctl anywhere generate support-bundle-config will generate a Support Bundle config yaml file for you to customize.
Do not add personally identifiable information (PII) or other confidential or sensitive information to your support bundle. If you provide the support bundle to get support from AWS, it will be accessible to other AWS services, including AWS Support.
Collecting a Support Bundle and running analyzers
eksctl anywhere generate support-bundle
generate support-bundle will allow you to quickly collect relevant logs and cluster resources and save them locally in an archive file.
This archive can then be used to aid in further troubleshooting and debugging.
If you provide a cluster configuration file containing your cluster spec using the -f flag,
generate support-bundle will customize the auto-generated support bundle collectors and analyzers
to match the state of your cluster.
If you provide a support bundle configuration file using the --bundle-config flag,
for example one generated with generate support-bundle-config,
generate support-bundle will use the provided configuration when collecting information from your cluster and analyzing the results.
Flags:
      --bundle-config string   Bundle Config file to use when generating support bundle
  -f, --filename string        Filename that contains EKS-A cluster configuration
  -h, --help                   help for support-bundle
      --since string           Collect pod logs in the latest duration like 5s, 2m, or 3h.
      --since-time string      Collect pod logs after a specific datetime(RFC3339) like 2021-06-28T15:04:05Z
  -w, --w-config string        Kubeconfig file to use when creating support bundle for a workload cluster
Collecting and analyzing a bundle
You only need to run a single command to generate a support bundle, collect information and analyze the output:
eksctl anywhere generate support-bundle -f myCluster.yaml
This command will collect the information from your cluster and run an analysis of the collected information.
The collected information will be saved to your local disk in an archive which can be used for debugging and obtaining additional in-depth support.
The analysis will be printed to your console.
Collect phase:
$ ./bin/eksctl anywhere generate support-bundle -f ./testcluster100.yaml
 Collecting support bundle cluster-info
 Collecting support bundle cluster-resources
 Collecting support bundle secret
 Collecting support bundle logs
 Analyzing support bundle
Analysis phase:
 Analyze Results
------------
Check PASS
Title: gitopsconfigs.anywhere.eks.amazonaws.com
Message: gitopsconfigs.anywhere.eks.amazonaws.com is present on the cluster

------------
Check PASS
Title: vspheredatacenterconfigs.anywhere.eks.amazonaws.com
Message: vspheredatacenterconfigs.anywhere.eks.amazonaws.com is present on the cluster

------------
Check PASS
Title: vspheremachineconfigs.anywhere.eks.amazonaws.com
Message: vspheremachineconfigs.anywhere.eks.amazonaws.com is present on the cluster

------------
Check PASS
Title: capv-controller-manager Status
Message: capv-controller-manager is running.

------------
Check PASS
Title: capv-controller-manager Status
Message: capv-controller-manager is running.

------------
Check PASS
Title: coredns Status
Message: coredns is running.

------------
Check PASS
Title: cert-manager-webhook Status
Message: cert-manager-webhook is running.

------------
Check PASS
Title: cert-manager-cainjector Status
Message: cert-manager-cainjector is running.

------------
Check PASS
Title: cert-manager Status
Message: cert-manager is running.

------------
Check PASS
Title: capi-kubeadm-control-plane-controller-manager Status
Message: capi-kubeadm-control-plane-controller-manager is running.

------------
Check PASS
Title: capi-kubeadm-bootstrap-controller-manager Status
Message: capi-kubeadm-bootstrap-controller-manager is running.

------------
Check PASS
Title: capi-controller-manager Status
Message: capi-controller-manager is running.

------------
Check PASS
Title: capi-controller-manager Status
Message: capi-controller-manager is running.

------------
Check PASS
Title: capi-kubeadm-control-plane-controller-manager Status
Message: capi-kubeadm-control-plane-controller-manager is running.

------------
Check PASS
Title: capi-kubeadm-control-plane-controller-manager Status
Message: capi-kubeadm-control-plane-controller-manager is running.

------------
Check PASS
Title: capi-kubeadm-bootstrap-controller-manager Status
Message: capi-kubeadm-bootstrap-controller-manager is running.

------------
Check PASS
Title: clusters.anywhere.eks.amazonaws.com
Message: clusters.anywhere.eks.amazonaws.com is present on the cluster

------------
Check PASS
Title: bundles.anywhere.eks.amazonaws.com
Message: bundles.anywhere.eks.amazonaws.com is present on the cluster

------------
Archive phase:
a support bundle has been created in the current directory: {"path": "support-bundle-2021-09-02T19_29_41.tar.gz"}
Generating a custom Support Bundle configuration for your EKS Anywhere Cluster
EKS Anywhere will automatically generate a support bundle based on your cluster configuration; however, if you’d like to customize the support bundle to collect specific information, you can generate your own support bundle configuration yaml for EKS Anywhere to run on your cluster.
eksctl anywhere generate support-bundle-config will generate a default support bundle configuration and print it as yaml.
eksctl anywhere generate support-bundle-config -f myCluster.yaml will generate a support bundle configuration customized to your cluster and print it as yaml.
To run a customized support bundle configuration yaml file on your cluster,
save this output to a file and run the command eksctl anywhere generate support-bundle using the flag --bundle-config.
eksctl anywhere generate support-bundle-config
Flags:
  -f, --filename string   Filename that contains EKS-A cluster configuration
  -h, --help              help for support-bundle-config
3.3 - Curated Packages Troubleshooting
You must set and export the CURATED_PACKAGES_SUPPORT environment variable before running any commands for packages to activate the feature flag.
export CURATED_PACKAGES_SUPPORT=true
The major component of Curated Packages is the package controller. If the container is not running or not running correctly, packages will not be installed. Generally it should be debugged like any other Kubernetes application. The first step is to check that the pod is running.
kubectl get pods -n eksa-packages
You should see one pod running with two containers
NAME                                     READY   STATUS    RESTARTS   AGE
eks-anywhere-packages-6c7db8bc6f-xg6bq   2/2     Running   0          3m35s
The describe command might help to get more detail on why there is a problem
kubectl describe pods -n eksa-packages
Logs of the controller can be seen in a normal Kubernetes fashion
kubectl logs deploy/eks-anywhere-packages -n eksa-packages controller
The general state of the package can be seen through the custom resources
kubectl get packages,packagebundles,packagebundlecontrollers -A
This will generate output similar to this
NAMESPACE       NAME                                         PACKAGE   AGE     STATE        CURRENTVERSION   TARGETVERSION                                                   DETAIL
eksa-packages   package.packages.eks.amazonaws.com/my-test   Test      2m33s   installing                    v0.1.1-8b3810e1514b7432e032794842425accc837757a-helm (latest)   loading helm chart my-test: locating helm chart oci://public.ecr.aws/l0g8r8j6/hello-eks-anywhere tag sha256:64ea03b119d2421f9206252ff4af4bf7cdc2823c343420763e0e6fc20bf03b68: failed to download "oci://public.ecr.aws/l0g8r8j6/hello-eks-anywhere" at version "v0.1.1-8b3810e1514b7432e032794842425accc837757a-helm"

NAMESPACE       NAME                                                   STATE
eksa-packages   packagebundle.packages.eks.amazonaws.com/v1-21-1001    active

NAMESPACE       NAME                                                                                 STATE
eksa-packages   packagebundlecontroller.packages.eks.amazonaws.com/eksa-packages-bundle-controller   active
Looking at the output, you can see the active packagebundlecontroller and packagebundle. The state of the package is “installing”.
Error: curated packages installation is not supported in this release
Error: curated packages installation is not supported in this release
Curated packages is supported behind a feature flag, you must set and export the CURATED_PACKAGES_SUPPORT environment variable before
export CURATED_PACKAGES_SUPPORT=true
Error: this command is currently not supported
Error: this command is currently not supported
Curated packages is supported behind a feature flag, you must set and export the CURATED_PACKAGES_SUPPORT environment variable.
export CURATED_PACKAGES_SUPPORT=true
Package controller not running
If you do not see a pod or various resources for the package controller, it may be that it is not installed.
No resources found in eksa-packages namespace.
Most likely the cluster was created with an older version of the EKS Anywhere CLI or the feature flag was not enabled. If you run the version command, it should return v0.9.0 or later release.
eksctl anywhere version
Curated packages is supported behind a feature flag, you must set and export the CURATED_PACKAGES_SUPPORT environment variable.
export CURATED_PACKAGES_SUPPORT=true
During cluster creation, you should see messages after the cluster is created when the package controller and any packages are installed.
🎉 Cluster created!
----------------------------------------------------------------------------------------------------------------
The EKS Anywhere package controller and the EKS Anywhere Curated Packages
(referred to as “features”) are provided as “preview features” subject to the AWS Service Terms,
(including Section 2 (Betas and Previews)) of the same. During the EKS Anywhere Curated Packages Public Preview,
the AWS Service Terms are extended to provide customers access to these features free of charge.
These features will be subject to a service charge and fee structure at ”General Availability“ of the features.
----------------------------------------------------------------------------------------------------------------
Installing curated packages controller on workload cluster
package.packages.eks.amazonaws.com/my-harbor created
ImagePullBackOff on Package or Package Controller
If a package or the package controller fails to start with ImagePullBackOff
NAME                                     READY   STATUS             RESTARTS   AGE
eks-anywhere-packages-6589449669-q7rjr   0/2     ImagePullBackOff   0          13h
This is most like because the machine running kubelet in your Kubernetes cluster cannot access the registry with the images or those images do not exist on that registry. Log into the machine and see if it has access to the images:
ctr image pull public.ecr.aws/eks-anywhere/eks-anywhere-packages@sha256:whateveritis
4 - EKS Anywhere curated package management
The main goal of EKS Anywhere curated packages is to make it easy to install, configure and maintain operational components in an EKS Anywhere cluster. EKS Anywhere curated packages offers to run secure and tested operational components on EKS Anywhere clusters. Please check out EKS Anywhere curated packages for more details.
Check the existence of package controller
kubectl get pods -n eksa-packages | grep "eks-anywhere-packages"
Skip the following installation steps if the returned result is not empty.
Important
-
To install EKS Anywhere, create an EKS Anywhere cluster or review the EKS Anywhere system requirements. See the Getting started
guide for details.
-
Check if the version of
eksctl anywhereisv0.9.0or above with the following commands:eksctl anywhere version -
Make sure cert-manager is up and running in the cluster.
Install package controller
-
Install the package controller
eksctl anywhere install packagecontroller --kube-version 1.21 -
Check the package controller
kubectl get pods -n eksa-packagesExample command output
NAME                                       READY   STATUS     RESTARTS   AGE
eks-anywhere-packages-57778bc88f-587tq     2/2     Running    0          16h
Curated package list
See packages for the complete curated package list.
4.1 - Harbor
Important
If your cluster was created with a release of EKS Anywhere prior to v0.9.0, you may need to install the package controller.Install
-
Generate the package configuration
eksctl anywhere generate package harbor --source cluster > packages.yaml -
Add the desired configuration to
packages.yamlPlease see complete configuration options for all configuration options and their default values.
Important
- All configuration options are listed in dot notations (e.g.,
expose.tls.enabled) in the doc, but they have to be transformed to hierachical structures when specified in theconfigsection in the YAML spec. - Harbor web portal is exposed through
NodePortby default, and its default port number is30003with TLS enabled and30002with TLS disabled. - TLS is enabled by default for connections to Harbor web portal, and a secret resource named
harbor-tls-secretis required for that purpose. It can be provisioned through cert-manager or manually with the following command using self-signed certificate:kubectl create secret tls harbor-tls-secret --cert=[path to certificate file] --key=[path to key file] -n eksa-packages secretKeyhas to be set as a string of 16 characters for encryption.
TLS example with auto certificate generation
apiVersion: packages.eks.amazonaws.com/v1alpha1
kind: Package
metadata:
   name: my-harbor
   namespace: eksa-packages
spec:
   packageName: harbor
   config: |-
      secretKey: "use-a-secret-key"
      externalURL: https://harbor.eksa.demo:30003
      expose:
         tls:
            certSource: auto
            auto:
               commonName: "harbor.eksa.demo"
Non-TLS example
apiVersion: packages.eks.amazonaws.com/v1alpha1 kind: Package metadata: name: my-harbor namespace: eksa-packages spec: packageName: harbor config: |- secretKey: "use-a-secret-key" externalURL: http://harbor.eksa.demo:30002 expose: tls: enabled: false - All configuration options are listed in dot notations (e.g.,
-
Install Harbor
eksctl anywhere create packages -f packages.yaml -
Check Harbor
eksctl anywhere get packagesExample command output
NAME        PACKAGE   AGE     STATE       CURRENTVERSION             TARGETVERSION        DETAIL
my-harbor   harbor    5m34s   installed   v2.5.0                     v2.5.0 (latest)
Harbor web portal is accessible at whatever
externalURLis set to. See complete configuration options for all default values.
Upgrade
Note
- New versions of software packages will be automatically downloaded but not automatically installed. You can always manually run
eksctlto check and install updates.
-
Verify a new bundle is available
eksctl anywhere get packagebundleExample command output
NAME VERSION STATE v1.21-1000 1.21 active (upgrade available) v1.21-1001 1.21 inactive -
Upgrade Harbor
eksctl anywhere upgrade packages --bundle-version v1.21-1001 -
Check Harbor
eksctl anywhere get packagesExample command output
NAME        PACKAGE   AGE     STATE       CURRENTVERSION             TARGETVERSION        DETAIL
my-harbor   Harbor    14m     installed   v2.5.1                     v2.5.1 (latest)
Uninstall
-
Uninstall Harbor
Important
- By default, PVCs created for jobservice and registry are not removed during a package delete operation, which can be changed by leaving
persistence.resourcePolicyempty.
eksctl anywhere delete package my-harbor - By default, PVCs created for jobservice and registry are not removed during a package delete operation, which can be changed by leaving