This chapter walks through the following:
- Overview of provisioning
- Prerequisites for creating an EKS Anywhere cluster
- Provisioning a new EKS Anywhere cluster
- Verifying the cluster installation
This is the multi-page printable view of this section. Click here to print.
This chapter walks through the following:
EKS Anywhere uses the eksctl executable to create a Kubernetes cluster in your environment.
Currently it allows you to create and delete clusters in a vSphere environment.
You can run cluster create and delete commands from an Ubuntu or Mac administrative machine.
To create a cluster, you need to create a specification file that includes all of your vSphere details and information about your EKS Anywhere cluster.
Running the eksctl anywhere create cluster command from your admin machine creates the workload cluster in vSphere.
It does this by first creating a temporary bootstrap cluster to direct the workload cluster creation.
Once the workload cluster is created, the cluster management resources are moved to your workload cluster and the local bootstrap cluster is deleted.
Once your workload cluster is created, a KUBECONFIG file is stored on your admin machine with RBAC admin permissions for the workload cluster.
You’ll be able to use that file with kubectl to set up and deploy workloads.
For a detailed description, see Cluster creation workflow
. Here’s a diagram that explains the process visually.

Next steps:
EKS Anywhere will create and manage Kubernetes clusters on multiple providers. Currently we support creating development clusters locally with Docker and production clusters using VMware vSphere. Other deployment targets will be added in the future, including bare metal support in 2022.
Creating an EKS Anywhere cluster begins with setting up an Administrative machine where you will run Docker and add some binaries. From there, you create the cluster for your chosen provider. See Create cluster workflow
for an overview of the cluster creation process.
To create an EKS Anywhere cluster you will need eksctl
and the eksctl-anywhere plugin.
This will let you create a cluster in multiple providers for local development or production workloads.
Docker 20.x.x
Mac OS (10.15) / Ubuntu (20.04.2 LTS)
4 CPU cores
16GB memory
30GB free disk space
<ul>
installation instructions to install Docker and not the Snap installation.
"deprecatedCgroupv1": true must be set in ~/Library/Group\ Containers/group.com.docker/settings.json.EKS Anywhere only works on computers with x86 and amd64 process architecture.
It currently will not work on computers with Apple Silicon or Arm based processors.
You can install eksctl and eksctl-anywhere with homebrew
.
This package will also install kubectl and the aws-iam-authenticator which will be helpful to test EKS Anywhere clusters.
brew install aws/tap/eks-anywhere
Install the latest release of eksctl.
The EKS Anywhere plugin requires eksctl version 0.66.0 or newer.
curl "https://github.com/weaveworks/eksctl/releases/latest/download/eksctl_$(uname -s)_amd64.tar.gz" \
    --silent --location \
    | tar xz -C /tmp
sudo mv /tmp/eksctl /usr/local/bin/
Install the eksctl-anywhere plugin.
export EKSA_RELEASE="0.9.1" OS="$(uname -s | tr A-Z a-z)" RELEASE_NUMBER=12
curl "https://anywhere-assets.eks.amazonaws.com/releases/eks-a/${RELEASE_NUMBER}/artifacts/eks-a/v${EKSA_RELEASE}/${OS}/amd64/eksctl-anywhere-v${EKSA_RELEASE}-${OS}-amd64.tar.gz" \
    --silent --location \
    | tar xz ./eksctl-anywhere
sudo mv ./eksctl-anywhere /usr/local/bin/
If you installed eksctl-anywhere via homebrew you can upgrade the binary with
brew update
brew upgrade eks-anywhere
If you installed eksctl-anywhere manually you should follow the installation steps to download the latest release.
You can verify your installed version with
eksctl anywhere version
Once you have the tools installed you can deploy a local cluster or production cluster in the next steps.
EKS Anywhere supports a Docker provider for development and testing use cases only. This allows you to try EKS Anywhere on your local system before deploying to a supported provider.
To install the EKS Anywhere binaries and see system requirements please follow the installation guide
.
Generate a cluster config
CLUSTER_NAME=dev-cluster
eksctl anywhere generate clusterconfig $CLUSTER_NAME \
   --provider docker > $CLUSTER_NAME.yaml
The command above creates a file named eksa-cluster.yaml with the contents below in the path where it is executed. The configuration specification is divided into two sections:
apiVersion: anywhere.eks.amazonaws.com/v1alpha1
kind: Cluster
metadata:
name: dev-cluster
spec:
clusterNetwork:
   cniConfig:
      cilium: {}
   pods:
      cidrBlocks:
      - 192.168.0.0/16
   services:
      cidrBlocks:
      - 10.96.0.0/12
controlPlaneConfiguration:
   count: 1
datacenterRef:
   kind: DockerDatacenterConfig
   name: dev-cluster
externalEtcdConfiguration:
   count: 1
kubernetesVersion: "1.21"
managementCluster:
   name: dev-cluster
workerNodeGroupConfigurations:
- count: 1
   name: md-0
---
apiVersion: anywhere.eks.amazonaws.com/v1alpha1
kind: DockerDatacenterConfig
metadata:
name: dev-cluster
spec: {}
Create Cluster: Create your cluster either with or without curated packages:
Cluster creation without curated packages installation
eksctl anywhere create cluster -f $CLUSTER_NAME.yaml
Example command output
Performing setup and validations
✅ validation succeeded {"validation": "docker Provider setup is valid"}
Creating new bootstrap cluster
Installing cluster-api providers on bootstrap cluster
Provider specific setup
Creating new workload cluster
Installing networking on workload cluster
Installing cluster-api providers on workload cluster
Moving cluster management from bootstrap to workload cluster
Installing EKS-A custom components (CRD and controller) on workload cluster
Creating EKS-A CRDs instances on workload cluster
Installing AddonManager and GitOps Toolkit on workload cluster
GitOps field not specified, bootstrap flux skipped
Deleting bootstrap cluster
🎉 Cluster created!
Cluster creation with optional curated packages
<ul>
eksctl anywhere version version should be later than v0.9.0.export CURATED_PACKAGES_SUPPORT=trueDiscover curated-packages to install
eksctl anywhere list packages --source registry --kube-version 1.21
Example command output
Package                 Version(s)
-------                 ----------
harbor                  2.5.0-4324383d8c5383bded5f7378efb98b4d50af827b
Generate a curated-packages config
The example shows how to install the harbor package from the curated package list
.
eksctl anywhere generate package harbor --source registry --kube-version 1.21 > packages.yaml
Create a cluster
# Create a cluster with curated packages installation
eksctl anywhere create cluster -f $CLUSTER_NAME.yaml --install-packages packages.yaml
Example command output
Performing setup and validations
✅ validation succeeded {"validation": "docker Provider setup is valid"}
Creating new bootstrap cluster
Installing cluster-api providers on bootstrap cluster
Provider specific setup
Creating new workload cluster
Installing networking on workload cluster
Installing cluster-api providers on workload cluster
Moving cluster management from bootstrap to workload cluster
Installing EKS-A custom components (CRD and controller) on workload cluster
Creating EKS-A CRDs instances on workload cluster
Installing AddonManager and GitOps Toolkit on workload cluster
GitOps field not specified, bootstrap flux skipped
Deleting bootstrap cluster
🎉 Cluster created!
----------------------------------------------------------------------------------------------------------------
The EKS Anywhere package controller and the EKS Anywhere Curated Packages
(referred to as “features”) are provided as “preview features” subject to the AWS Service Terms,
(including Section 2 (Betas and Previews)) of the same. During the EKS Anywhere Curated Packages Public Preview,
the AWS Service Terms are extended to provide customers access to these features free of charge.
These features will be subject to a service charge and fee structure at ”General Availability“ of the features.
----------------------------------------------------------------------------------------------------------------
Installing curated packages controller on workload cluster
package.packages.eks.amazonaws.com/my-harbor created
Use the cluster
Once the cluster is created you can use it with the generated KUBECONFIG file in your local directory
export KUBECONFIG=${PWD}/${CLUSTER_NAME}/${CLUSTER_NAME}-eks-a-cluster.kubeconfig
kubectl get ns
Example command output
NAME                                STATUS   AGE
capd-system                         Active   21m
capi-kubeadm-bootstrap-system       Active   21m
capi-kubeadm-control-plane-system   Active   21m
capi-system                         Active   21m
capi-webhook-system                 Active   21m
cert-manager                        Active   22m
default                             Active   23m
eksa-system                         Active   20m
kube-node-lease                     Active   23m
kube-public                         Active   23m
kube-system                         Active   23m
You can now use the cluster like you would any Kubernetes cluster. Deploy the test application with:
kubectl apply -f "https://anywhere.eks.amazonaws.com/manifests/hello-eks-a.yaml"
Verify the test application in the deploy test application section
.
See the Cluster management
section for more information on common operational tasks like scaling and deleting the cluster.
See the Package management
section for more information on post-creation curated packages installation.
To verify that a cluster control plane is up and running, use the kubectl command to show that the control plane pods are all running.
kubectl get po -A -l control-plane=controller-manager
NAMESPACE                           NAME                                                             READY   STATUS    RESTARTS   AGE
capi-kubeadm-bootstrap-system       capi-kubeadm-bootstrap-controller-manager-57b99f579f-sd85g       2/2     Running   0          47m
capi-kubeadm-control-plane-system   capi-kubeadm-control-plane-controller-manager-79cdf98fb8-ll498   2/2     Running   0          47m
capi-system                         capi-controller-manager-59f4547955-2ks8t                         2/2     Running   0          47m
capi-webhook-system                 capi-controller-manager-bb4dc9878-2j8mg                          2/2     Running   0          47m
capi-webhook-system                 capi-kubeadm-bootstrap-controller-manager-6b4cb6f656-qfppd       2/2     Running   0          47m
capi-webhook-system                 capi-kubeadm-control-plane-controller-manager-bf7878ffc-rgsm8    2/2     Running   0          47m
capi-webhook-system                 capv-controller-manager-5668dbcd5-v5szb                          2/2     Running   0          47m
capv-system                         capv-controller-manager-584886b7bd-f66hs                         2/2     Running   0          47m
You may also check the status of the cluster control plane resource directly. This can be especially useful to verify clusters with multiple control plane nodes after an upgrade.
kubectl get kubeadmcontrolplanes.controlplane.cluster.x-k8s.io
NAME                       INITIALIZED   API SERVER AVAILABLE   VERSION              REPLICAS   READY   UPDATED   UNAVAILABLE
supportbundletestcluster   true          true                   v1.20.7-eks-1-20-6   1          1       1
To verify that the expected number of cluster worker nodes are up and running, use the kubectl command to show that nodes are Ready.
This will confirm that the expected number of worker nodes are present.
Worker nodes are named using the cluster name followed by the worker node group name (example: my-cluster-md-0)
kubectl get nodes
NAME                                           STATUS   ROLES                  AGE    VERSION
supportbundletestcluster-md-0-55bb5ccd-mrcf9   Ready    <none>                 4m   v1.20.7-eks-1-20-6
supportbundletestcluster-md-0-55bb5ccd-zrh97   Ready    <none>                 4m   v1.20.7-eks-1-20-6
supportbundletestcluster-mdrwf                 Ready    control-plane,master   5m   v1.20.7-eks-1-20-6
To test a workload in your cluster you can try deploying the hello-eks-anywhere
.
For each user that needs to create workload clusters, have the vSphere administrator create a VM and template folder. That folder will host:
User permissions should be set up to:
In your EKS Anywhere configuration file you will reference to a path under this folder associated with the cluster you create.
Follow these steps to create the user’s vSphere folder:
documentation.
You need to get a vSphere username with the right privileges to let you creatie EKS Anywhere clusters on top of your vSphere cluster. Then you would need to import the latest release of the EKS Anywhere OVA template to your VSphere cluster to use it to provision your Cluster nodes.
Ask your VSphere administrator to add a vCenter user that will be used for the provisioning of the EKS Anywhere cluster in VMware vSphere.
For more details, see vSphere Add vCenter Single Sign-On Users
documentation.
When you add a user for creating clusters, that user initially has no privileges to perform management operations. So you have to add this user to groups with the required permissions, or assign a role or roles with the required permission to this user.
Three roles are needed to be able to create the EKS Anywhere cluster:
Create a global custom role: For example, you could name this EKS Anywhere Global. Define it for the user on the vCenter domain level and its children objects. Create this role with the following privileges:
> Content Library
* Add library item
* Check in a template
* Check out a template
* Create local library
> vSphere Tagging
* Assign or Unassign vSphere Tag
* Assign or Unassign vSphere Tag on Object
* Create vSphere Tag
* Create vSphere Tag Category
* Delete vSphere Tag
* Delete vSphere Tag Category
* Edit vSphere Tag
* Edit vSphere Tag Category
* Modify UsedBy Field For Category
* Modify UsedBy Field For Tag
Create a user custom role: The second role is also a custom role that you could call, for example, EKS Anywhere User. Define this role with the following objects and children objects.
Create this role with the following privileges:
> Content Library
* Add library item
* Check in a template
* Check out a template
* Create local library
> Datastore
* Allocate space
* Browse datastore
* Low level file operations
> Folder
* Create folder
> vSphere Tagging
* Assign or Unassign vSphere Tag
* Assign or Unassign vSphere Tag on Object
* Create vSphere Tag
* Create vSphere Tag Category
* Delete vSphere Tag
* Delete vSphere Tag Category
* Edit vSphere Tag
* Edit vSphere Tag Category
* Modify UsedBy Field For Category
* Modify UsedBy Field For Tag
> Network
* Assign network
> Resource
* Assign virtual machine to resource pool
> Scheduled task
* Create tasks
* Modify task
* Remove task
* Run task
> Profile-driven storage
* Profile-driven storage view
> Storage views
* View
> vApp
* Import
> Virtual machine
* Change Configuration
  - Add existing disk
  - Add new disk
  - Add or remove device
  - Advanced configuration
  - Change CPU count
  - Change Memory
  - Change Settings
  - Configure Raw device
  - Extend virtual disk
  - Modify device settings
  - Remove disk
* Edit Inventory
  - Create from existing
  - Create new
  - Remove
* Interaction
  - Power off
  - Power on
* Provisioning
  - Clone template
  - Clone virtual machine
  - Create template from virtual machine
  - Customize guest
  - Deploy template
  - Mark as template
  - Read customization specifications
* Snapshot management
  - Create snapshot
  - Remove snapshot
  - Revert to snapshot
Create a default Administrator role: The third role is the default system role Administrator that you define to the user on the folder level and its children objects (VMs and OVA templates) that was created by the VSphere admistrator for you.
To create a role and define privileges check Create a vCenter Server Custom Role
pages.
If the user creating the cluster has permission and network access to create and tag a template, you can skip these steps because EKS Anywhere will automatically download the OVA and create the template if it can. If the user does not have the permissions or network access to create and tag the template, follow this guide. The OVA contains the operating system (Ubuntu or Bottlerocket) for a specific EKS-D Kubernetes release and EKS-A version. The following example uses Ubuntu as the operating system, but a similar workflow would work for Bottlerocket.
page and download the OVA template with the newest EKS-D Kubernetes release to your computer.
To build your own Ubuntu OVA template check the Building your own Ubuntu OVA section in the following link
.
To use the deployed OVA template to create the VMs for the EKS Anywhere cluster, you have to tag it with specific values for the os and eksdRelease keys.
The value of the os key is the operating system of the deployed OVA template, which is ubuntu in our scenario.
The value of the eksdRelease holds kubernetes and the EKS-D release used in the deployed OVA template.
Check the following Customize OVAs
page for more details.
page and take notes of the tags and values associated with the OVA template you deployed in the previous step.
os tag name associated with your OVA that you took notes of, which in our case is os:ubuntu and paste it as the name for the first tag required.os if it exist or create it if it does not exist.os tag name associated with your OVA that you took notes of, which in our case is eksdRelease:kubernetes-1-21-eks-8 and paste it as the name for the second tag required.eksdRelease if it exist or create it if it does not exist.To run EKS Anywhere, you will need:
Set up an Administrative machine as described in Install EKS Anywhere
.
To prepare a VMware vSphere environment to run EKS Anywhere, you need the following:
A vSphere 7+ environment running vCenter
Capacity to deploy 6-10 VMs
running in vSphere environment in the primary VM network for your workload cluster
One network in vSphere to use for the cluster. This network must have inbound access into vCenter
An OVA
imported into vSphere and converted into a template for the workload VMs
User credentials to create VMs and attach networks, etc
One IP address routable from cluster but excluded from DHCP offering. This IP address is to be used as the Control Plane Endpoint IP or kube-vip VIP address
Below are some suggestions to ensure that this IP address is never handed out by your DHCP server.
You may need to contact your network engineer.
Each VM will require:
The administrative machine and the target workload environment will need network access to:
You need to get the following information before creating the cluster:
Static IP Addresses: You will need one IP address for the management cluster control plane endpoint, and a separate one for the controlplane of each workload cluster you add.
Let’s say you are going to have the management cluster and two workload clusters. For those, you would need three IP addresses, one for each. All of those addresses will be configured the same way in the configuration file you will generate for each cluster.
A static IP address will be used for each control plane VM in your EKS Anywhere cluster. Choose IP addresses in your network range that do not conflict with other VMs and make sure they are excluded from your DHCP offering.
An IP address will be the value of the property controlPlaneConfiguration.endpoint.host in the config file of the management cluster.
A separate IP address must be assigned for each workload cluster.
vSphere Datacenter Name: The vSphere datacenter to deploy the EKS Anywhere cluster on.

VM Network Name: The VM network to deploy your EKS Anywhere cluster on.
vCenter Server Domain Name: The vCenter server fully qualified domain name or IP address. If the server IP is used, the thumbprint must be set or insecure must be set to true.

thumbprint (required if insecure=false): The SHA1 thumbprint of the vCenter server certificate which is only required if you have a self-signed certificate for your vSphere endpoint.
There are several ways to obtain your vCenter thumbprint. If you have govc installed
, you can run the following command in the Administrative machine terminal, and take a note of the output:
govc about.cert -thumbprint -k
template: The VM template to use for your EKS Anywhere cluster. This template was created when you imported the OVA file into vSphere.

datastore: The vSphere datastore
to deploy your EKS Anywhere cluster on.
folder: The folder parameter in VSphereMachineConfig allows you to organize the VMs of an EKS Anywhere cluster. With this, each cluster can be organized as a folder in vSphere. You will have a separate folder for the management cluster and each cluster you are adding.
resourcePool:
The vSphere Resource pools for your VMs in the EKS Anywhere cluster. If there is a resource pool: /<datacenter>/host/<resource-pool-name>/Resources
EKS Anywhere supports a vSphere provider for production grade EKS Anywhere deployments. EKS Anywhere allows you to provision and manage Amazon EKS on your own infrastructure.
This document walks you through setting up EKS Anywhere in a way that:
If your initial cluster is a management cluster, it is intended to stay in place so you can use it later to modify, upgrade, and delete workload clusters. Using a management cluster makes it faster to provision and delete workload clusters. Also it lets you keep vSphere credentials for a set of clusters in one place: on the management cluster. The alternative is to simply use your initial cluster to run workloads.
EKS Anywhere needs to be run on an administrative machine that has certain machine requirements . An EKS Anywhere deployment will also require the availability of certain resources from your VMware vSphere deployment .
The following steps are divided into two sections:
Follow these steps to create an EKS Anywhere cluster that can be used either as a management cluster or as a self-managed cluster (for running workloads itself).
All steps listed below should be executed on the admin machine with reachability to the vSphere environment where the EKA Anywhere clusters are created.
Generate an initial cluster config (named mgmt-cluster for this example):
export MGMT_CLUSTER_NAME=mgmt-cluster
eksctl anywhere generate clusterconfig $MGMT_CLUSTER_NAME \
   --provider vsphere > $MGMT_CLUSTER_NAME.yaml
The command above creates a config file named mgmt-cluster.yaml in the path where it is executed. Refer to vsphere configuration for information on configuring this cluster config for a vSphere provider.
The configuration specification is divided into three sections:
Some key considerations and configuration parameters:
Create at least two control plane nodes, three worker nodes, and three etcd nodes for a production cluster, to provide high availability and rolling upgrades.
osFamily (operating System on virtual machines) parameter in VSphereMachineConfig by default is set to bottlerocket. Permitted values: ubuntu, bottlerocket.
The recommended mode of deploying etcd on EKS Anywhere production clusters is unstacked (etcd members have dedicated machines and are not collocated with control plane components). More information here. The generated config file comes with external etcd enabled already. So leave this part as it is.
Apart from the base configuration, you can optionally add additional configuration to enable supported EKS Anywhere functionalities.
As of now, you have to pre-determine which features you want to enable on your cluster before cluster creation. Otherwise, to enable them post-creation will require you to delete and recreate the cluster. However, the next EKS-A release will remove such limitation.
To enable managing cluster resources using GitOps, you would need to enable GitOps configurations on the initial/managemet cluster. You can not enable GitOps on workload clusters as long as you have enabled it on the initial/management cluster. And if you want to manage the deployment of Kubernetes resources on a workload cluster, then you would need to bootstrap Flux against your workload cluster manually, to be able deploying Kubernetes resources to this workload cluster using GitOps
Modify the initial cluster generated config (mgmt-cluster.yaml) as follows:
You will notice that the generated config file comes with the following fields with empty values. All you need is to fill them with the values we gathered in the prerequisites
page.
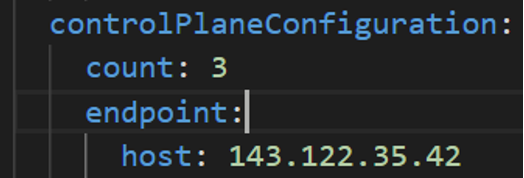
Cluster: controlPlaneConfiguration.endpoint.host: ""
controlPlaneConfiguration:
   count: 3
   endpoint:
      # Fill this value with the IP address you want to use for the management
      # cluster control plane endpoint. You will also need  a separate one for the
      # controlplane of each workload cluster you add later.
      host: ""
VSphereDatacenterConfig:
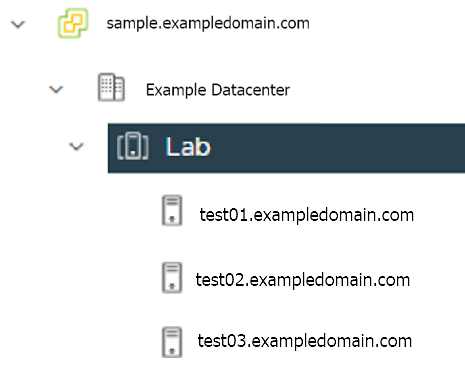
datacenter: "" # Fill it with the vSphere Datacenter Name. Example: "Example Datacenter"
insecure: false
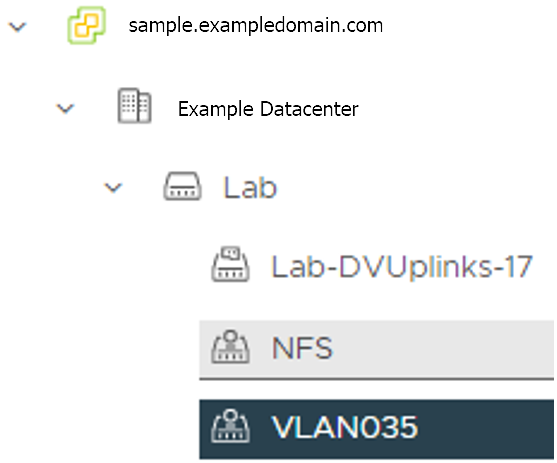
network: "" # Fill it with VM Network Name. Example: "/Example Datacenter/network/VLAN035"
server: "" # Fill it with the vCenter Server Domain Name. Example: "sample.exampledomain.com"
thumbprint: "" # Fill it with the thumprint of your vCenter server. Example: "BF:B5:D4:C5:72:E4:04:40:F7:22:99:05:12:F5:0B:0E:D7:A6:35:36"
VSphereMachineConfig sections:
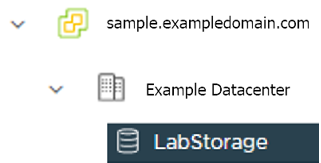
datastore: "" # Fill in the vSphere datastore name: Example "/Example Datacenter/datastore/LabStorage"
diskGiB: 25
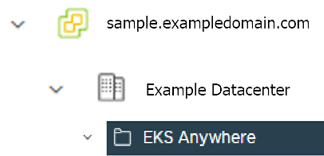
# Fill in the folder name that the VMs of the cluster will be organized under.
# You will have a separate folder for the management cluster and each cluster you are adding.
folder: "" # Fill in the foler name Example: /Example Datacenter/vm/EKS Anywhere/mgmt-cluster
memoryMiB: 8192
numCPUs: 2
osFamily: ubuntu # You can set it to botllerocket or ubuntu
resourcePool: "" # Fill in the vSphere Resource pool. Example: /Example Datacenter/host/Lab/Resources
users property, and it will be genrated during the cluster creation automatically. It will set the username to capv if osFamily=ubuntu, and ec2-user if osFamily=botllerocket which is the default option. It will also generate an SSH Key pair, that you can use later to connect to your cluster VMs.template: /Example Datacenter/vm/EKS Anywhere/ubuntu-2004-kube-v1.21.2
Refer to vsphere configuration for more information on the configuring that can be used for a vSphere provider.
Set Credential Environment Variables
Before you create the initial/management cluster, you will need to set and export these environment variables for your vSphere user name and password. Make sure you use single quotes around the values so that your shell does not interpret the values
# vCenter User Credentials
export GOVC_URL='[vCenter Server Domain Name]'     # Example: https://sample.exampledomain.com
export GOVC_USERNAME='[vSphere user name]'         # Example: USER1@exampledomain
export GOVC_PASSWORD='[vSphere password]'
export GOVC_INSECURE=true
export EKSA_VSPHERE_USERNAME='[vSphere user name]' # Example: USER1@exampledomain
export EKSA_VSPHERE_PASSWORD='[vSphere password]'
Set License Environment Variable
If you are creating a licensed cluster, set and export the license variable (see License cluster if you are licensing an existing cluster):
export EKSA_LICENSE='my-license-here'
Now you are ready to create a cluster with the basic stettings.
After you have finish adding all the configuration needed to your configuration file the mgmt-cluster.yaml and set your credential environment variables, you are ready to create the cluster. Run the create command with the option -v 9 to get the highest level of verbosity, in case you want to troubleshoot any issue happened during the creation of the cluster. You may need also to output it to a file, so you can look at it later.
eksctl anywhere create cluster -f $MGMT_CLUSTER_NAME.yaml \
-v 9 > $MGMT_CLUSTER_NAME-$(date "+%Y%m%d%H%M").log 2>&1
With the completion of the above steps, the management EKS Anywhere cluster is created on the configured vSphere environment under a sub-folder of the EKS Anywhere folder. You can see the cluster VMs from the vSphere console as below:
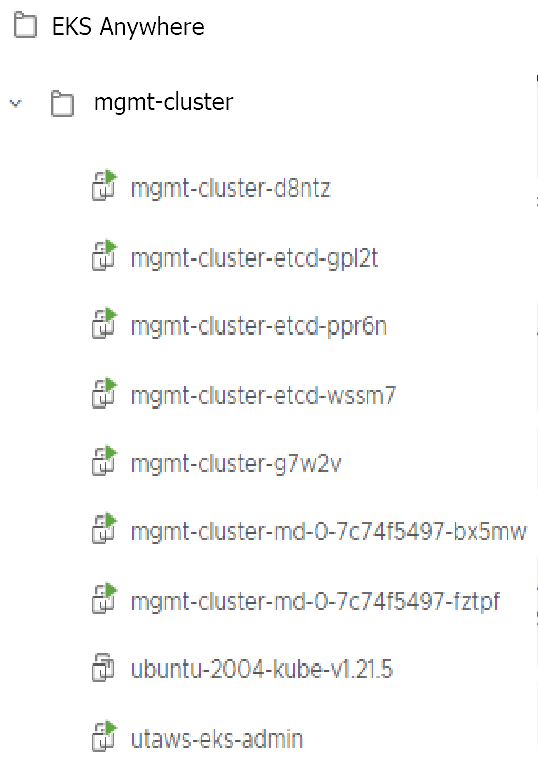
Once the cluster is created a folder got created on the admin machine with the cluster name which contains the kubeconfig file and the cluster configuration file used to create the cluster, in addition to the generated SSH key pair that you can use to SSH into the VMs of the cluster.
ls mgmt-cluster/
Output
eks-a-id_rsa      mgmt-cluster-eks-a-cluster.kubeconfig
eks-a-id_rsa.pub  mgmt-cluster-eks-a-cluster.yaml
Now you can use your cluster with the generated KUBECONFIG file:
export KUBECONFIG=${PWD}/${MGMT_CLUSTER_NAME}/${MGMT_CLUSTER_NAME}-eks-a-cluster.kubeconfig
kubectl cluster-info
The cluster endpoint in the output of this command would be the controlPlaneConfiguration.endpoint.host provided in the mgmt-cluster.yaml config file.
Check the cluster nodes:
To check that the cluster completed, list the machines to see the control plane, etcd, and worker nodes:
kubectl get machines -A
Example command output
NAMESPACE   NAME                PROVIDERID        PHASE    VERSION
eksa-system mgmt-b2xyz          vsphere:/xxxxx    Running  v1.21.2-eks-1-21-5
eksa-system mgmt-etcd-r9b42     vsphere:/xxxxx    Running
eksa-system mgmt-md-8-6xr-rnr   vsphere:/xxxxx    Running  v1.21.2-eks-1-21-5
...
The etcd machine doesn’t show the Kubernetes version because it doesn’t run the kubelet service.
Check the initial/management cluster’s CRD:
To ensure you are looking at the initial/management cluster, list the CRD to see that the name of its management cluster is itself:
kubectl get clusters mgmt -o yaml
Example command output
...
kubernetesVersion: "1.21"
managementCluster:
  name: mgmt
workerNodeGroupConfigurations:
...
Follow these steps if you want to use your initial cluster to create and manage separate workload clusters. All steps listed below should be executed on the same admin machine the management cluster created on.
Generate a workload cluster config:
export WORKLOAD_CLUSTER_NAME='w01-cluster'
export MGMT_CLUSTER_NAME='mgmt-cluster'
eksctl anywhere generate clusterconfig $WORKLOAD_CLUSTER_NAME \
   --provider vsphere > $WORKLOAD_CLUSTER_NAME.yaml
The command above creates a file named w01-cluster.yaml with similar contents to the mgmt.cluster.yaml file that was generated for the management cluster in the previous section. It will be generated in the path where it is executed.
Same key considerations and configuration parameters apply to workload cluster as well, that were mentioned above with the initial cluster.
Refer to the initial config described earlier for the required and optional settings. The main differences are that you must have a new cluster name and cannot use the same vSphere resources.
Modify the generated workload cluster config parameters same way you did in the generated configuration file of the management cluster. The only differences are with the following fileds:
controlPlaneConfiguration.endpoint.host:
That you will use a different IP address for the Cluster filed controlPlaneConfiguration.endpoint.host for each workload cluster as with the initial cluster. Notice here that you use a different IP address from this one that was used with the management cluster.
managementCluster.name: By default the value of this field is the same as the cluster name, when you generate the configuration file. But because we want this workload cluster we are adding, to managed by the management cluster, then you need to change that to the management cluster name.
managementCluster:
   name: mgmt-cluster # the name of the initial/management cluster
VSphereMachineConfig.folder It’s recommended to have a separate folder path for each cluster you add for organization purposes.
folder: /Example Datacenter/vm/EKS Anywhere/w01-cluster
Other than that all other parameters will be configured the same way.
Create a workload cluster
To create a new workload cluster from your management cluster run this command, identifying:
eksctl anywhere create cluster \
    -f $WORKLOAD_CLUSTER_NAME.yaml \
    --kubeconfig $MGMT_CLUSTER_NAME/$MGMT_CLUSTER_NAME-eks-a-cluster.kubeconfig \
    -v 9 > $WORKLOAD_CLUSTER_NAME-$(date "+%Y%m%d%H%M").log 2>&1
As noted earlier, adding the --kubeconfig option tells eksctl to use the management cluster identified by that kubeconfig file to create a different workload cluster.
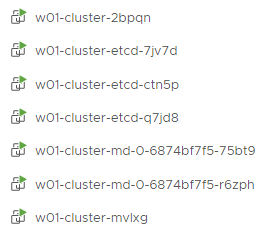
With the completion of the above steps, the management EKS Anywhere cluster is created on the configured vSphere environment under a sub-folder of the EKS Anywhere folder. You can see the cluster VMs from the vSphere console as below:
Once the cluster is created a folder got created on the admin machine with the cluster name which contains the kubeconfig file and the cluster configuration file used to create the cluster, in addition to the generated SSH key pair that you can use to SSH into the VMs of the cluster.
ls w01-cluster/
Output
eks-a-id_rsa      w01-cluster-eks-a-cluster.kubeconfig
eks-a-id_rsa.pub  w01-cluster-eks-a-cluster.yaml
You can list the workload clusters managed by the management cluster.
export KUBECONFIG=${PWD}/${MGMT_CLUSTER_NAME}/${MGMT_CLUSTER_NAME}-eks-a-cluster.kubeconfig
kubectl get clusters
Check the workload cluster:
You can now use the workload cluster as you would any Kubernetes cluster. Change your credentials to point to the kubconfig file of the new workload cluster, then get the cluster info
export KUBECONFIG=${PWD}/${WORKLOAD_CLUSTER_NAME}/${WORKLOAD_CLUSTER_NAME}-eks-a-cluster.kubeconfig
kubectl cluster-info
The cluster endpoint in the output of this command should be the controlPlaneConfiguration.endpoint.host provided in the w01-cluster.yaml config file.
To verify that the expected number of cluster worker nodes are up and running, use the kubectl command to show that nodes are Ready.
kubectl get nodes
Test deploying an application with:
kubectl apply -f "https://anywhere.eks.amazonaws.com/manifests/hello-eks-a.yaml"
Verify the test application in the deploy test application section .
Add more workload clusters:
To add more workload clusters, go through the same steps for creating the initial workload, copying the config file to a new name (such as w01-cluster.yaml), modifying resource names, and running the create cluster command again.
See the Cluster management section with more information on common operational tasks like scaling and deleting the cluster.